|
|
| Home > Documentation > Apache Geronimo v1.0 - User's Guide > Security > Configuring LDAP |
Geronimo uses the Apache Directory Server for its directory service, this is part of the Apache Directory Project. Geronimo implements the following two projects from the ApacheDS project.
More information about these two projects can be found at the ApacheDS project URL:
http://directory.apache.org/subprojects/apacheds/projects/index.html
At this point, Geronimo does not provide a LDAP client commands for configuring the server. You can use any LDAP client such as ldapbrowser/editor, jxplorer or gq for browsing and editing the configurations of the Directory Server in Geronimo.
Ensure that the Geronimo server is up and running and the "Directory" application is started. The initial default status for the Directory application in M5 is Stopped. To start the Directory module (org/apache/geronimo/Directory) you can use the Geronimo console, after you logged in click on System Modules on the left panel, look for org/apache/geronimo/Directory and click on Start.
Apache Geronimo can be configured to use two different Web containers, you can either use Jetty or Apache Tomcat. The sample application and instructions provided in this article are Web container independent. They have been tested on Jetty and Tomcat and it works without having to modify anything in the application.
The following sections will address how to configure LDAP on Geronimo for each of these containers.
For this LDAP configuration example, the sample application used is a modified version of the application already available in the open JIRA GERONIMO-417. Download the sample application from the following URL:
After extracting the zip file a ldap-jetty directory is created, from now on this directory will be referred as <ldap_home>.
Note: Although the zip file and the directory created for the sample application indicates "jetty" in the name, this sample application is designed as Web container independent, so it will work on both Jetty and Apache Tomcat.
At this point it is assumed that you have installed Java 1.4.2 and an LDAP client and you are capable of exporting/importing an .ldif file to a directory server.
Ensure that Geronimo is up and running and the Directory service is started. Start your LDAP client and create a new connection profile with the following values:
Host: | <localhost> |
Port: | 1389 |
Base DN: | ou=system |
User DN: | uid=admin,ou=system |
Password: | secret |
Once you connect to the Geronimo Directory server you will see the initial configuration, this configuration can be exported as a backup in a ldif file. Depending the LDAP client you are using the export/import steps will be different. When you export the initial configuration you get an ldif file with a content similar as the one shown in the following example.
dn: ou=system
ou: system
objectClass: organizationalUnit
objectClass: top

dn: uid=admin, ou=system
displayName: Directory Superuser
uid: admin
userPassword:: c2VjcmV0
objectClass: inetOrgPerson
objectClass: organizationalPerson
objectClass: person
objectClass: top
sn: administrator
cn: system administrator

dn: ou=users, ou=system
ou: users
objectClass: organizationalUnit
objectClass: top

dn: ou=groups, ou=system
ou: groups
objectClass: organizationalUnit
objectClass: top

dn: ou=configuration, ou=system
ou: configuration
objectClass: organizationalUnit
objectClass: top

dn: ou=partitions, ou=configuration, ou=system
ou: partitions
objectClass: organizationalUnit
objectClass: top

dn: ou=services, ou=configuration, ou=system
ou: services
objectClass: organizationalUnit
objectClass: top

dn: ou=interceptors, ou=configuration, ou=system
ou: interceptors
objectClass: organizationalUnit
objectClass: top

dn: prefNodeName=sysPrefRoot, ou=system
objectClass: extensibleObject
prefNodeName: sysPrefRoot
Now you need to import the entries needed to run the sample application. Packaged with the sample application is a sample .ldif file with all the entries necessary to run the LDAP sample application, this file is located in <ldap_home>/ldap-sample.ldif.
The following example shows the content of the ldap-sample.ldif file.
# User: system

dn: uid=system,ou=users,ou=system
cn: John Doe
sn: Doe
givenname: John
objectclass: top
objectclass: person
objectclass: organizationalPerson
objectclass: inetOrgPerson
ou: Human Resources
ou: People
l: Las Vegas
uid: system
mail: system@apachecon.comm
telephonenumber: +1 408 555 5555
facsimiletelephonenumber: +1 408 555 5556
roomnumber: 4613
userPassword: manager

# User: user1

dn: uid=user1,ou=users,ou=system
cn: User
sn: One
givenname: User1
objectclass: top
objectclass: person
objectclass: organizationalPerson
objectclass: inetOrgPerson
ou: Human Resources
ou: People
l: Las Vegas
uid: user1
mail: user1@apachecon.comm
telephonenumber: +1 408 555 5555
facsimiletelephonenumber: +1 408 555 5556
roomnumber: 4613
userPassword: p1

# User: user2

dn: uid=user2,ou=users,ou=system
cn: User
sn: Two
givenname: User2
objectclass: top
objectclass: person
objectclass: organizationalPerson
objectclass: inetOrgPerson
ou: Human Resources
ou: People
l: Las Vegas
uid: user2
mail: user2@apachecon.comm
telephonenumber: +1 408 555 5555
facsimiletelephonenumber: +1 408 555 5556
roomnumber: 4613
userPassword: p2

# Group: admin

dn: cn=admin,ou=groups,ou=system
objectClass: groupOfUniqueNames
uniqueMember: uid=system,ou=users,ou=system
cn: admin

# Group: guest

dn: cn=guest,ou=groups,ou=system
objectClass: groupOfUniqueNames
uniqueMember: uid=user1,ou=users,ou=system
uniqueMember: uid=user2,ou=users,ou=system
cn: guest
Once the file is imported you should get a confirmation that five entries were successfully imported.
The LDAP sample application provides a security realm that needs to be deployed before the deployment of the application itself. This realm is located in <ldap_home>/ldap-realm.xml and the content is illustrated in the following example.
To deploy the ldap-realm.xml run the following command from the <geronimo_home>/bin directory:
java -jar deployer.jar --user system --password manager deploy <ldap_home>/ldap-realm.xml
Once deployed you should see a confirmation message similar to the following example:
E:\geronimo\bin>java -jar deployer.jar --user system --password manager deploy e:/ldap-jetty/ldap-realm.xml
Deployed org/apache/geronimo/ldap-secure
The deployment plans are located in the <ldap_home>/WEB-INF directory. Clearly, geronimo-web.xml is the Geronimo specific deployment plan. It provides the details on what security realm to use and user role mappings as well as the Geronimo specific namespace used to identify the elements in the security configuration. Common to other types of applications, not just security, the deployment plan also provides the main namespace for the deployment plan, a module identification (optional), a parent module configuration ID (also optional) and a context root. The following example illustrates the Geronimo specific deployment plan.
The web.xml deployment descriptor shown in the following example (also located in the <ldap_home>/WEB-INF diretory) adds security constraints based on the location of the files.
Now that all the elements have been identified, it is necessary to package the sample application in a Web application Archive (.war). Open a command line window, change directory to <ldap_home> and run the following command:
jar -cvf ldap-demo.war *
This command will package all the existing files and directories inside <ldap_home>. Although not needed inside the .war file, the ldap-realm.xml and ldap-sample.ldif files will also be included.
To deploy the LDAP sample application make sure the Geronimo server is up and running. Open a command line window, change directory to <geronimo_home>/bin and run the following command:
java -jar deployer.jar --user system --password manager deploy <ldap_home>/ldap-demo.war
Once the Web application is successfully deployed you should see a confirmation message similar as the one shown in the following example:
E:\geronimo\bin>java -jar deployer.jar --user system --password manager deploy e:/ldap-jetty/ldap-demo.war
    Deployed org/apache/geronimo/ldap-secure-demo @
    http://hcunico:8080/ldap-demo
To test the LDAP application open a Web browser and access the following URL:
http://localhost:8080/ldap-demo
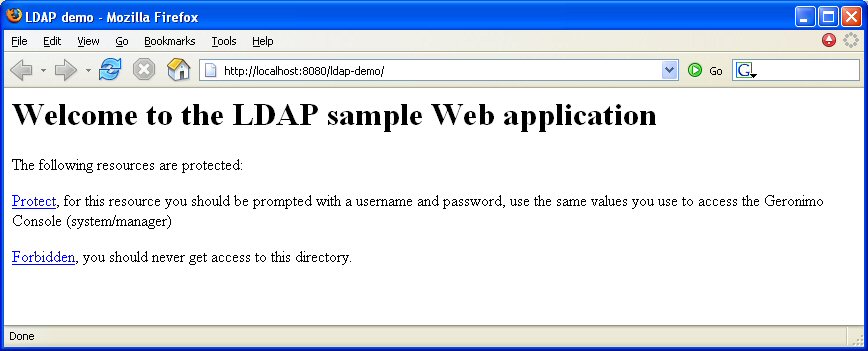
The following figure shows the welcome page for the LDAP sample application.
Click on Protect to validate against the LDAP Directory Server.
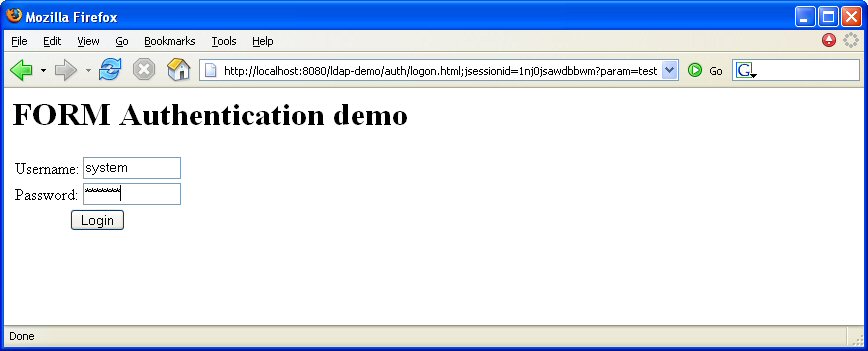
Enter system as the username and manager as the password and click Login. The username and password you provide here is the same you use to access the Geronimo Web console and it is stored in the Directory Server database. Once you are logged in you should see the following screen.
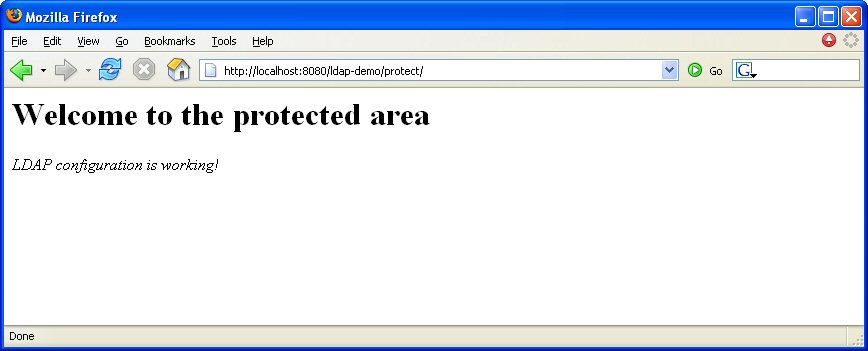
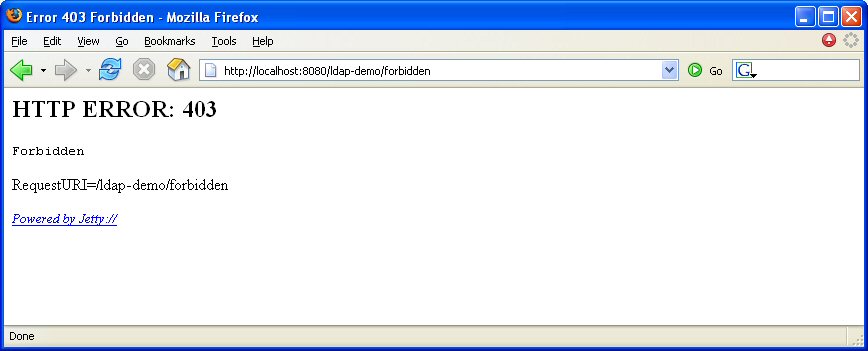
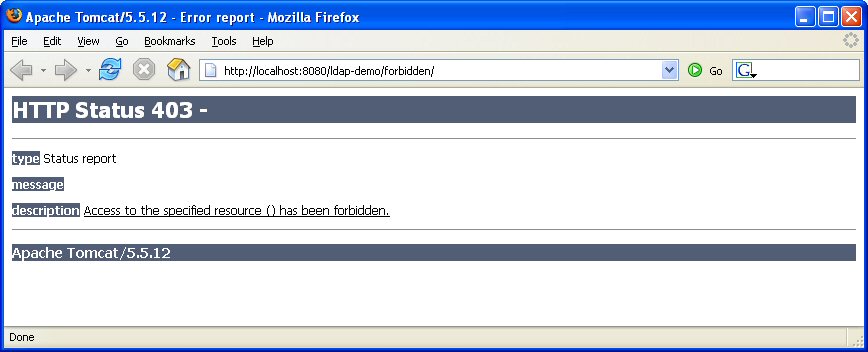
At this point you have an application that is validating username and passwords against an LDAP Directory Server database based on the security configuration you provided earlier. Now, if you go back to the welcome page and click on Forbidden you should receive a 403 - Forbidden HTTP error similar as the one shown in the following figures.
If you are using Jetty as the Web container:
If you are using Apache Tomcat as the Web container:
|
|
Privacy Policy - Copyright © 2003-2009, The Apache Software Foundation, Licensed under ASL 2.0. |