|
|
| Home > Documentation > User's guide > Administration > Administrative Tasks > Configuring security > Database (SQL) Realm |
In this section we will focus on using a database to verify and retrieve user names and passwords.
For this example we created a new database called SecurityDatabase using the built-in Derby database. The following steps summarize the procedure performed to create the database and tables, load some sample data and create the connection pool. Detailed instructions on how to define database connection pools are described in the Configuring database pools section.
create table users(username varchar(15),password varchar(15));create table groups(username varchar(15),groupname varchar(15));insert into users values('userone','p1');insert into users values('usertwo','p2');insert into users values('userthree','p3');insert into groups values('userone','admin');insert into groups values('usertwo','admin');insert into groups values('userthree','user');To create a new security realm click on Add new security realm from the Security Realms portlet.

Enter derby_security_realm in the Name of Security Realm: field and select Database (SQL) Realm from the Realm type: pull-down menu and click Next.
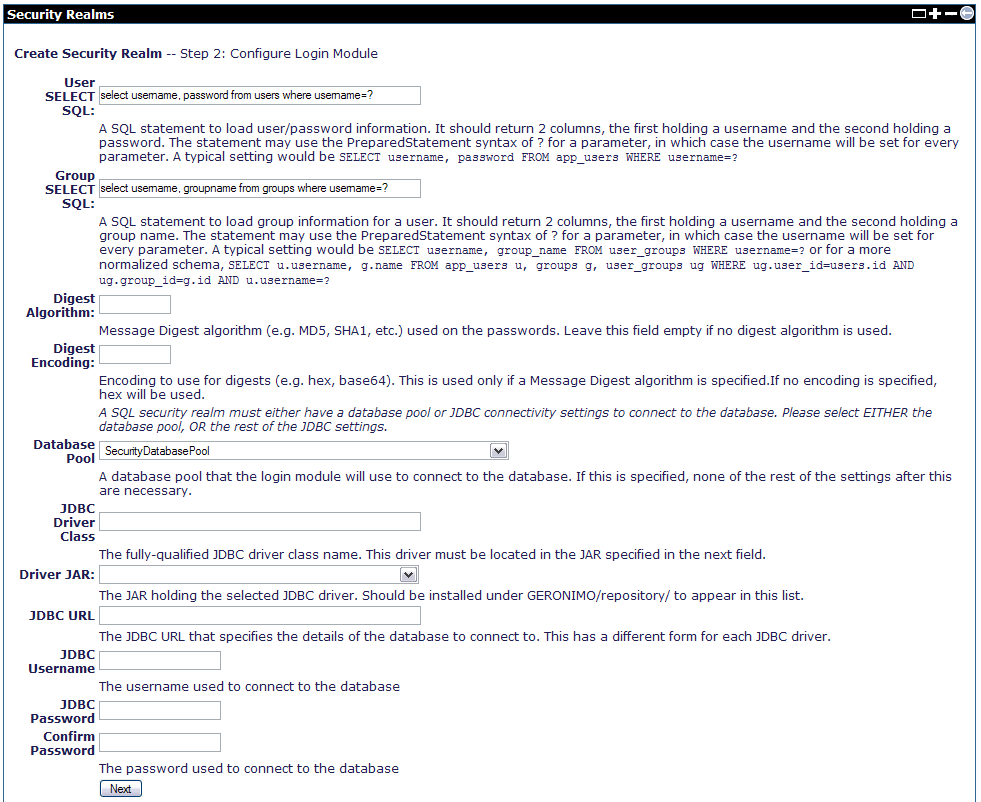
The following screen configures the login module. The first two field you need to fill may vary from one database type to another. In this case we are using the embedded Derby database so the User and Group select SQL should read as follows:
User SELECT SQL: select username, password from users where username=?
Group SELECT SQL: select username, groupname from groups where username=?
Once you entered the SQL statements for retrieving users and groups you need to select from the Database Pool pull-down menu the database connection pool you created in the previous step. Add the required values as shown below and click Next.
Database Pool: SecurityDatabasePool
The following step will allow you to enable auditing for monitoring the login attempts via this realm. In this step you can also configure the account lockout based on the number of failed loging attempts withing a specified timeframe. If you enable Store Password, then it will allow the realm to store the user's password in a private credential in the "Subject". If you enable Naming Credential, in addition to the user's password, this option will use private credentials to store user names too.
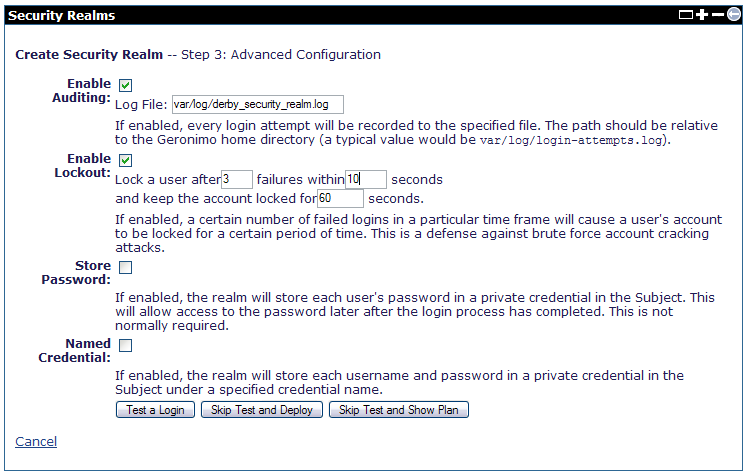
At this point you have configured this new security realm, the next step i to test it and then deploy it. Click on Test a Login.
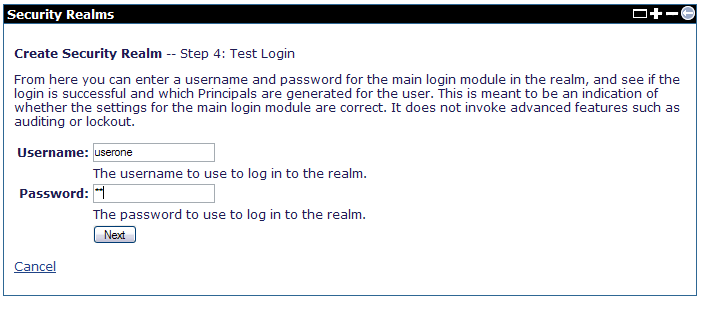
Enter a valid user name and password to be retrieved from the database and click Next.
You should receive a confirmation message that the login succeeded, click on Deploy Realm to load this configuration to the server.
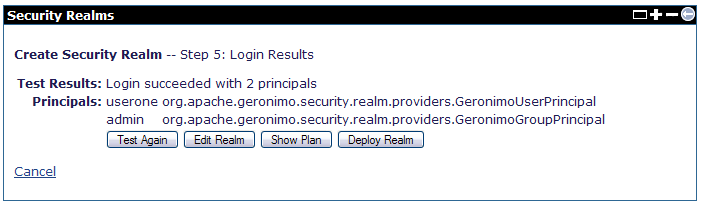
Now you have a new, fully configured, security realm that retrieves user names and passwords from the build in Derby database.
If you get an error the first time you try to validate this realm, you will very likely see the SQL Exception: Failed to start database ... error in the terminal and logs. This is a know issue with Derby, you will need to restart Geronimio so the new database can communicate properly.
The following example shows the deployment plan for this security realm. As an alternative to the Geronimo Administration Console, you can save this example to a file (i.e. derby_security_realm.xml) and deploy it with the Deployer tool by running the following command:
<geronimo_home>\bin\deploy --user system --password manager deploy <realm_path>\derby_security_realm.xml
Once the security realm has been created, you can use the usage link to view samples of how to use the new realm in your applications.
|
|
Privacy Policy - Copyright © 2003-2011, The Apache Software Foundation, Licensed under ASL 2.0. |