HomeDocumentation > Developer's guide > Apache Geronimo Development Tools Project > How to install Geronimo Eclipse Plugin v2.1.7 > How to install Geronimo Eclipse Plugin v2.1.3 or v2.1.4
{scrollbar}

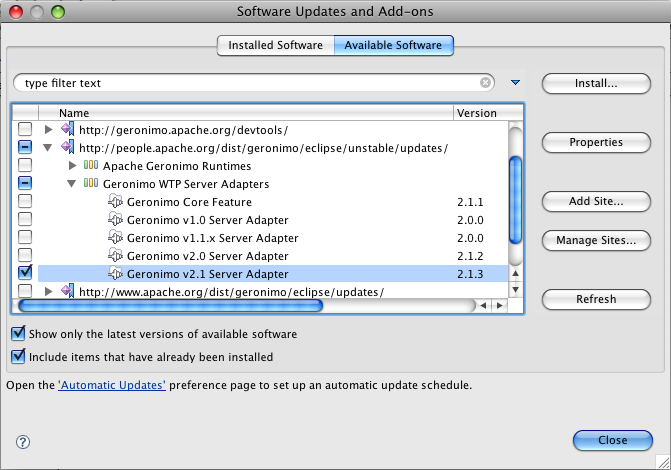
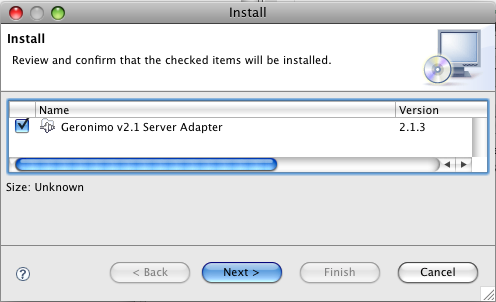
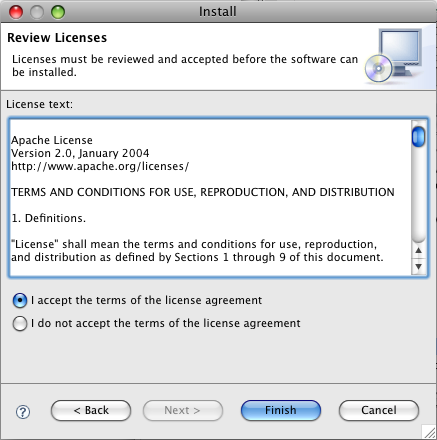
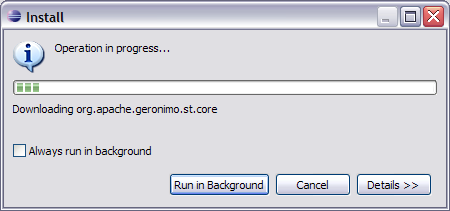
We will be using Eclipse Ganymede and Sun JDK 6.0+ for the illustration. Geronimo Eclipse Plugin (GEP) can be installed using the following options

This page describes how to install the current release of the GEP. For information about installing previous releases, see this page.

Prerequisites Prereqs

Installing GEP within WTP

  1. Once you have all the #Prerequisites installed, launch Eclipse from <Eclipse_Home>/eclipse.
  2. By default Eclipse will be launched with Java EE perspective.
  3. Select the servers tab as shown in the figure and select New->Server.


  4. On the next screen select Download Additional Server Adapters as shown in the figure.


  5. Select Geronimo V2.1 Server Adapter v2.1.3 adapter and select Next.


  6. Accept the license agreement and select Finish.


  7. Next screen will ask for confirmation. Select Ok. Once done Geronimo V2.1 server adapter will be downloaded and installed.


  8. Once the adapter is installed you will be prompted to restart the server. Select Yes.


Installing GEP using Eclipse update manager

(star) A video desktop demonstration of Installing the Apache Geronimo Eclipse Plugin with the Eclipse Update Manager is available.

  1. Once you have all the prerequisites installed. Launch Eclipse from <Eclipse_Home>/eclipse.
  2. By default Eclipse will be launched with Java EE perspective.
  3. Select Help->Software Updates.. from the menu.


  4. On the next screen select Available Software tab. Select Add Site.


  5. Copy and paste the following site to Add Site window and Select Ok.


    html http://apache.org/dist/geronimo/eclipse/updates/


  6. Expand http://apache.org/dist/geronimo/eclipse/updates/ and Select Geronimo v2.1 Server Adapter v2.1.3.


  7. Once done you have to wait a few seconds while Eclipse resolves dependencies.


  8. Once done, the Install window will pop up. Select Next.


  9. Accept the license and Select Finish.


  10. Installation will start and will take time few minutes. A progress window will display the jars being installed.


  11. Once GEP is installed you will be prompted to restart. Select yes.

Manual Installation

Using updatesite.zip

  1. Download the package geronimo-eclipse-plugin-2.1.3-updatesite.zip from http://apache.org/dist/geronimo/eclipse/2.1.3/.
  2. Once done, unzip the package to a directory on your machine.
  3. Follow the instructions in #Installing GEP using Eclipse update manager section. When adding a an update site in step 5, choose Local, and navigate to the directory where you unzipped the updatesite.zip package in the previous step.

Using deployable.zip

  1. Download the package geronimo-eclipse-plugin-2.1.3-deployable.zip from http://apache.org/dist/geronimo/eclipse/2.1.3/.
  2. Once done, unzip the package to your eclipse installation directory. For Ganymede, unzip to the eclipse/dropins directory. You may get a prompt regarding file replacement. Select All.
  3. Restart eclipse with the -clean option.

Verify GEP installation

  1. Select Help->About Eclipse Platform.


  2. You can see a G icon in the About Eclipse Platform. This confirms the successful installation of GEP. Click the icon.


  3. On the next screen you can view details- License, Plug-in-Details and set the Columns of the table being displayed.


Uninstalling GEP

GEP may be uninstalled in a similar manner in which it was installed.

Uninstall does not work well on Ganymede, especially for GEP. It will uninstall GEP, but then you can't reinstall it, as it doesn't really get uninstalled. The only way to reinstall GEP in Ganymede is to reinstall Ganymede itself! See Eclipse Bugzilla 244935 for details, and hopefully a fix soon!