|
|
| Home > Documentation > Configuring and administering > Configuring services > Configuring datasource > Configuring a DB2 datasource |
This article shows you how to configure a DB2 datasource in Apache Geronimo.
In this scenario we are creating a connection pool for a DB2 database, in order to connect to that database we are required to define at least two driver jar files. They include the JDBC driver itself and the respective license files. Depending on your implementation you will need different license files.
The steps described in this article are valid for deploying any other datasource when you don't have the drivers installed on the server and/or require multiple driver files.
This article provides two alternatives to deploy the connection pool: using the Geronimo Administration Console and using the command line option.
To add the DB2 drivers and license to the Geronimo repository you are required to place the files in a particular directory structure. You will normally have two or three files to add to the repository. These files are:
These files are available in the <sqllib_home>\java directory. For additional information on the DB2 JDBC drivers and licenses visit the DB2 Information Center available at the following URL:
In order to use these files in Geronimo, rename (copy and rename) the files according to the following table.In this case we will not use db2jcc_license_cisuz.jar because it's for Z/OS and iSeries.
Original name | Renamed |
|---|---|
db2jcc.jar | db2jcc-9.5.jar |
db2jcc_license_cu.jar | db2jcc_license_cu-9.5.jar |
This means that for this particular case DB2 v9.5 was used.
At this point you are ready to add those files to the Geronimo repository in two ways. You can either use any graphical or command line tool to copy the files and create the necessary directories, or you use the Geronimo Administration Console and add the driver and licenses to the common libraries. See the following details.
Create the following directory structures under the <geronimo_home>\repository directory and copy the appropriate files to the respective directories.
com/ibm/db2/db2jcc/9.5com/ibm/db2/db2jcc_license_cu/9.5In order to use the console, Apache Geronimo must be running. Access the Geronimo Administration Console by pointing your browser to the following URL:
With the drivers and license files installed, you can now create a new database connection pool.
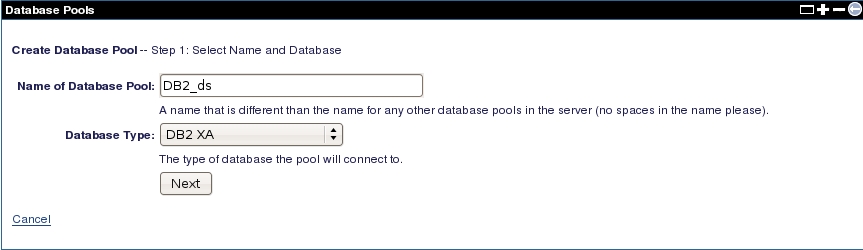
From the Geronimo Administration Console select Database Pools and create a new pool by clicking Using the Geronimo database pool wizard.
com/ibm/db2/db2jcc/9.5/jar and com.ibm/db2/db2jcc_license_cu/9.5/jar from the list by pressing Ctrl on the keyboard, then enter the remaining connection information as shown in the following figure. For this example the default db2admin user and password was used and a SAMPLE database was created via the DB2 Control Center, Server Name as localhost. 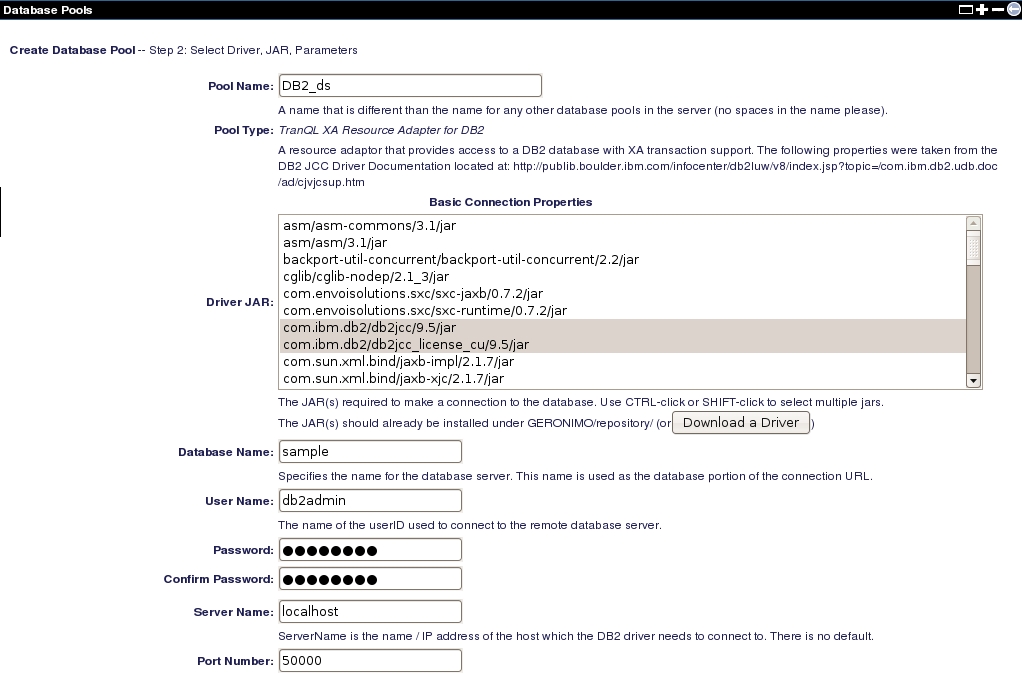
As an alternative to the wizard, you can create a deployment plan manually and deploy it using the command line based deployer tool. To use this option create a db2-plan.xml file and copy the content of the following example.
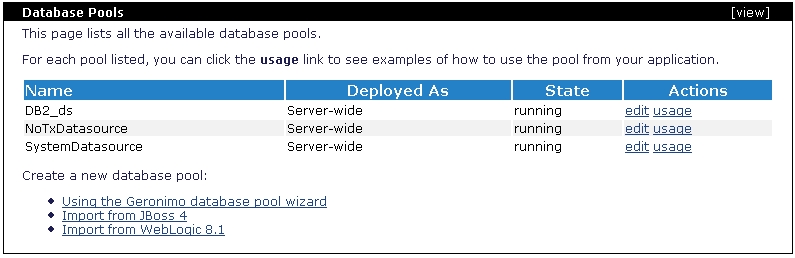
Let's analyze this plan now. Take a look at the <dep:environment> section, there you can find the moduleId which identifies the resource or component being deployed; in the Administration Console the moduleId is displayed in the Component Name column on the Database Pools portlet.
Right after the moduleId comes the definition of the dependencies. In this particular case you can find three <dep:dependency> blocks pertaining to the DB2 JDBC driver and the license jar. The last "big" block in this plan is the <resourceadapter> where the connection paramenters such as driver, user and password, connection URL, etc. are defined.
To the deploy the DB2 datasource you just created, run the following command from the <geronimo_home>\bin directory.
deploy --user system --password manager deploy <dep_plan_home>\db2-plan.xml ..\repository\org\tranql\tranql-connector-db2-xa\1.4\tranql-connector-db2-xa-1.4.rar
You will receive the following message:
|
|
Privacy Policy - Copyright © 2003-2011, The Apache Software Foundation, Licensed under ASL 2.0. |