|
|
| Home > Documentation > Developing > Tutorials > Developing EJB applications > Stateless Session Bean |
Stateless beans are used in the case when the process or action can be completed in one go. In this case, object state will not be preserved in a series of linked invocation. Each invocation of bean will be unique in itself in a Stateless Session Bean. A stateless session bean in represented by @Stateless annotation.
Here is an example of Simple Stateless Session Bean:
@Stateless
public class StatelessBean implements StatelessBeanRemote
{
public void SimpleFunction()
{
System.out.println("This is a stateless session bean");
}
}
As can be seen in the code, @Stateless defines a simple POJO as a Stateless Session bean.
The above gives a very high level idea of what is a stateless session bean and how is it implemented using EJB3 annotations. While working with examples we will try to make you understand stateless session beans in-depth.
This sample application will take you through the basics of Stateless Session Bean. This application will demonstrate how annotations like @Stateless, @Resource, @PostConstruct, @PreDestroy are used in an EJB3 application.
The application walks through a authentication page, where the user has to authenticate to move to the resource page of Apache Geronimo. In case of a new user, the user has to go through the registration process. Later the user will be directed to login page again once the registration is done. In the login page the bean class will check for the username and password entered by the user against a database.
Basically a Stateless Session EJB is used whenever there is a single step process and maintaining a session is obsolete. In this sample the user registration form is a one step process and hence we have used stateless session bean for its implementation. The login page is a misnomer and should not be considered as an implementation for stateless session EJB. This is because once logged in you have to maintain the session and stateless session beans are not meant to maintain the session.
To run this tutorial, as a minimum you will be required to have installed the following prerequisite software.
Details on installing eclipse are provided in the Development environment section.
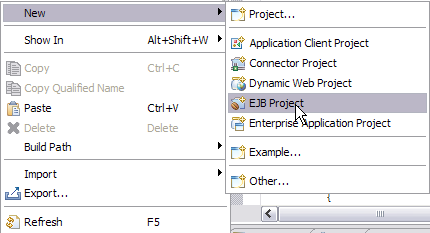
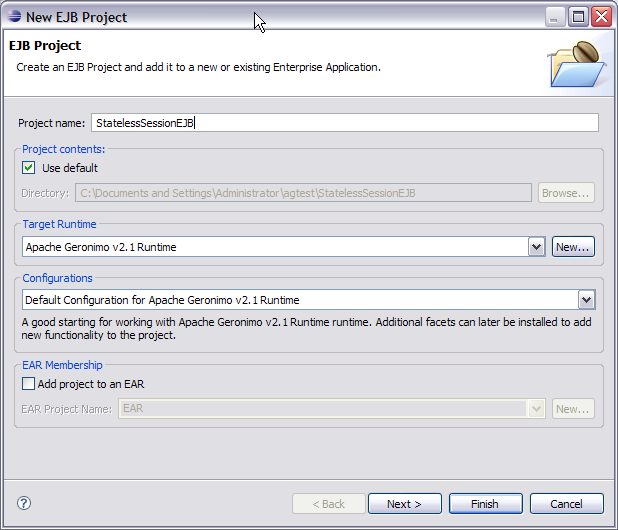
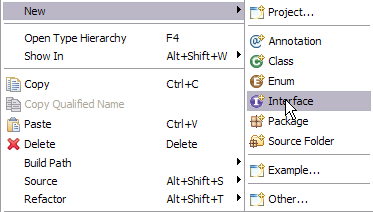
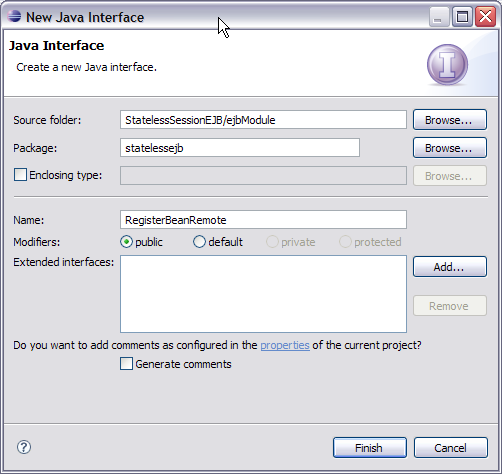
This tutorial is organized in the following sections:
package statelessejb;
import javax.ejb.Remote;
@Remote
public interface RegisterBeanRemote
{
public void register(String FirstName, String LastName, String Sex, String UserName, String Password);
public boolean verify(String username, String password);
}
package statelessejb;
import java.sql.Connection;
import java.sql.PreparedStatement;
import java.sql.ResultSet;
import javax.annotation.PostConstruct;
import javax.annotation.PreDestroy;
import javax.annotation.Resource;
import javax.ejb.Stateless;
import javax.sql.DataSource;
@Stateless
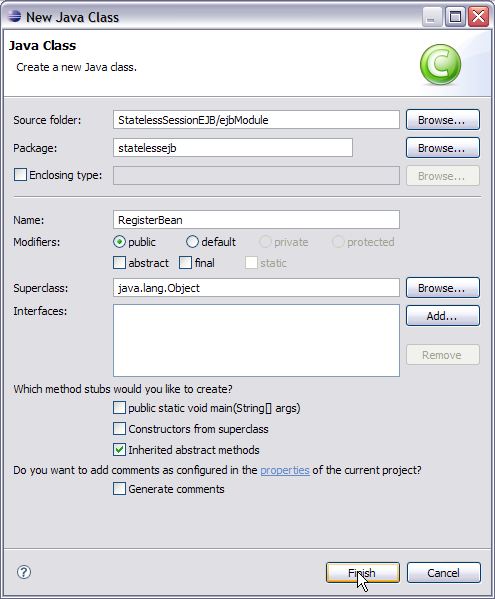
public class RegisterBean implements RegisterBeanRemote{
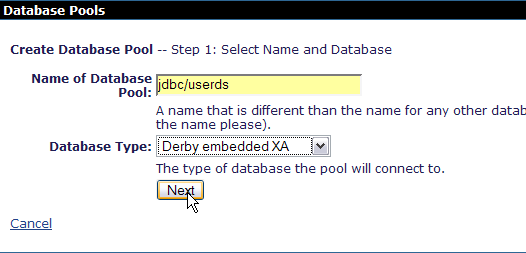
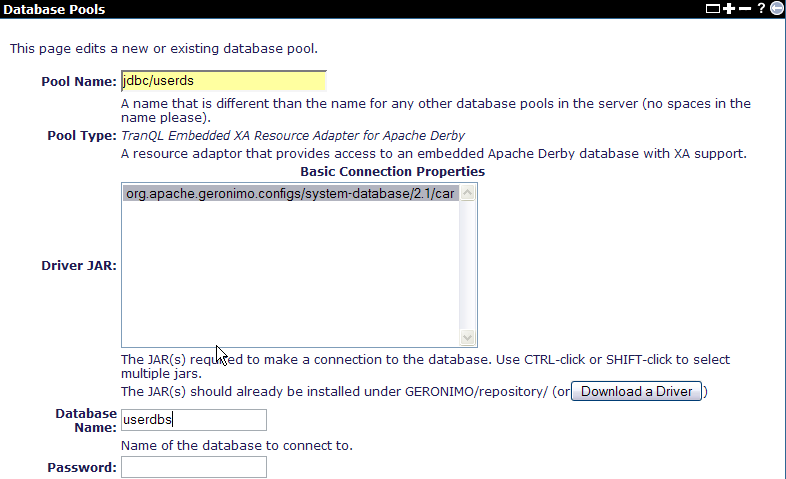
@Resource(name="jdbc/userds")
private DataSource dbsource;
private Connection dbconnect;
@PostConstruct
public void initialize()
{
try{
dbconnect= dbsource.getConnection();
}
catch(Exception e)
{
e.printStackTrace();
}
}
public void register(String FirstName, String LastName, String Sex, String UserName, String Password)
{
try
{
String insert="INSERT INTO USERINFO (" + "FIRSTNAME," + "LASTNAME," + "SEX," + "USERNAME," + "PASSWORD)" + " VALUES(?,?,?,?,?)";
PreparedStatement ps=dbconnect.prepareStatement(insert);
ps.setString(1,FirstName);
ps.setString(2,LastName);
ps.setString(3,Sex);
ps.setString(4,UserName);
ps.setString(5,Password);
int rs =ps.executeUpdate();
}
catch(Exception e)
{
e.printStackTrace();
}
}
public boolean verify(String username, String password)
{
boolean ret=false;
String select="SELECT * FROM USERINFO";
try{
PreparedStatement ps=dbconnect.prepareStatement(select);
ResultSet rs= ps.executeQuery();
while(rs.next())
{
String str=(rs.getString("USERNAME")).trim();
String str1=(rs.getString("PASSWORD")).trim();
if (str.compareTo(username)==0)
{
if(str1.compareTo(password)==0)
{
ret=true;
break;
}
else
ret=false;
}
else
ret=false;
}
}
catch(Exception e)
{
e.printStackTrace();
}
System.out.println(ret);
return ret;
}
@PreDestroy
public void destroy(){
try
{
dbconnect.close();
dbconnect=null;
}
catch(Exception e)
{
e.printStackTrace();
}
}
}
Warning
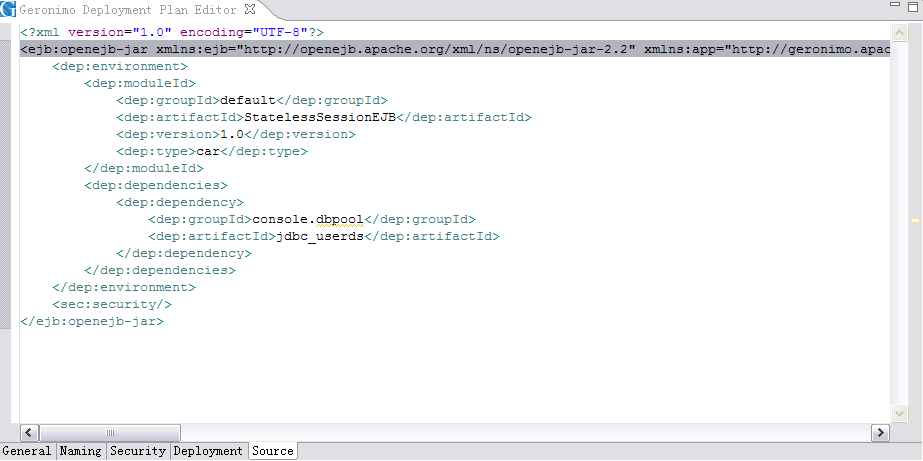
Due to some limitations in Geronimo Eclipse Plugin the generated deployment plan(openejb-jar.xml) does not have the correct namespace. Replace the existing namespace as shown in the figure with the following
<openejb-jar xmlns="http://www.openejb.org/xml/ns/openejb-jar-2.2" xmlns:nam="http://geronimo.apache.org/xml/ns/naming-1.2" xmlns:pkgen="http://www.openejb.org/xml/ns/pkgen-2.0" xmlns:sec="http://geronimo.apache.org/xml/ns/security-1.2" xmlns:sys="http://geronimo.apache.org/xml/ns/deployment-1.2">

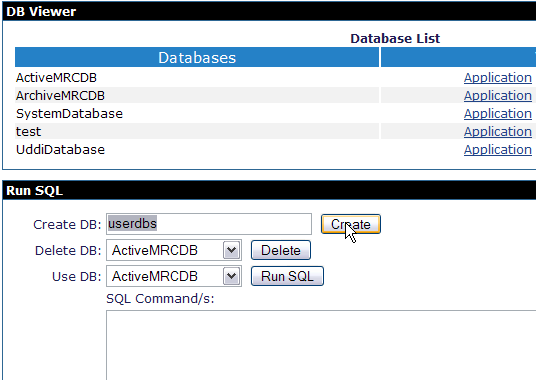
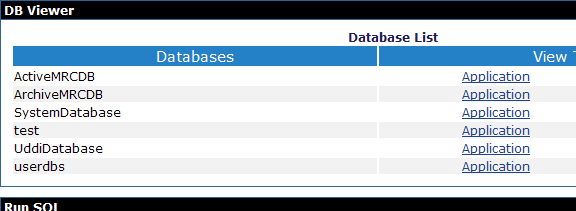

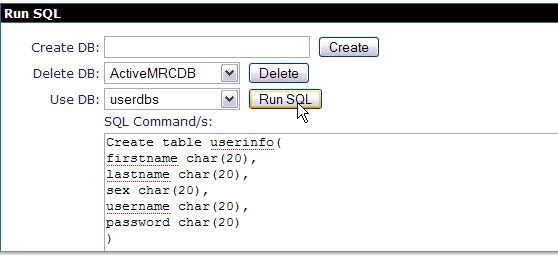
CREATE TABLE USERINFO
(
FIRSTNAME char(20),
LASTNAME  char(20),
SEX       char(7),
USERNAME  char(20),
PASSWORD  char(20)
)


login.jsp:
<%@ page language="java" contentType="text/html; charset=ISO-8859-1"
pageEncoding="ISO-8859-1"%>
<!DOCTYPE html PUBLIC "-//W3C//DTD HTML 4.01 Transitional//EN" "http://www.w3.org/TR/html4/loose.dtd">
<html>
<head>
<meta http-equiv="Content-Type" content="text/html; charset=ISO-8859-1">
<title>Welcome to Apache Geronimo</title>
</head>
<body bgcolor="white">
<form method="post" action="passCredentials.jsp">
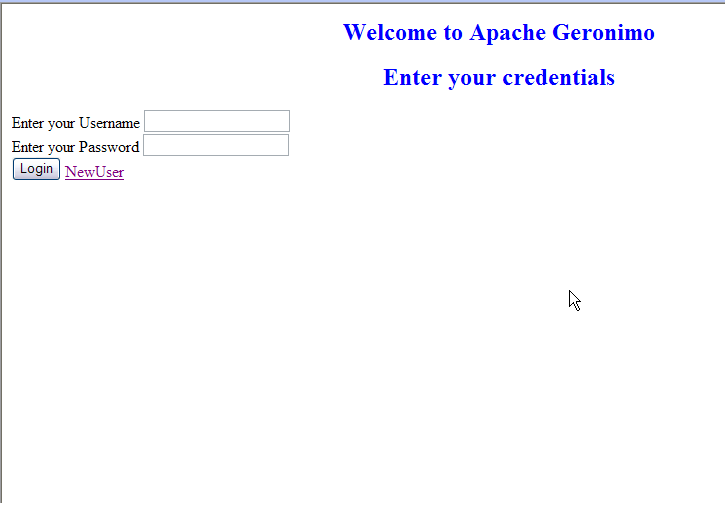
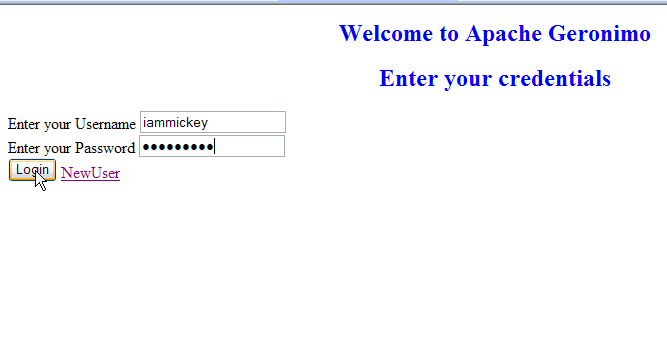
<h2 align="center"><font color="blue">Welcome to Apache Geronimo</font></h2>
<h2 align="center"><font color="blue">Enter your credentials</font></h2>
Enter your Username
<input type="text" name="username" size=20><br>
Enter your Password
<input type="password" name="password" size=20><br>
<input type="submit" value="Login">
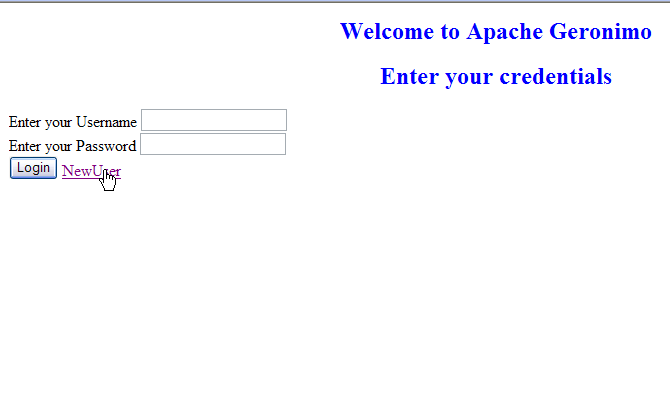
<a href="http://localhost:8080/ApplicationClient/register.jsp">NewUser</a>
</form>
</body>
</html>
passCredentials.jsp (checkout the action in the form tag) to verify the authenticity of user credentials. In case the user is new he has to go through the registration process. This statement <a href="http://localhost:8080/ApplicationClient/register.jsp">NewUser</a> is used to route the user to registration page.
<%@ page import="java.util.Properties,javax.naming.Context,javax.naming.InitialContext,statelessejb.RegisterBeanRemote" %>
<html>
<head>
<meta http-equiv="Content-Type" content="text/html; charset=ISO-8859-1">
<title>Insert title here</title>
</head>
<body bgcolor="white">
<%!boolean i; %>
<%
Properties prop=new Properties();
prop.put(Context.INITIAL_CONTEXT_FACTORY, "org.apache.openejb.client.RemoteInitialContextFactory");
	prop.put("java.naming.provider.url", "ejbd://localhost:4201");
Context context = new InitialContext(prop);
RegisterBeanRemote myejb=(RegisterBeanRemote)context.lookup("RegisterBeanRemote");
String s= request.getParameter("username");
String s1= request.getParameter("password");
i=myejb.verify(s,s1);
%>
<%
	if (i==true){
%>
<jsp:forward page="/resources.jsp"></jsp:forward>
<%
	} else {
%>
	<jsp:forward page="/login.jsp"></jsp:forward>
<%
}
%>
</body>
</html>
Why is the lookup name RegisterBeanRemote??
This will be explained in the deploy an run section
<%@ page language="java" contentType="text/html; charset=ISO-8859-1"
pageEncoding="ISO-8859-1"%>
<!DOCTYPE html PUBLIC "-//W3C//DTD HTML 4.01 Transitional//EN" "http://www.w3.org/TR/html4/loose.dtd">
<html>
<head>
<meta http-equiv="Content-Type" content="text/html; charset=ISO-8859-1">
<title>Welcome to Apache Geronimo</title>
</head>
<body bgcolor="white">
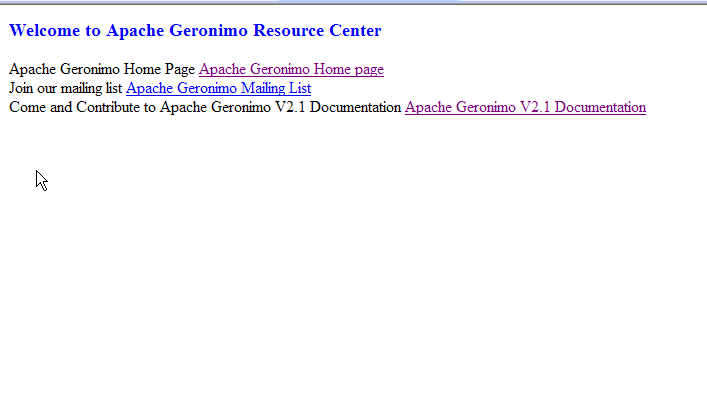
<h3><font color="blue">Welcome to Apache Geronimo Resource Center</font></h3>
Apache Geronimo Home Page
<a href="http://geronimo.apache.org">Apache Geronimo Home page</a><br>
Join our mailing list
<a href="http://geronimo.apache.org/mailing-lists.html">Apache Geronimo Mailing List</a><br>
Come and Contribute to Apache Geronimo V2.1 Documentation
<a href="http://cwiki.apache.org/GMOxDOC22/">Apache Geronimo V2.1 Documentation</a>
</body>
</html>
<%@ page language="java" contentType="text/html; charset=ISO-8859-1"
pageEncoding="ISO-8859-1"%>
<!DOCTYPE html PUBLIC "-//W3C//DTD HTML 4.01 Transitional//EN" "http://www.w3.org/TR/html4/loose.dtd">
<html>
<head>
<meta http-equiv="Content-Type" content="text/html; charset=ISO-8859-1">
<title>Welcome to Apache Geronimo</title>
</head>
<body bgcolor="white">
<script type="text/javascript">
function valForm()
{
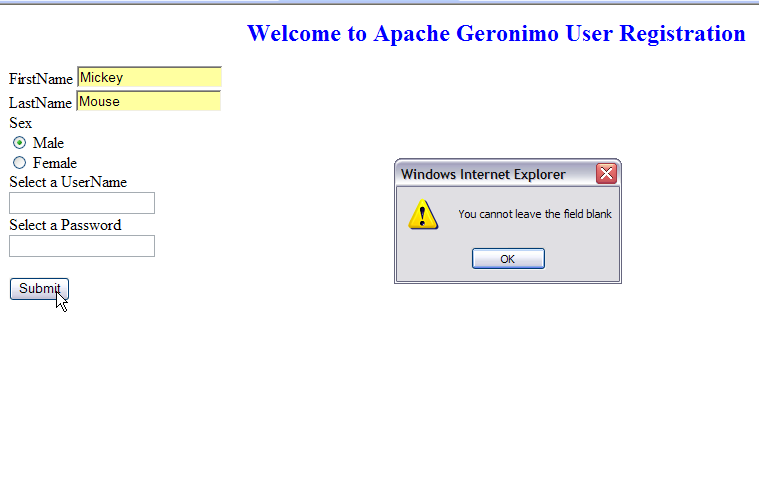
if (this.document.form1.username.value=="" || this.document.form1.username.value=="")
{
alert("You cannot leave the field blank");
this.document.form1.firstname.focus();
return false;
}
else
{
return true;
}
}
</script>
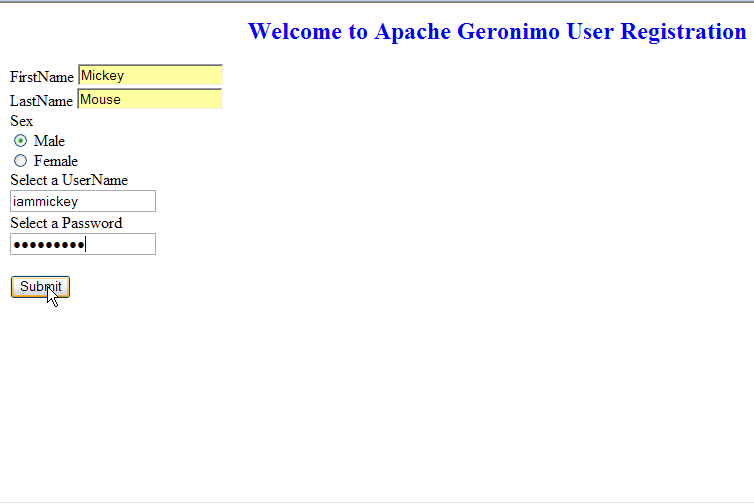
<h2 align="center"><font color="blue">Welcome to Apache Geronimo User Registration</font></h2>
<form method="post" name="form1" action="passVariables.jsp" onSubmit=" return valForm();">
FirstName
<INPUT type="text" name="firstname" SIZE=20><br>
LastName
<INPUT type="text" name="lastname" SIZE=20 ><br>
Sex<br>
<input type="radio" name="sex" value="male"> Male
<br>
<input type="radio" name="sex" value="female"> Female
<br>
Select a UserName<br>
<input type="text" name="username" size=20><br>
Select a Password<br>
<input type="password" name="password" size=20><br>
<br>
<input type="submit" value="Submit">
</form>
</body>
</html>
passVariables.jsp is called.
<%@ page import="java.util.Properties,javax.naming.Context,javax.naming.InitialContext,statelessejb.RegisterBeanRemote" %>
<html>
<head>
<meta http-equiv="Refresh" content="5;URL=http://localhost:8080/ApplicationClient/login.jsp">
<title>Welcome to Apache Geronimo</title>
</head>
<%
Properties prop=new Properties();
prop.put(Context.INITIAL_CONTEXT_FACTORY, "org.apache.openejb.client.RemoteInitialContextFactory");
prop.put("java.naming.provider.url", "ejbd://localhost:4201");
Context context = new InitialContext(prop);
RegisterBeanRemote myejb=(RegisterBeanRemote)context.lookup("RegisterBeanRemote");
String s= request.getParameter("firstname");
String s1= request.getParameter("lastname");
String s2= request.getParameter("sex");
String s3= request.getParameter("username");
String s4= request.getParameter("password");
myejb.register(s,s1,s2,s3,s4);
%>
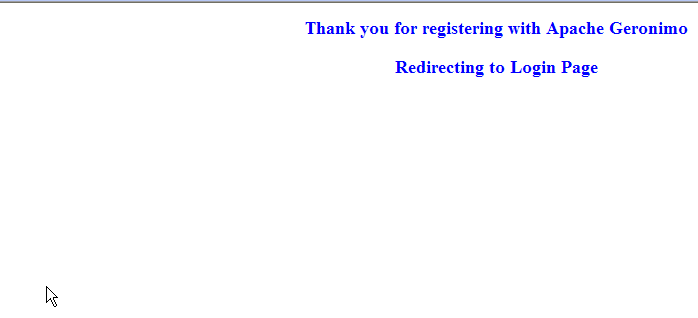
<h3 align="center"><font color="blue">Thank you for registering with Apache Geronimo</font></h3>
<h3 align="center"><font color="blue">Redirecting to Login Page</font></h3>
</html>
register.jsp and the register function in the bean class is called to populate the database.
<%@ page language="java" contentType="text/html; charset=ISO-8859-1"
    pageEncoding="ISO-8859-1"%>
<!DOCTYPE html PUBLIC "-//W3C//DTD HTML 4.01 Transitional//EN" "http://www.w3.org/TR/html4/loose.dtd">
<html>
<body>
<jsp:forward page="/login.jsp" />
</body>
</html>
openejb-jar.xml and add the following
<sys:dependencies>
            <sys:dependency>
                <sys:groupId>console.dbpool</sys:groupId>
                <sys:artifactId>jdbc_userds</sys:artifactId>
            </sys:dependency>
</sys:dependencies>
openejb-jar.xml will look like this
<?xml version="1.0" encoding="UTF-8"?>
<openejb-jar xmlns="http://www.openejb.org/xml/ns/openejb-jar-2.2"
xmlns:nam="http://geronimo.apache.org/xml/ns/naming-1.2"
xmlns:pkgen="http://www.openejb.org/xml/ns/pkgen-2.0"
xmlns:sec="http://geronimo.apache.org/xml/ns/security-1.2"
xmlns:sys="http://geronimo.apache.org/xml/ns/deployment-1.2">
  <sys:environment>
    <sys:moduleId>
      <sys:groupId>default</sys:groupId>
      <sys:artifactId>StatelessSessionEJB</sys:artifactId>
      <sys:version>1.0</sys:version>
      <sys:type>car</sys:type>
    </sys:moduleId>
    <sys:dependencies>
            <sys:dependency>
                <sys:groupId>console.dbpool</sys:groupId>
                <sys:artifactId>jdbc_userds</sys:artifactId>
            </sys:dependency>
</sys:dependencies>
  </sys:environment>
  <enterprise-beans/>
</openejb-jar>
Where did the above dependencies come from??
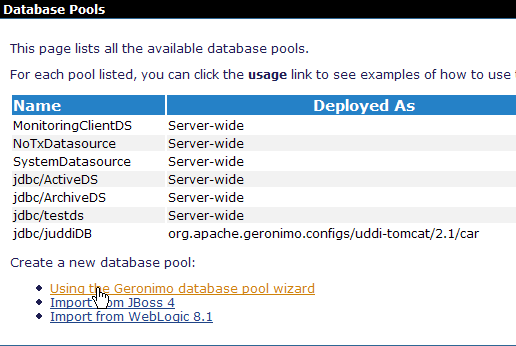
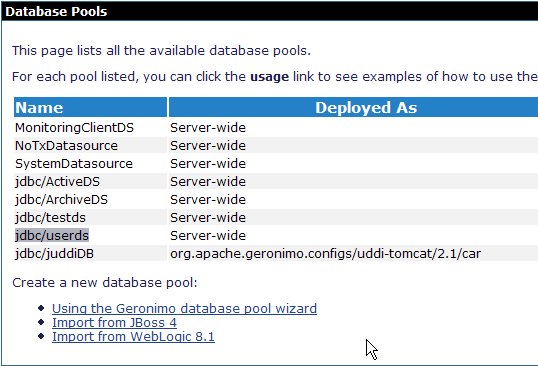
To make the datasource visible to EJB we need to add a dependency to the EJB deployment plan that is openejb-jar.xml. The above element can be obtained automatically from Geronimo Database Pool wizard. Select usage against the database pool jdbc/userds
<sys:dependencies>
       <sys:dependency>
            <sys:groupId>default</sys:groupId>
      		<sys:artifactId>StatelessSessionEJB</sys:artifactId>
      		<sys:version>1.0</sys:version>
      		<sys:type>car</sys:type>
       </sys:dependency>
</sys:dependencies>
geronimo-web.xml will look like this
<?xml version="1.0" encoding="UTF-8"?>
<web-app xmlns="http://geronimo.apache.org/xml/ns/j2ee/web-1.2"
xmlns:nam="http://geronimo.apache.org/xml/ns/naming-1.2"
xmlns:sec="http://geronimo.apache.org/xml/ns/security-1.2"
xmlns:sys="http://geronimo.apache.org/xml/ns/deployment-1.2">
  <sys:environment>
    <sys:moduleId>
      <sys:groupId>default</sys:groupId>
      <sys:artifactId>ApplicationClient</sys:artifactId>
      <sys:version>1.0</sys:version>
      <sys:type>car</sys:type>
    </sys:moduleId>
    <sys:dependencies>
       <sys:dependency>
            <sys:groupId>default</sys:groupId>
      		<sys:artifactId>StatelessSessionEJB</sys:artifactId>
      		<sys:version>1.0</sys:version>
      		<sys:type>car</sys:type>
       </sys:dependency>
</sys:dependencies>
  </sys:environment>
  <context-root>/ApplicationClient</context-root>
</web-app>
warning
Due to limitation with Geronimo Eclipse Plugin, you will have to export the Stateless Session EJB project and Web Application project as a jar and war respectively.
StatelessSessionEJB.jar and ApplicationClient.war.

|
|
Privacy Policy - Copyright © 2003-2013, The Apache Software Foundation, Licensed under ASL 2.0. |