You can create new database pools by clicking the Using the Geronimo database pool wizard link on the Database Pools portlet from the administration console. This wizard will walk you through an easy four-step procedure.
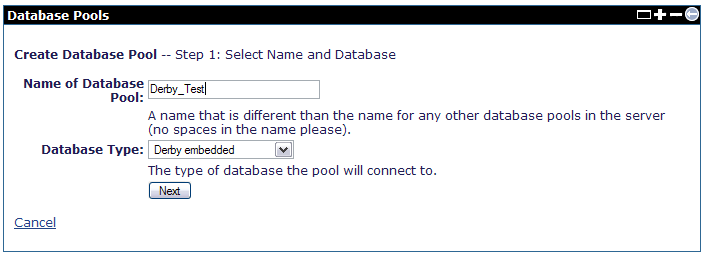
- Specify the Name of Database Pool and the Database Type. Then click Next.
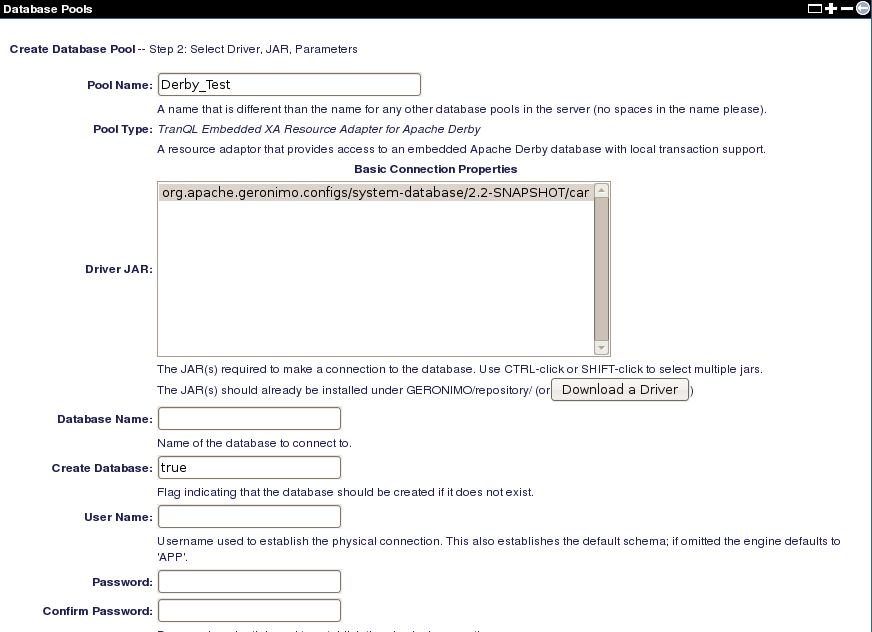
- In the next step, you must select the Driver JAR. For this example, from the Driver JAR field, select the JDBC drivers, which by default have been pre-filled based on the database type that you selected in the previous step. If the Driver JAR that you require does not exist, you can choose to download a driver by clicking the Download a Driver button to access the download page.
Specify a database in the Database Name field for the database pool to connect to. Set true for Create Database so that a database will be created if it dose not already exist. Alternatively, you can create a database manually with a single step procedure explained in Creating a database in Geronimo. You can click Deploy to deploy this database pool. Alternatively, you can click Show Plan to see or edit the deployment plan for this database pool.
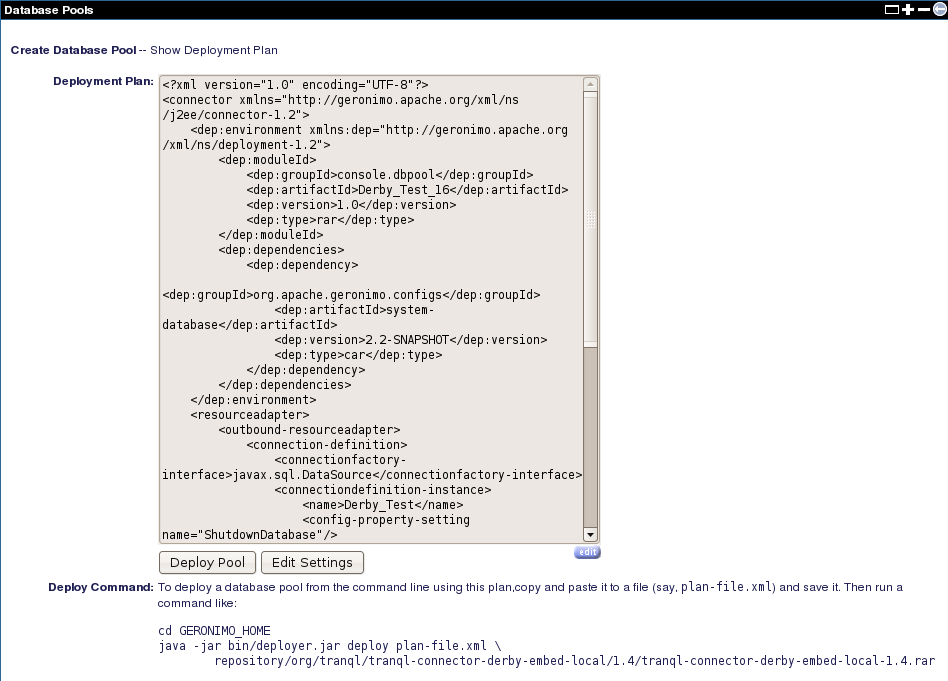
- If you clicked Show Plan in the previous step, you will see the Deployment Plan for the selected database pool as follows. This plan contains the pool type, connector interface, and the connection factory options from the setup properties. You can click Edit Settings to return to the previous step to modify your settings or click Deploy Pool to deploy the deployment plan for your database pool.
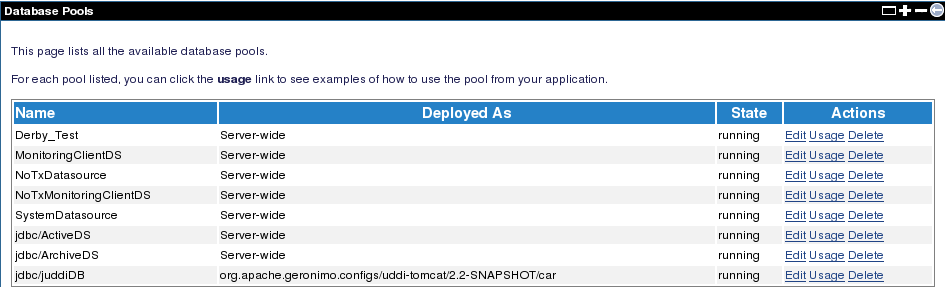
- After a successful deployment, you will see the new database pool listed on the Database Pools portlet as follows. Additional instructions about how to manually deploy a DB plan can be found in the Configuring a DB2 datasource section.