|
|
| Home > Index > Extensible Administration Console > Administration Console Extension User's Guide |
This document contains the following sections:
The Extensible Administration Console is a new Administration Console designed to mirror the flexibility of Geronimo's architecture. While the previous console was static, allowing configuration only for pre-defined components, the new Extensible Console changes dynamically with the components installed on your server.
This framework allows Geronimo plugin developers to package extensions to the Administration Console (called ACEs) with their components. On installation of a plugin, this new content will automatically be added to the Extensible Administration Console, so that the user can manage all of the configuration and tools from one place.
After reading this document, a Geronimo user will be able to
This document covers installing Geronimo's Administration Console into a Geronimo minimal assembly and the process to install an ACE plugin. For more information about the underlying architecture and ACE development, see the Administration Console Extension Developer's Guide.
These instructions are geared towards a basic user of Geronimo who wants to install new components on the administration console. Knowledge of the internal workings of the server is not necessary.
The reader should be familiar with the Geronimo application server and its applications. The reader should also be familiar with the basics of Geronimo's plugin framework. For more information about the architecture, this guide may also be a valuable resource: http://media.wiley.com/product_ancillary/31/04717854/DOWNLOAD/Pro_Apache_Geronimo_ch17.pdf.
The reader should have Apache Geronimo 2.1 Minimal ("Little-G") installed and running, with either Tomcat6 or Jetty6 as the web container. The Java EE assemblies already have the Extensible Aministration Console installed. For more information about getting started or getting updated to the right version, see this website: http://cwiki.apache.org/GMOxDOC21/installation.html.
This section will prepare the user to install an ACE by providing the necessary terminology and introducing the installation scenarios that will be discussed.
Plugin - An archive file (.car or .war) that can be installed into Geronimo to install a specific new service, such as ActiveMQ. For more about plugins, or to look at available plugins, check out geronimoplugins.com or geronimoplugincentral.org.
.CAR file (Configuration ARchive) - An archive file that stores Geronimo-specific configurations, as well as the classes, libraries, web pages, and other information associated with an application.
.WAR file (Web ARchive)- An archive file that contains a web application, including all of its classes, libraries, HTML and JSP pages, and other information. It can be deployed on any Java Enterprise compatible servlet container.
ACE (Administration Console Extension) - An archive file (either a .car or a .war), that includes Administration Console portlets. These portlets will be added to the Extensible Administration Console when the ACE is activated.
Extensible Administration console - A flexible version of Geronimo's original administration console. Once installed it is available at http://localhost:8080/console, and includes some portlets that correspond to the currently activated services in Geronimo.
Service - a component or set of functionality for Geronimo - it may be pre-installed, such as the Tomcat or Jetty web container, or it may be installed as a plugin
Minimal console - The administration console as it is first installed - with only the services necessary for basic functionality
Portlet - A web user interface component that can be assembled together with other similar components to create a web (portal) page. See the Portlet Specification JSR 168.
Which kind of file format do I want ?
What about installing a .car file from disk?
Unfortunately, it is not possible to install a .car file from disk with the current Geronimo Administration Console. However you can still use the "deploy install-plugin" tool from the command line. For more information, read up on the deployer tool at http://cwiki.apache.org/GMOxDOC11/deployer-tool.html
This section covers all the necessary steps to install the new Extensible Administration Console on your Geronimo 2.1 Minimal Server. The Geronimo 2.1 Java EE servers already have the console installed.
bin/deploy.sh search-plugins http://geronimo.apache.org/plugins/geronimo-2.1/
An ACE in .war format will install only the console extension. Its pre-requisite must already be installed on your system. For example, if you were installing a console extension to monitor a Derby database, Derby would need to be pre-installed on your server.
Prerequisites
An ACE in the .car format installs a component and adds its configuration portlets to the Extensible Administration Console.
Prerequisites
1. Access the Extensible Administration Console by pointing a web browser to the following address http://localhost:8080/console.
2. Select Plugins on the left navigation bar.
3. Under Install Geronimo Plugins, choose the plugin's repository address.
How do I choose the repository address?
a. If the correct address does not appear in the Repository list, select Add Repository.
b. In the New Repository textbox, enter the repository's address. Don't forget to include the forward-slash ( / ) at the end of the address.
c. Select Add Repository. The new address will now appear in the Repository list.
4. With the correct repository displayed in the Repository box, select Search for Plugins.
5. Choose the plugin from the Available Plugins list by clicking directly on the plugin name.
Where's the plugin I want?
a. If the desired plugin is not a hyperlink, there are a number of potential reasons:
i. If already installed is displayed next to the plugin name, the plugin may already be installed on your server. Check for its name on the System Modules tab to make sure it is running, and to start or uninstall it if necessary.
ii. If Not available is displayed next to the plugin name, it may require a different version of Geronimo or a different web container (Tomcat or Jetty). Select View Details for more information.
b. If the list of Available Plugins does not display, or the desired plugin is not listed, you may have entered the wrong repository address. Try entering it again. If problems continue, contact the plugin provider or email the user mailing list at user@geronimo.apache.org.
6. Select Continue on next screen if the information is correct, or Cancel to return to the previous screen.
7. Select Install Plugin on the next screen to download and install the ACE and all of its required components.
8. When the plugin installation is complete, refresh your browser.
9. A new menu item will appear on the left. You can now configure this plugin's settings from the newly installed portlets.
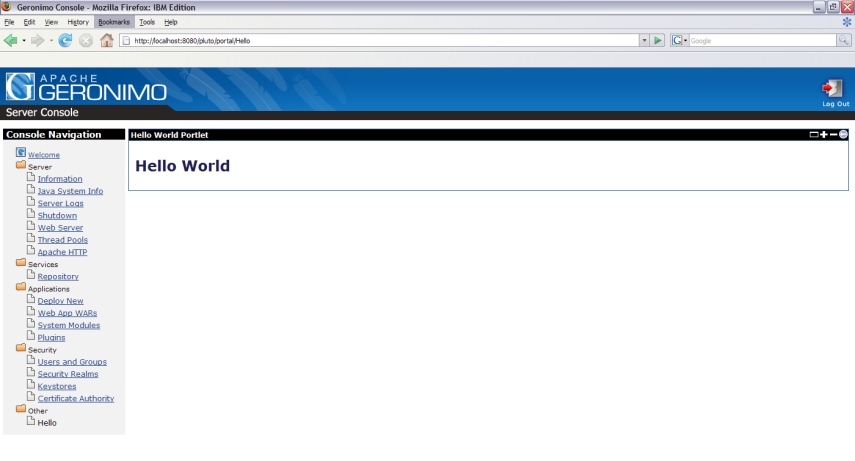
This is an example of a simple ACE file. It is not attached to any components - it simply adds a new "Hello World" portlet to the Extensible Administration Console.
1. Download example-extension-new.war example_extension_new.war
2. Access the Extensible Administration Console by pointing your web browser to http://localhost:8080/console.
3. Select Deploy New on the left navigation bar.
4. Click browse next to Archive and select the example-extension-new.war file. Leave the Plan box blank, Start app after install checked, and Redeploy application unchecked.
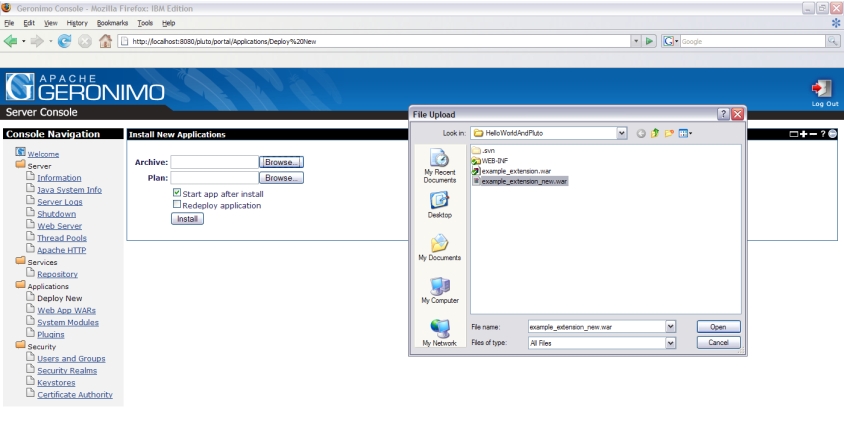
5. Click Install. Your new component will show up on the left side navigation menu.
|
|
Privacy Policy - Copyright © 2003-2011, The Apache Software Foundation, Licensed under ASL 2.0. |