|
|
| Home > Documentation > Apache Geronimo v1.0 - User's Guide > Migrating to Apache Geronimo > JBoss to Geronimo - Web Services Migration |
This article will help you migrate Web services applications developed for JBoss v4 to Apache Geronimo. This article is part of a series of migration articles covering different types of applications migration.
This article provides some details on the differences between these two application servers as well as a detailed step-by-step migration procedure for porting Web services applications from JBoss v4 to Apache Geronimo. To define a common starting point (the source environment) we provide steps for deploying the sample Search a Phone Directory Web services application into the JBoss source environment. Then you will be guided through the application migration and deployment process onto Apache Geronimo.
This article is organized in the following sections:
Web services implementation may vary from one vendor to another. The purpose of this section is to provide comparison of JBoss and Apache Geronimo features which are used in the implementation of the sample application described further in this article. You can use the information below to identify the differences of these two servers and plan for migration accordingly.
Features | JBoss v4 | Apache Geronimo |
|---|---|---|
Web services engine | Currently uses Apache Axis. However, JBoss plans to implement its own engine in the near future. | Uses Apache Axis. |
Document/literal Web services | Runs server and Web client endpoints generated according to Java Web services specification. | Runs server and Web client endpoints generated according to Java Web services specification. However, it requires that an element defined in the XML schema and representing request message of an operation has exactly the same name as the operation. |
The described Geronimo requirement for names of request elements and operations is be illustrated by the following example where names which must be the same are marked with bold:
The following example illustrates the requirement from Geronimo of having the same name the request elements. Look for the three occurences of myOperation".
This article contains the Search a Phone Directory Web services application to demonstrate Web services migration from JBoss to Geronimo. The application implements both server and Web-client sides of a simple service which searches through a phone directory. The user works with the Web-client to test the application. The user specifies a search criterion and receives the search results.

Download the Search a Phone Directory Web services application from the following link:
After extracting the ZIP file, a webservices directory is created, from now on this directory will be referred as <webservices_home>.
The Web service is generic in implementation and is based on the document/literal encoding style. The WSDL document describing the service can be found in the directory <webservices_home>/web/WEB-INF/wsdl.
The sample application consists of the following packages, the source code can be found in the <webservices_home>/src directory.
In addition to these packages, the client endpoint of the Web service also consists a single JSP page. This JSP displays a search form, sends request to the server endpoint and displays the search results.
The tools used for developing and building the sample application are:
JWSDP provides a number of tools useful in development of different Web services. It was used for generation of JAXP-RPC mapping files located in the directory <webservices_home>/web and auxiliary Java classes and interfaces described above. Java Web Services Development Pack can be downloaded from the following URL:
http://java.sun.com/webservices
The Eclipse IDE was used for development of the sample application. This is a very powerful and popular open source development tool. Integration plug-ins are available for both JBoss and Geronimo. Eclipse can be downloaded from the following URL:
http://www.eclipse.org
Ant is a pure Java build tool. It is used for building the war files and populating the database for the Online Brokerage application. Ant can be downloaded from the following URL:
http://ant.apache.org
This section shows you how and where the sample JBoss reference environment was installed so you can map this scenario to your own implementation.
Detailed instructions for installing, configuring, and managing JBoss are provided in the product documentation. Check the product Web site for the most updated documents.
The following list highlights the general tasks you will need to complete to install and configure the initial environment as the starting point for deploying the sample application.
run.sh -c <your_server_name> command from the <jboss_home>\bin directory.Compiling the source code of the sample application requires Java libraries that provide J2EE API interfaces. Build scripts included with the sample application package are configured for using JAR files provided by a JBoss installation.
The only additional software required for building the application is Apache Ant. If you still do not have Ant installed this is a good time for doing it and make sure that <ant_home>\bin directory is added to the system's path variable.
Apache Ant can be downloaded from the following URL:
The Search a Phone Directory Web services sample application included with this article provides an Ant script that you will use in order to build modules of the application. If you have not downloaded the sample application yet, this is a good time for doing it. Download the Search a Phone Directory application package from the following link:
After extracting the zip file, a webservices directory is created. From now on this directory will be referred as <webservices_home>. In that directory open the build.properties file and edit the properties starting with the prefix jboss to match your environment as shown in the following example.
You should also ensure that the property server.port specifies the actual port used by JBoss on the local host. This number will be parsed to the <webservices_home>/web/WEB-INF/search-phones-service.wsdl file which is used by the Web service client endpoint to locate the server endpoint of the service. The remaining properties are not relevant at this point in time, you will use them later to build the Geronimo version of the sample application.
# Name of the server to build the application for:
server.name = jboss

# Port number occupied by the server on the local host
# (used by the web services client to locate the server
# endpoint):
server.port = 8080

# Home directory of JBoss 4.0.2 J2ee Application Server and
# name of the server instance on which the application
# should be deployed (this instance should be either a copy
# of the default JBoss server or the default server itself
# because its libs are also used for building the source
# code):
jboss.home = <jboss_home>
jboss.server = <your_server_name>

# Home directory of Geronimo Application Server
# and its administrator credentials:
geronimo.home = <geronimo_home>
geronimo.user = system
geronimo.password = manager
When specifying the directories and paths in the build.properties file, make sure to use just the forward slash "/" , otherwise the build will not locate the required files.
From a command prompt or shell go to the <webservices_home> directory and run the ant build command. This will create the WAR file and place it directly into the <webservices_home> directory.
In addition to the compiled Java classes and the previously mentioned WSDL and JAXP-RPC mapping files the WEB-INF directory of the archive contains standard web.xml and webservices.xml deployment descriptors and a descriptor specific to JBoss jboss-web.xml. The JBoss deployment descriptor is illustrated in the following example.
Since this sample application does not use any resources no features specific to JBoss this file just provides the context root for the application. This path is optional and in case of such a simple descriptor you can build and deploy the application even without it.
To deploy the Search a Phone Directory Web services application, copy the webservices.war file from the <webservices_home> directory into the <jboss_home>\server\<your_server_name>\deploy directory.
Alternatively, you may run the command ant deploy that will build the application and deploy it to JBoss automatically.
If JBoss is running, it will automatically deploy and start the application. Otherwise, the application will be deployed and started at the next invocation of the application server.
To test the application, open a Web browser and access the following URL:
http://localhost:8080/webservices
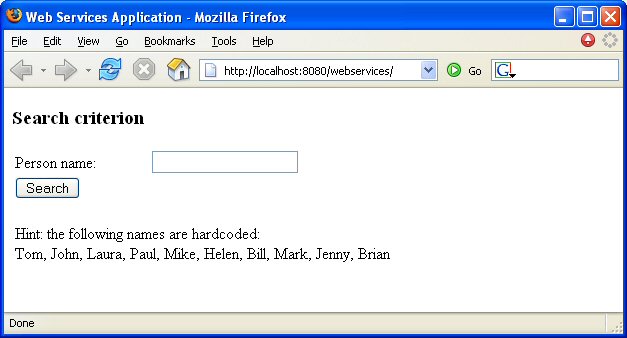
This brings up the JSP page of the sample application. Use the input form to search through the directory.
Download and install Geronimo from the following URL:
http://geronimo.apache.org/downloads.html
The release notes available there provide clear instructions on system requirements and how to install and start Geronimo. Throughout the rest of this article we will refer to the Geronimo installation directory as <geronimo_home>.
TCP/IP ports conflict
If you are planning to run JBoss and Geronimo on the same machine consider to change the default service ports on, at least, one of these servers.
As it was described in the beginning of this article, Geronimo does not allow an XML schema element representing request message of an operation to have a name different from the name of the operation. Hence if your WSDL defines unsupported names you need to correct the WSDL and generate or re-generate required Java classes. Depending on your coding approach, this may require manual modification of classes implementing endpoint of the Web service.
The Search a Phone Directory Web services sample application uses WSDL names convention supported by both servers. Therefore the only thing that you need to do prior to deploy the application on Geronimo is to replace the deployment descriptor specific to JBoss with one specific to Geronimo. The geronimo-web.xml file is located in the <webservices_home>/web/WEB-INF directory and its contents is listed below.
Similar to JBoss, this descriptor just specifies the context root path for the application and in this case due to its simplicity the file is optional for inclusion into the WAR archive.
These are the only changes required to run the Web services application on Geronimo.
In order to build the WAR file for Geronimo, you need tomodify the build.properties file so that the server.name property value is set to geronimo and properties which start from the prefix geronimo match your environment as shown in the following example. You should also ensure that the property server.port specifies the actual TCP/IP port used by Geronimo on the local host. This port number will be parsed to the file <webservices_home>/web/WEB-INF/search-phones-service.wsdl file which is used by the Web service client endpoint to locate the server endpoint of the service.
# Name of the server to build the application for:
server.name = geronimo

# Port number occupied by the server on the local host
# (used by the web services client to locate the server
# endpoint):
server.port = 8080

# Home directory of JBoss 4.0.2 J2ee Application Server and
# name of the server instance on which the application
# should be deployed (this instance should be either a copy
# of the default JBoss server or the default server itself
# because its libs are also used for building the source
# code):
jboss.home = <jboss_home>
jboss.server = <your_server_name>

# Home directory of Geronimo Application Server
# and its administrator credentials:
geronimo.home = <geronimo_home>
geronimo.user = system
geronimo.password = manager
Modifying the source code
If you modify the Java source code of this application, ensure that the properties which start with the prefix jboss still match your environment. The build scripts still refer to JBoss libraries for J2EE API interfaces required for the source code compilation. Alternatively, you can update the classpath specified in the build.xml file so that it refers to the library <geronimo_home>/repository/geronimo-spec/jars/geronimo-spec-j2ee-1.4-rc5.jar instead of JBoss JARs.
Now run the command ant build. This will create the Geronimo version of the WAR file in which the deployment descriptor jboss-web.xml is replaced with the geronimo-web.xml and place it directly into the <webservices_home> directory.
To deploy the migrated Search a Phone Directory Web services application, make sure the Geronimo server is up and running.
From a command line, change directory to <webservices_home> and type the following command:
java -jar <geronimo_home>/bin/deployer.jar --user system --password manager deploy webservices.war
Another way to deploy the WAR file on Geronimo (that is running on the default port 8080) is to update the build.properties file so that the properties which starts with geronimo match with your environment and invoke the ant deploy command. The script executed by Ant will uninstall the sample application if installed and deploy the latest built created on the previous step.
Once the application is deployed, open a Web browser and access the following URL:
http://localhost:8080/webservices
You should see the same JSP page of the application as you tested when running the Web services sample on JBoss.
This article showed how to migrate a Web services application that uses document/literal encoding from JBoss to Apache Geronimo. It showed that if the WSDL document follows the widely accepted names conventions then the migration will take minimum effort or even the very same application could be redeployed on any of the servers without any changes at all.
|
|
Privacy Policy - Copyright © 2003-2009, The Apache Software Foundation, Licensed under ASL 2.0. |