HomeDocumentation > Developer's guide > Tutorials > Geronimo plugins > Custom server assemblies using Geronimo Administrative console
{scrollbar}

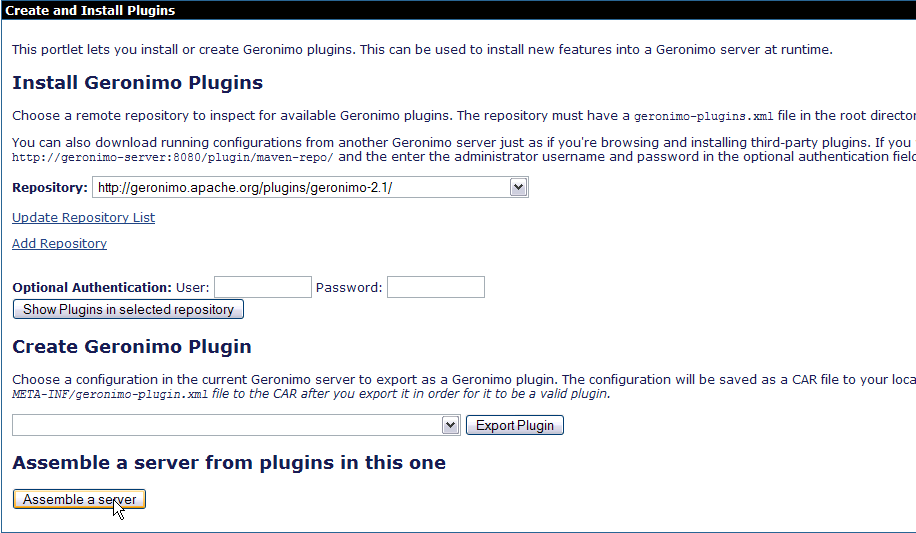
Geronimo has always been a flexible, component-based server environment which allowed lightweight server images to be custom built for specific application environments – minimizing server footprint and reducing server startup time. Until now, creating customized Geronimo server runtimes was largely a build-time operation. Geronimo 2.1 greatly simplifies build-time customization, but also allows users to export a new custom server image from a running Geronimo server. Users may take a function-centric approach, choosing the desired set of server plugins for the server (e.g. Web Container+JMS+Deploy capabilities), or an application-centric approach, choosing one or more application plugins and allowing Geronimo to calculate the necessary server components required by the applications.

In the following section we will illustrate the steps on assembling a customer server in Geronimo. We are using Apache Geronimo V2.1.1 for this tutorial. In this tutorial we are taking an application centric approach. Using this approach our application will define on the contents of server. Custom server will be built around our application and will include only the components required by our application. For the application we have used an existing tutorial from tutorial section. Refer Stateless Session Bean tutorial for application development and deployment. Later we will assemble a custom server which will only include functional components required by our application.

Clarification

Application client referred in this tutorial is actually a Web Application Client.

Identifying the functional components required by our server.

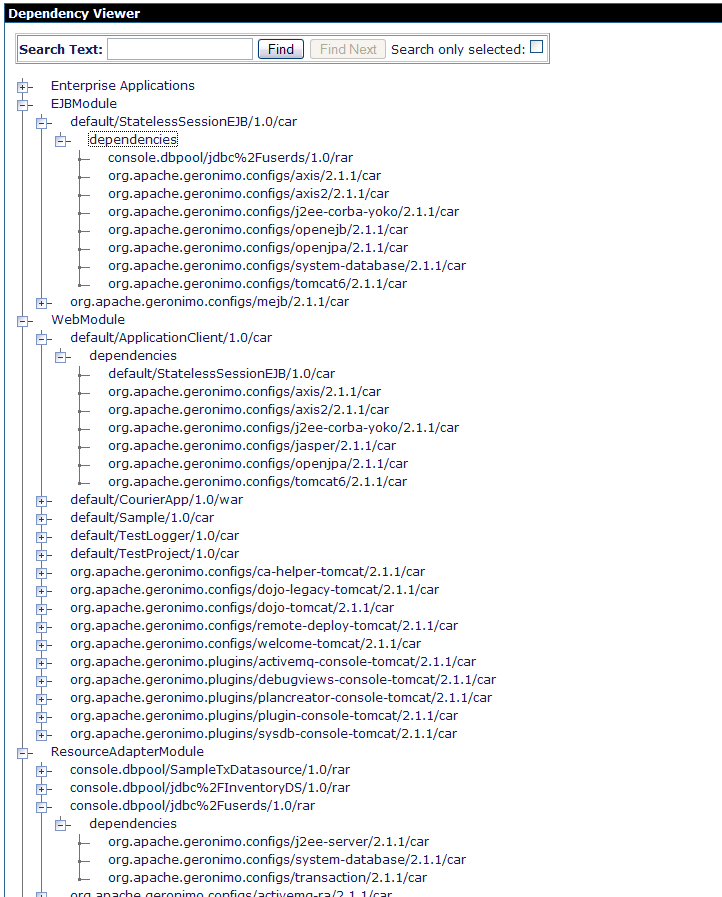
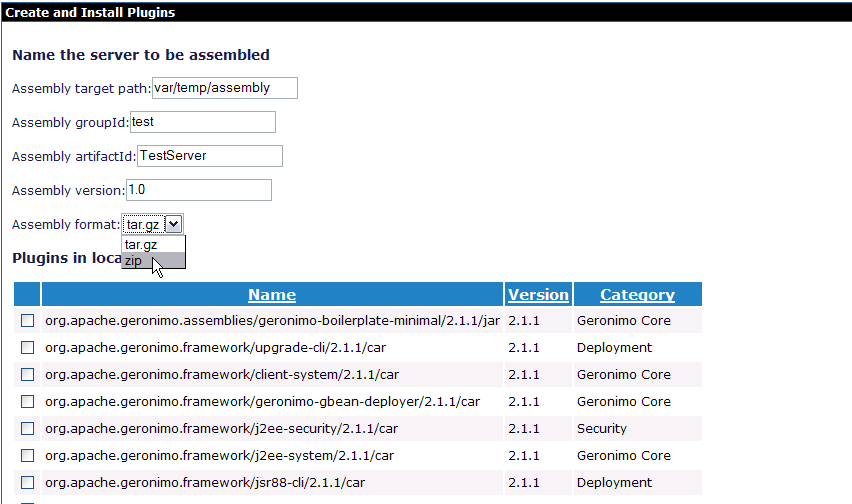
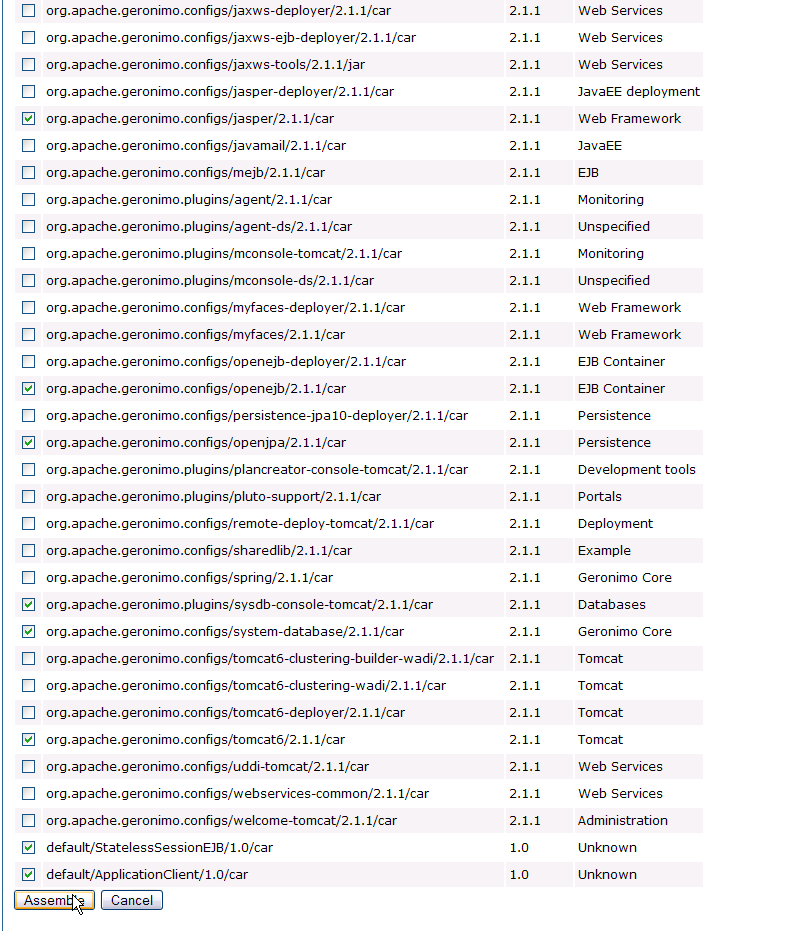
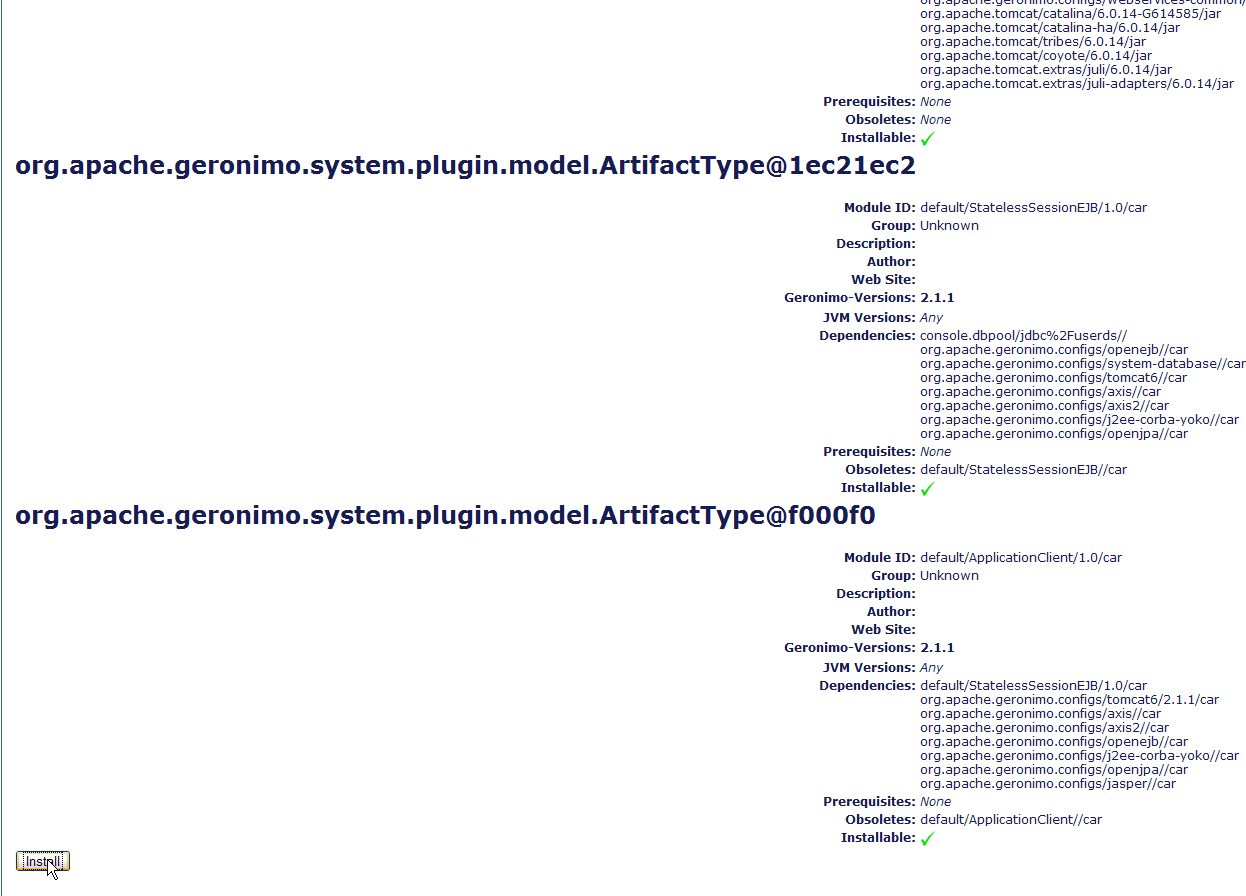
This step is required to identify the various dependencies required by our application. Since we are following an application centric approach we need to find out the various dependencies required by our application.
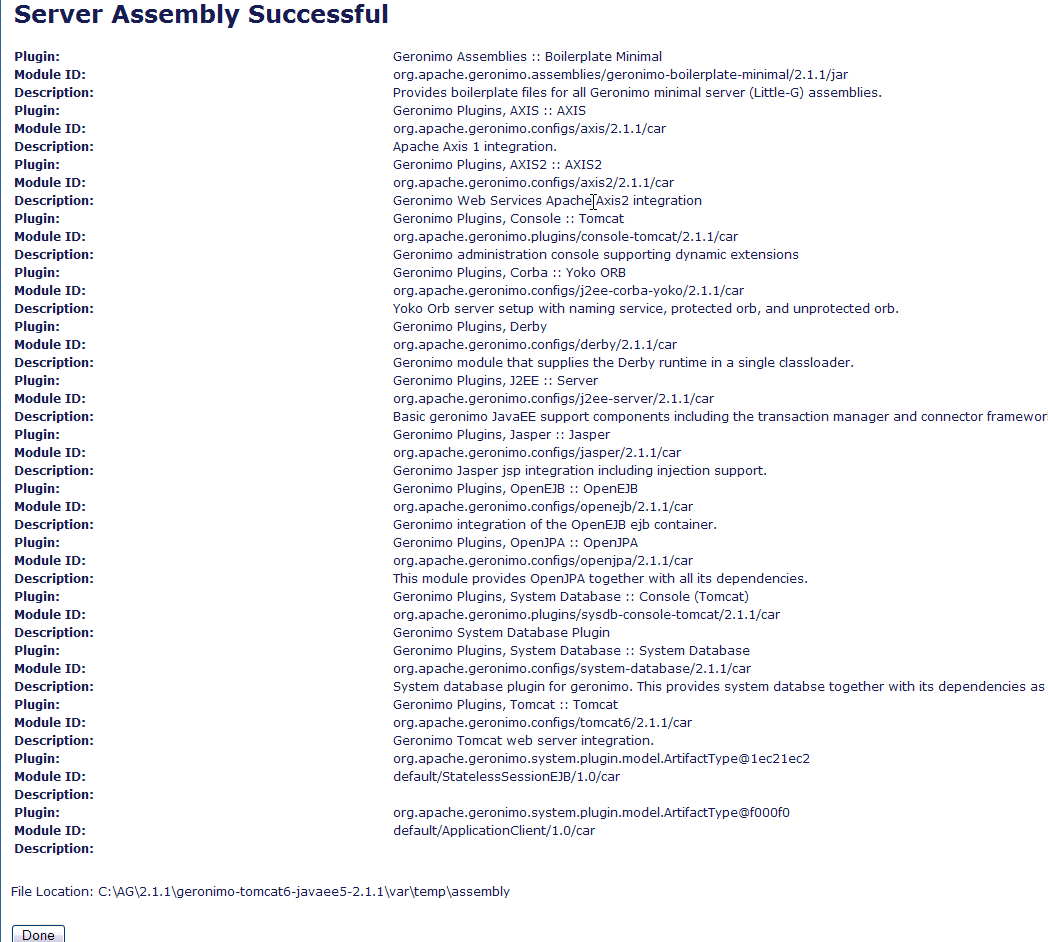
This is the major work required for our custom server which has been simplified by geronimo administrative console.

  1. To assemble a server from existing instance of geronimo we need to include geronimo-boilerplate-minimal plugin which includes several files used to start the server. Refer Plugin infrastructure section for more information on geronimo-boilerplate-minimal.
  2. To identify the various dependencies associated with our application Launch the Dependency Viewer under Debug Views.


  3. Expand EJBModule followed by default/StatelessSessionEJB/1.0/car. Select dependencies to list the dependencies for this application. Similarly expand WebModule followed by default/ApplicationClient/1.0/car and ResourceAdapterModule followed by console.dbpool/jdbc%2Fuserds/1.0/rar.


    This completes the identification of all the functional component(dependencies) required by our application centric custom server.

Assembling a custom server.

  1. Launch the administrative console and select Plugins under Applications.


  2. Select Assemble a server.


  3. Name the artifacts as suggested in the figure.


  4. Next step is to select the plugins required in our custom server assembly. Select geronimo-boilerplate-minimal, WAR, EJB and there respective dependencies. You also have to select org.apache.geronimo.configs/derby/2.1.1/car since our application uses derby database.
  5. To get a web based administrative console you need to select org.apache.geronimo.plugins/console-tomcat/2.1.1/car. For the database wizard select org.apache.geronimo.plugins/sysdb-console-tomcat/2.1.1/car.
  6. Final list of plugins we have selected are as follows
    • org.apache.geronimo.assemblies/geronimo-boilerplate-minimal/2.1.1/jar
    • org.apache.geronimo.configs/axis/2.1.1/car
    • org.apache.geronimo.configs/axis2/2.1.1/car
    • org.apache.geronimo.configs/j2ee-server/2.1.1/car
    • org.apache.geronimo.configs/j2ee-corba-yoko/2.1.1/car
    • org.apache.geronimo.configs/jasper/2.1.1/car
    • org.apache.geronimo.configs/openejb/2.1.1/car
    • org.apache.geronimo.configs/openjpa/2.1.1/car
    • org.apache.geronimo.plugins/sysdb-console-tomcat/2.1.1/car
    • org.apache.geronimo.configs/system-database/2.1.1/car
    • org.apache.geronimo.configs/tomcat6/2.1.1/car
    • default/StatelessSessionEJB/1.0/car
    • default/ApplicationClient/1.0/car
    • org.apache.geronimo.configs/derby/2.1.1/car
    • org.apache.geronimo.plugins/console-tomcat/2.1.1/car
    • org.apache.geronimo.plugins/sysdb-console-tomcat/2.1.1/car


  7. Once done select Assemble.


  8. On the next screen each artifact and its associated properties will be displayed. Select Install.


  9. Once done you will receive a confirmation message suggesting the success or failure of server assembly. It will also enlist the location of the custom server assembly which by default is <GERONIMO_HOME>/var/temp/assembly.
  10. The server will be named as TestServer-1.0-bin.zip. Unzip it and start the server.
  11. Since our Stateless Session Bean uses userdbs you need to create database and table as suggested in the tutorial.
    This completes our illustration for custom server assembly