HomeDocumentation > Developer's guide > Tutorials > Web services > Developing a simple Calculator Web Service
{scrollbar}

This tutorial will walk you through building and developing the jax-ws calculator that ships with the samples package for Geronimo. After completing this tutorial, you should be able to understand how to build simple web services with Apache Geronimo 2.1 using the Eclipse development environment

To run this tutorial, as a minimum you will be required to have installed the following prerequisite software.

  • Sun JDK 5.0+ (J2SE 1.5)
  • Eclipse 3.3.1.1 (Eclipse Classic package of Europa distribution), which is platform specific
  • Web Tools Platform (WTP) 2.0.1
  • Data Tools Platform (DTP) 1.5.1
  • Eclipse Modeling Framework (EMF) 2.3.1
  • Graphical Editing Framework (GEF) 3.3.1

Details on installing eclipse are provided in the Development environment section. This tutorial is organized in the following sections:

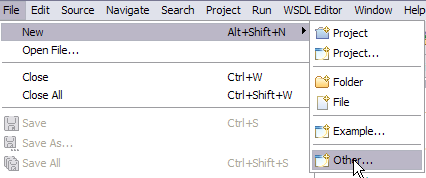
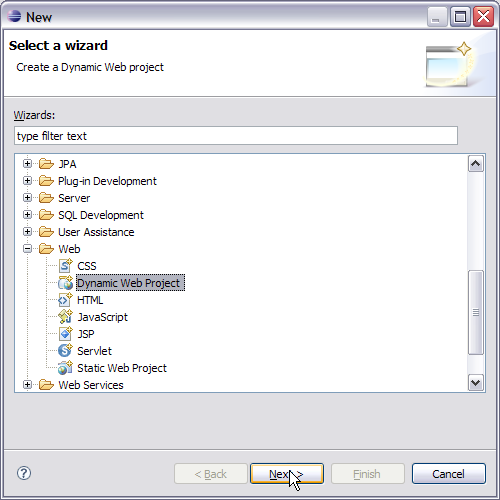
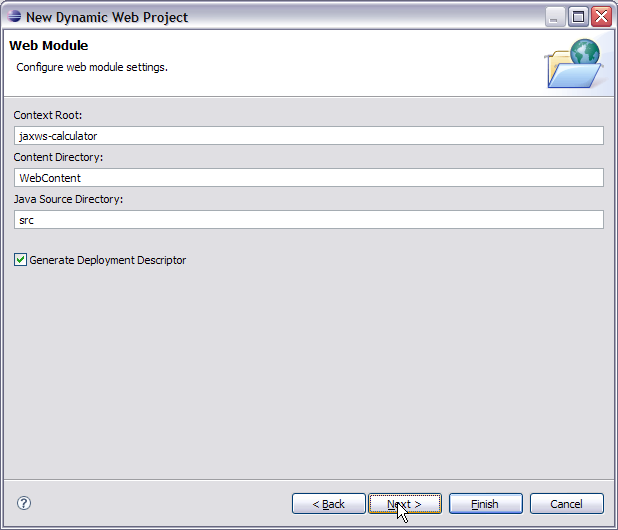
The application development will take you through the following

Setting Eclipse for Application Development

  1. Create a Dynamic Web Project
    • Select File -> New, select Other...


    • In the popup window select Web->Dynamic Web Project category and click NEXT.


    • Type in jaxws-calculator as the Project name: and select Next


    • On the next screen check the box for Axis2 Web Services


    • Make sure Generate Deployment Descriptor is selected and click Next.


    • Modify the Group Id to: org.apache.geronimo.samples.jws and Artifact Id: to Calculator.


      Useful Information

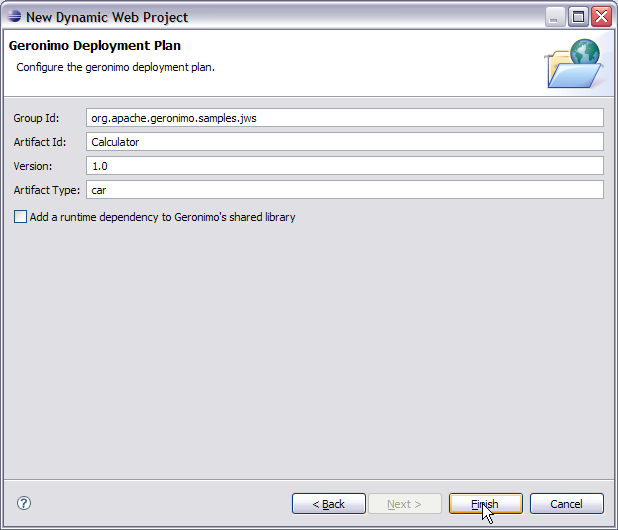
      Group ID: A name that identifies the group of a module. The default value is default.
      Artifact ID: A name of the module in a group. The default value is <blank>.
      Version: The version of module. The default value is 1.0
      Type: The type of module, such as system module (car), jar module (jar), web
      archive (war), enterprise archive (ear), and so on. The default value is car
      A module is stored inside a repository as repository/groupId/artifactId/version/artifactIdversion.
      type. This repository structure gives a more standardized and easily maintainable
      structure to Geronimo applications.

    • Select Finish. Warning

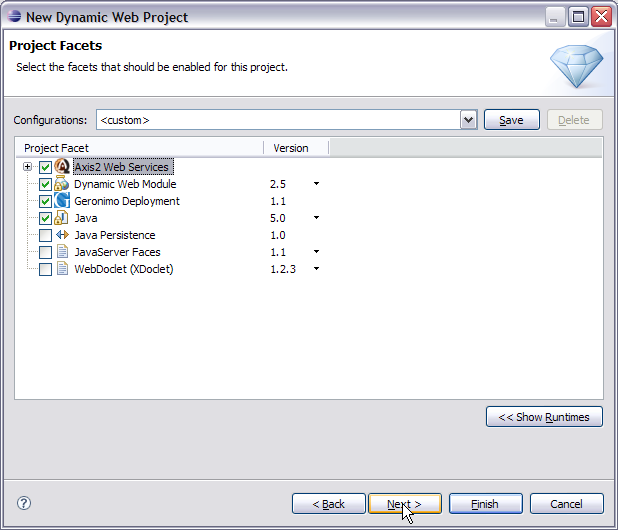
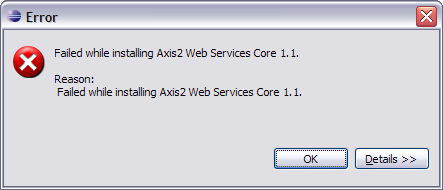
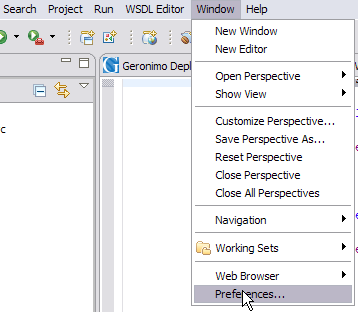
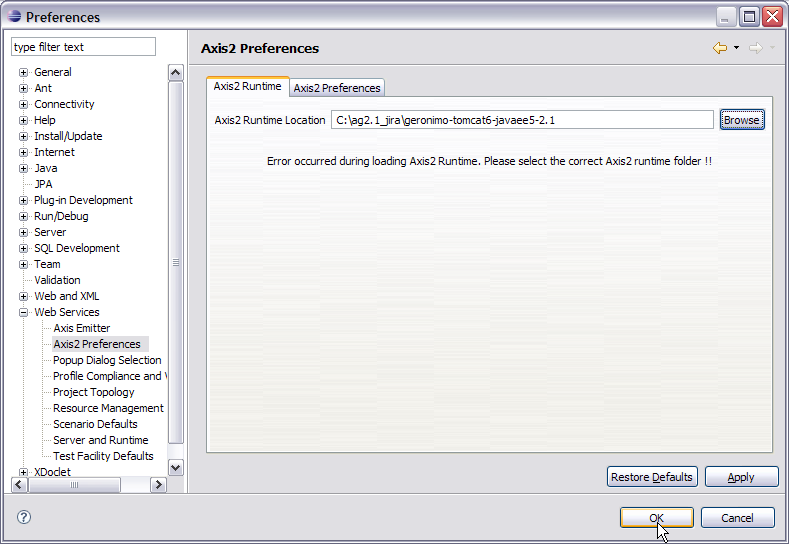
      Depending upon your environment, you may see the error message "Failed while installing Axis2 Web Services Core 1.1". Do not worry. We will just have to manually point Axis2 to the installation directory of Apache Geronimo to fix this error.


  2. AXIS2 Configuration
    • Select Window->Preferences.


    • Select Web Services->Axis2 Preferences.
    • Under Axis2 Runtime tab, browse to the installation root of Apache Geronimo. Select Ok.


      This completes the configuration of Eclipse for application development.

Creating the Web Services Implementation code

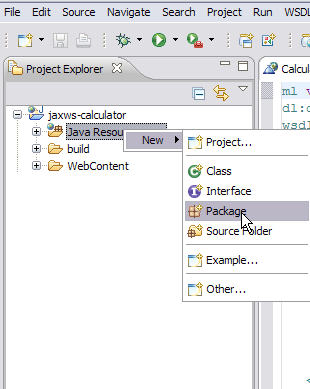
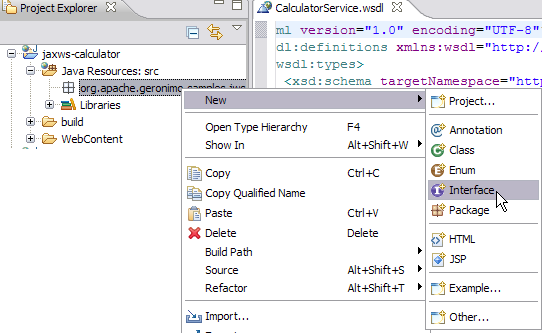
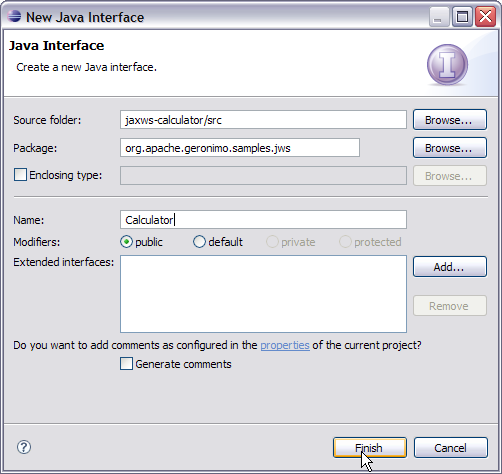
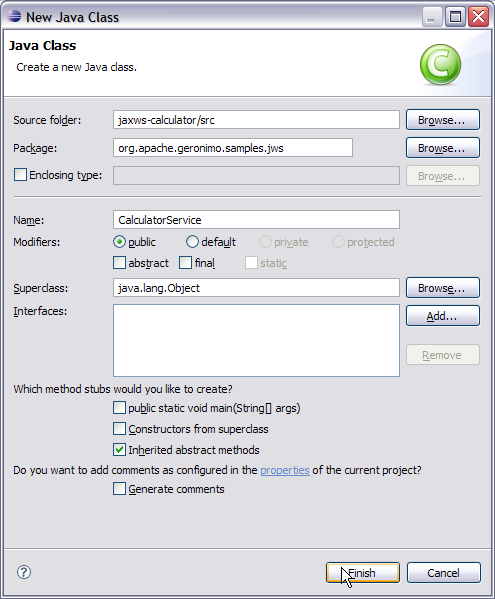
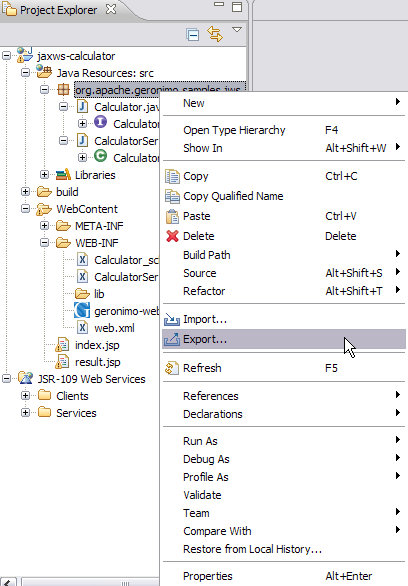
To implement the Calculator we are going to create a package org.apache.geronimo.samples.jws. This package will contain 2 classes. A Calculator Interface, and CalculatorService which implements the Calculator interface. Lets go step by step with creating the package, interface class and implementation class.

  1. Right click on Java Resources: src and select New->Package.


  2. Name the package as org.apache.geronimo.samples.jws. Select Finish.


  3. Right click on the new package and Select New->Interface.


  4. Name the interface as Calculator. Select Finish.


  5. Add the following code to the Calculator interface class Calculator.classsolid package org.apache.geronimo.samples.jws; import javax.jws.WebService; import javax.jws.WebMethod; import javax.jws.WebParam; @WebService(name="CalculatorPortType", targetNamespace = "http://jws.samples.geronimo.apache.org") public interface Calculator { @WebMethod public int add(@WebParam(name = "value1") int value1, @WebParam(name = "value2") int value2); }
  1. Right click on the package org.apache.geronimo.samples.jws and select
    New->Class.
  2. Name the class CalculatorService
  3. Accept all the defaults and Select Finish.


  4. Add the following code to CalculatorService.class CalculatorService.classsolid package org.apache.geronimo.samples.jws; import javax.annotation.Resource; import javax.jws.WebService; import javax.xml.ws.WebServiceContext; @WebService(serviceName = "Calculator", portName="CalculatorPort", endpointInterface = "org.apache.geronimo.samples.jws.Calculator", targetNamespace = "http://jws.samples.geronimo.apache.org" ) public class CalculatorService implements Calculator { @Resource private WebServiceContext context; public int add(int value1, int value2) { System.out.println("User Principal: " + context.getUserPrincipal()); return value1 + value2; } }

Let us try to understand each annotation

  • @WebService- This annotation can be used with a Java class as well as with interface. In our case we used it with both interface as well as the POJO. This annotation declares the POJO as a WebService. @WebService annotation is utilized in generating the WSDL file.
    • serviceName is same as the WSDL element service
    • name is same as the WSDL element <portType name>
    • endpointInterface suggests the user defined name for the Service Endpoint Interface(SEI).
    • portName is the element portName
    • targetNamespace is the XML namespace of the WSDL and some of the XML elements generated from the WebService
  • @WebMethod- This annotation is applied to a method to expose it as a WebService method. In case you have multiple methods you can use this annotation to selectively expose methods as WebService method. If you donot use this annotation all the public methods will be exposed as WebService.
  • @WebParam- This annotation is used along with @WebMethod annotation to define the WebService. It is used to customize parameter used in the message part of the wsdl.

This completes the development of the Web Service Implementation code.

Generating the wsdl for the web service

Geronimo provides a new jaxws-tools.bat which helps in generating the WSDL file from service endpoint interface.

  • Export the source files to a jar as shown in the figure.


  • Open a command prompt and point it to the bin directory of server installation.
    1. Run gsh. This will start the Gshell.
    2. Run the command WSDL Generation commandsolid Administrator@T60J9:/> jaxws/wsgen -classpath C:/WSDL/source.jar -d C:/WSDL/ -wsdl:soap1.1 org.apache.geronimo.samples.jws.CalculatorService In this command -classpath is used to set source.jar(exported from eclipse) in the classpath, -d defines the location where all the generated artifacts will be placed, -wsdl:soap1.1 suggests a wsdl generation following soap1.1 protocol, org.apache.geronimo.samples.jws.CalculatorService is the SEI used to generate the WSDL.
    3. Once the above command is run Calculator_schema1.xsd and Calculator.wsdl will be generated at C:/wsdl.
    4. Rename Calculator.wsdl as CalculatorService.wsdl and add both the generated files above to WEB-INF directory of the project. Why are we using gsh if we already have a jaxws-tools.bat

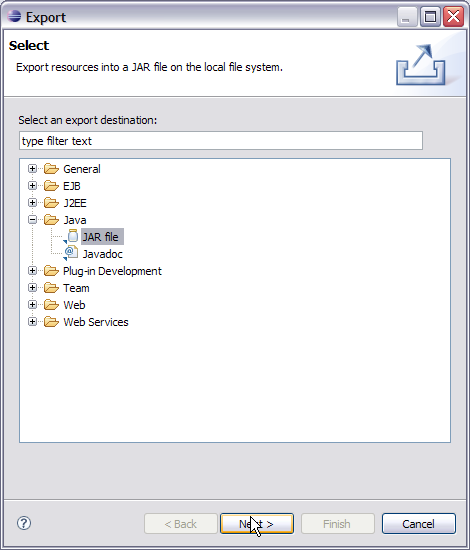
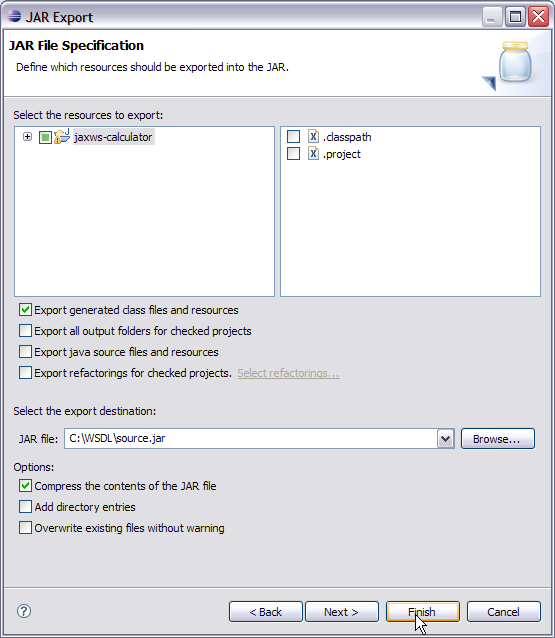
      This is because there are some issues involved with jaxws-tools.bat in AG 2.1 so we are using a gshell to call the web services generator.

      To learn more about GShell refer Gshell section in user guide. To know about more options associated with jaxws. Run jaxws/wsgen -help or jaxws/wsimport -help from gshell.

Developing a web client for Calculator

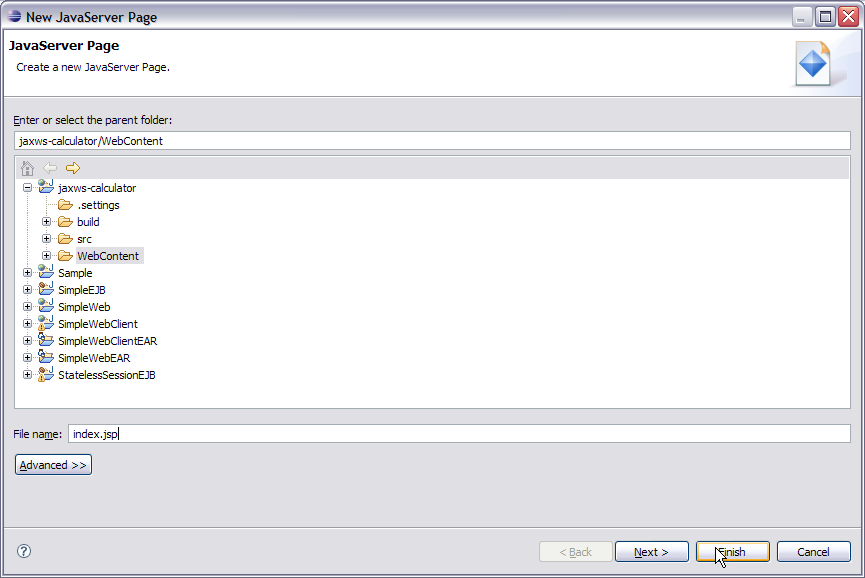
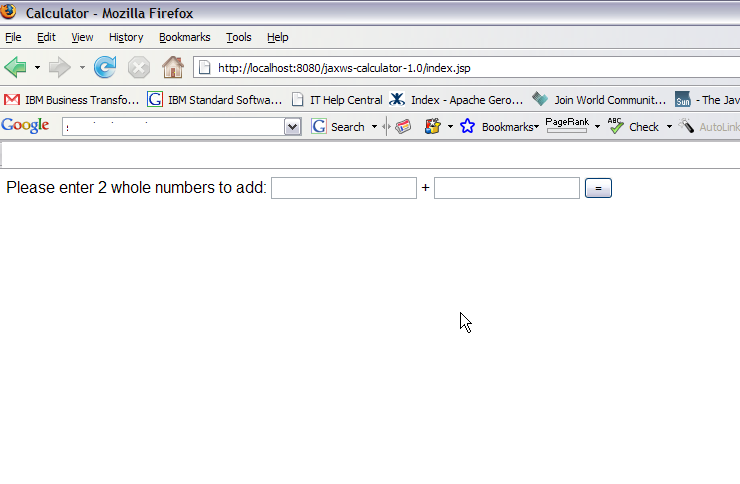
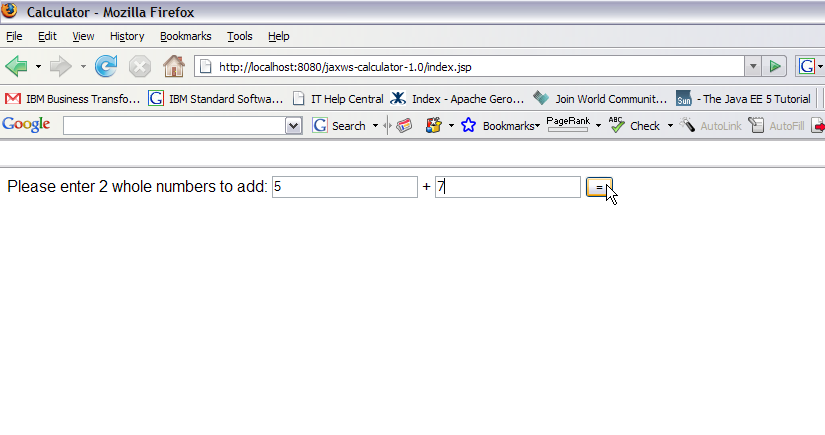
This section will take you through the creation of two jsp's index.jsp and result.jsp.index.jsp will prompt the
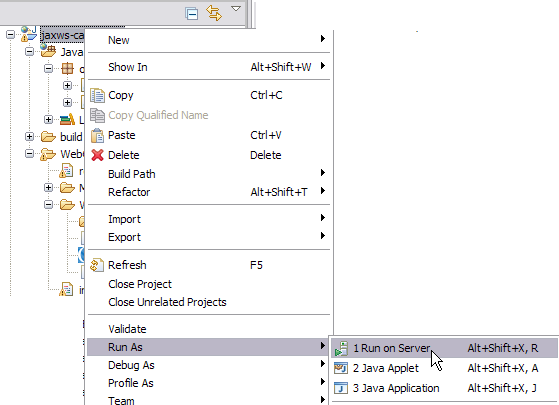
user to enter two whole number values to add together. After submitting the form, the action will be forwarded to result.jsp. Result.jsp will call the Calculator add Web Service.

  1. Right Click on the Web Content folder and Select New->JSP.
  2. Name the jsp as index.jsp and Select Finish.


  3. Add the following code to index.jsp index.jspsolid <%@ page import="java.net.URL,javax.xml.namespace.QName,javax.xml.ws.Service,org .apache.geronimo.samples.jws.Calculator"%> <html xmlns="http://www.w3.org/1999/xhtml" xml:lang="en"> <head> <title>Calculator</title> </head> <body> <form action="result.jsp"> Please enter 2 whole numbers to add: <input type="text" name="value1"> + <input type="text" name="value2"> <input type="submit" value="="> </form> </body> </html>
  4. Right Click on the Web Content folder and Select New->JSP.
  5. Name the jsp as result.jsp and Select Finish.
  6. Add the following code to jsp. result.jspsolid <%@ page import="java.net.URL,javax.xml.namespace.QName,javax.xml.ws.Service,org .apache.geronimo.samples.jws.Calculator"%> <html xmlns="http://www.w3.org/1999/xhtml" xml:lang="en"> <head> <title>Calculator Result</title> </head> <% int value1 = 0; int value2 = 0; int sum = 0; try { System.out.println( request.getParameter( "value1" ) + " " + request.getParameter( "value2" ) ); value1 = Integer.parseInt( request.getParameter( "value1" ) ); value2 = Integer.parseInt( request.getParameter( "value2" ) ); URL url = new URL("http://localhost:8080/jaxws-calculator- 1.0/calculator?wsdl"); QName qname = new QName("http://jws.samples.geronimo.apache.org", "Calculator"); Service service = Service.create(url, qname); Calculator calc = (Calculator)service.getPort(Calculator.class); sum = calc.add(value1, value2); } catch ( Exception e ) { e.printStackTrace(); } %> <body> The result is: <%=value1%>+<%=value2%>=<%=sum%> <br> <a href="index.jsp">Back</a> </body> </html> This finishes the development of Web client.

Setting up the Deployment Descriptor and Deployment Plan

  1. Expand WEB-INF/web.xml and add the following code web.xmlsolid <?xml version="1.0" encoding="UTF-8"?> <web-app xmlns:calc="urn:geronimo-samples-jws" xmlns="http://java.sun.com/xml/ns/javaee" version="2.5"> <servlet> <display-name>CalculatorService</display-name> <servlet-name>CalculatorService</servlet-name> <servlet-class> org.apache.geronimo.samples.jws.CalculatorService </servlet-class> </servlet> <servlet-mapping> <servlet-name>CalculatorService</servlet-name> <url-pattern>/calculator</url-pattern> </servlet-mapping> <service-ref> <service-ref-name>services/Calculator</service-ref-name> <service-interface>javax.xml.ws.Service</service-interface> <wsdl-file>WEB-INF/CalculatorService.wsdl</wsdl-file> </service-ref> </web-app>
  2. Similarly double click geronimo-web.xml and add the following code. geronimo-web.xmlsolid <?xml version="1.0" encoding="UTF-8"?> <web-app xmlns="http://geronimo.apache.org/xml/ns/j2ee/web-1.1"> <dep:environment xmlns:dep="http://geronimo.apache.org/xml/ns/deployment-1.1"> <dep:moduleId> <dep:groupId>org.apache.geronimo.samples.jws</dep:groupId> <dep:artifactId>Calculator</dep:artifactId> <dep:version>1.0</dep:version> <dep:type>car</dep:type> </dep:moduleId> <dep:dependencies> </dep:dependencies> </dep:environment> <context-root>/jaxws-calculator-1.0</context-root> <service-ref> <service-ref-name>services/Calculator</service-ref-name> <port> <port-name>CalculatorPort</port-name> <protocol>http</protocol> <host>localhost</host> <port>8080</port> <uri>/jaxws-calculator/calculator</uri> </port> </service-ref> </web-app>

Deploy and Run

  1. Right click on jaxws-calculator project. Select Run As->Run On Server.


  2. On the next window select Apache Geronimo V2.1 and Select Finish.


  3. Once the application is deployed on the server. Launch a browser and run the following URL http://localhost:8080/jaxws-calculator-1.0/index.jsp.


  4. Give the values as 5,7. Select =.


  5. The result is 12 as shown in the figure