HomeDocumentation > Developer's guide > Tutorials > JavaServer Faces > Developing a Simple JavaServer Faces application
{scrollbar}

This application will make you understand how Model(M), View(V), Controller(C) architecture is implemented in JavaServer Faces. This application will make use of UI components, Validator, Navigation and Bean component available with JSF.

Briefly describing the application, this application will take a user First Name and Last Name. Later these fields will be validated by JSF and using the controller bean and Navigation rule the output will be displayed. This application will also introduce a UI component which is a submit button.

To run this tutorial, as a minimum you will be required to have installed the following prerequisite software.

  • Sun JDK 5.0+ (J2SE 1.5)
  • Eclipse 3.3.1.1 (Eclipse Classic package of Europa distribution), which is platform specific
  • Web Tools Platform (WTP) 2.0.1
  • Data Tools Platform (DTP) 1.5.1
  • Eclipse Modeling Framework (EMF) 2.3.1
  • Graphical Editing Framework (GEF) 3.3.1

Details on installing eclipse are provided in the Development environment section. This tutorial is organized in the following sections:

The application development will take you through the following

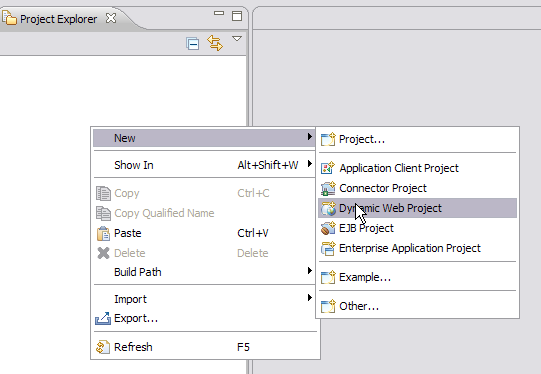
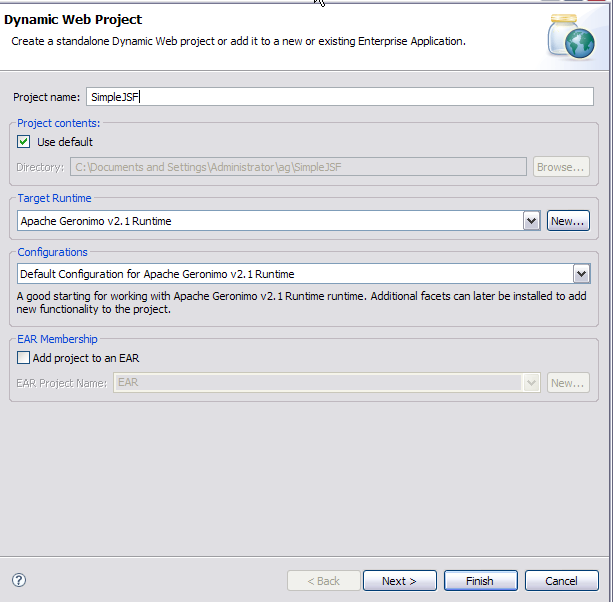
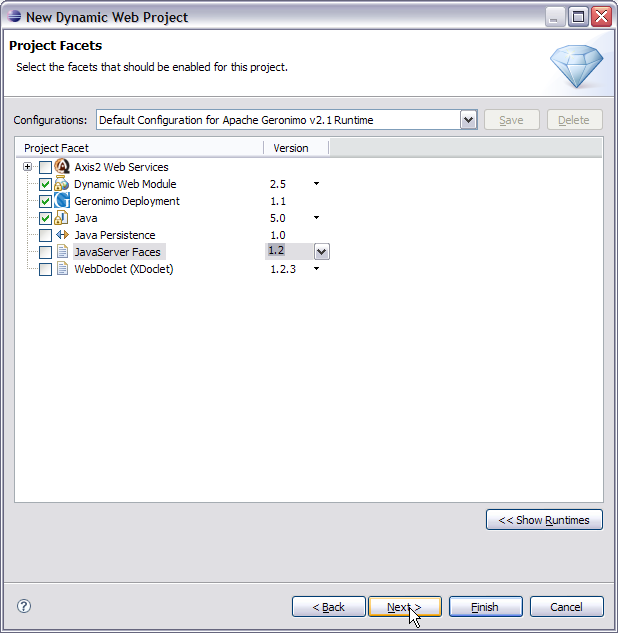
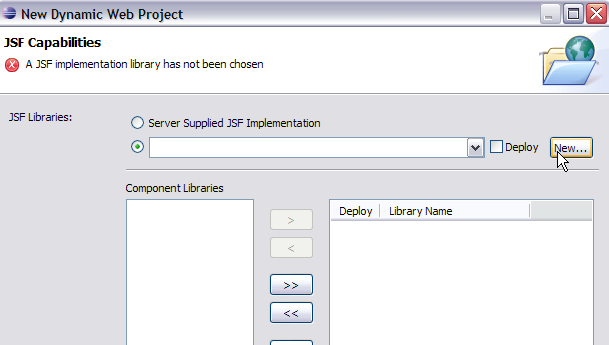
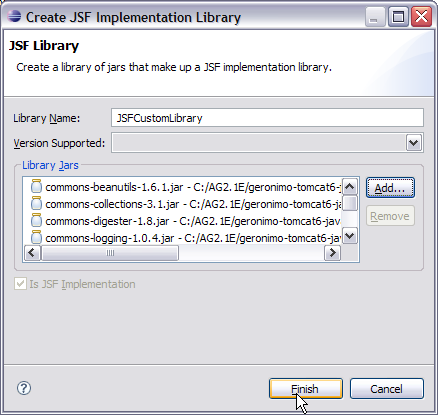
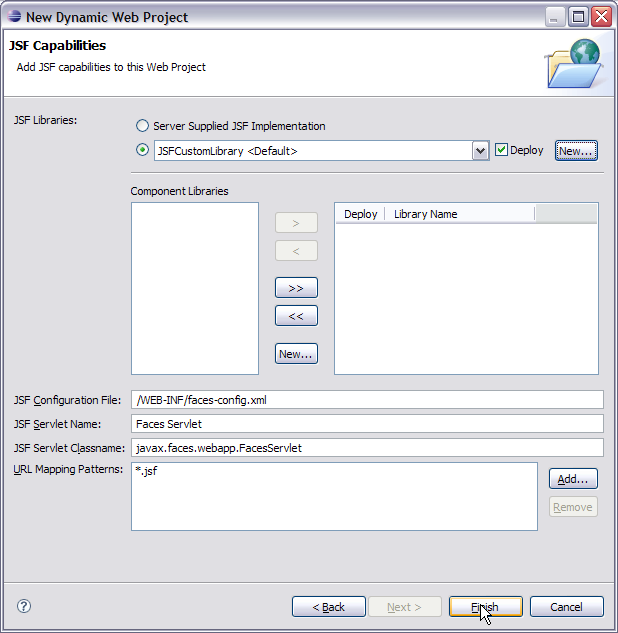
Once you have all the pre-requisites installed follow the following steps to create a project with Eclipse

Setting Eclipse for Application development

  1. Launch Eclipse and Create a dynamic web project as shown in the figure


  2. Give the fields for the Web Project as shown in the following figure


  3. Check the box for JavaServerFaces and under the version tab select 1.2 as the version


  4. Once done you can give default values for web module and Geronimo Deployment Plan. On the JSF capabilities window check the box and select new as shown in the figure


  5. The next window suggests to create JSF Implementation library. Give the library name as JSFCustomLibrary and add the following jars. Select Finish once done. See the figure below
    • <GERONIMO_HOME>\repository\commons-beanutils\commons-beanutils\1.6.1\commons-beanutils-1.6.1.jar
    • <GERONIMO_HOME>\repository\commons-collections\commons-collections\3.1\commons-collections-3.1.jar
    • <GERONIMO_HOME>\repository\commons-digester\commons-digester\1.8\commons-digester-1.8.jar
    • <GERONIMO_HOME>\repository\commons-logging\commons-logging\1.0.4\commons-logging-1.0.4.jar
    • <GERONIMO_HOME>\repository\org\apache\myfaces\core\myfaces-api\1.2.2\myfaces-api-1.2.2.jar
    • <GERONIMO_HOME>\repository\org\apache\myfaces\core\myfaces-impl\1.2.2\myfaces-impl-1.2.2.jar


  6. Check Deploy and modify the URL pattern to *.jsf as shown in the figure. Select Finish.


    This finishes the setting up of Eclipse IDE for application development

Define and Implement the application Model(M)

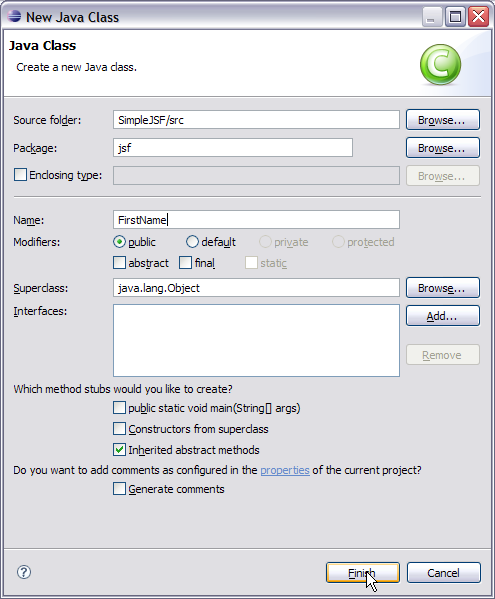
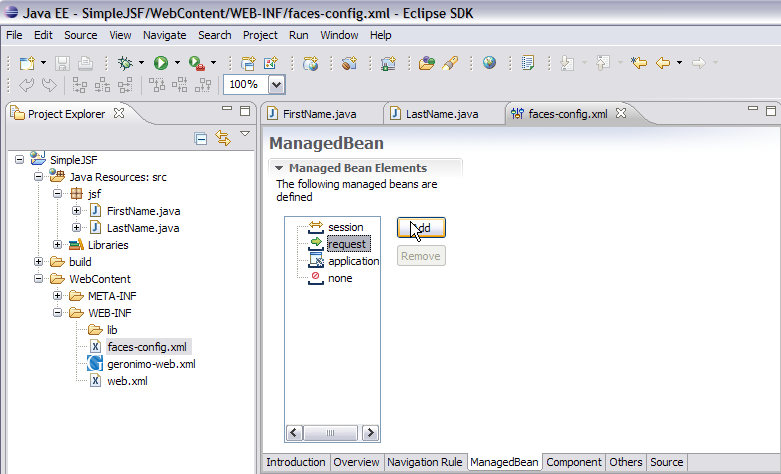
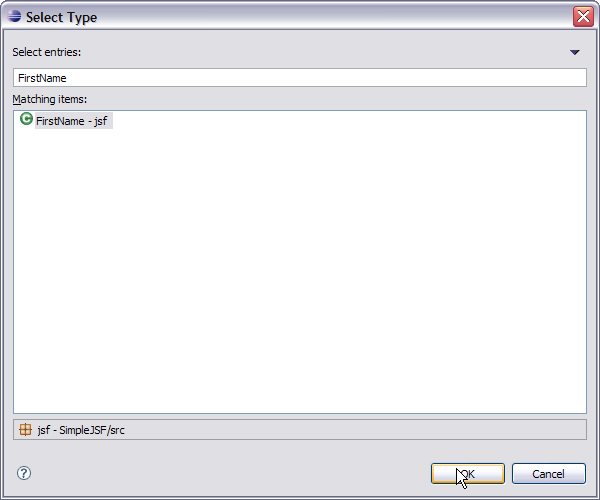
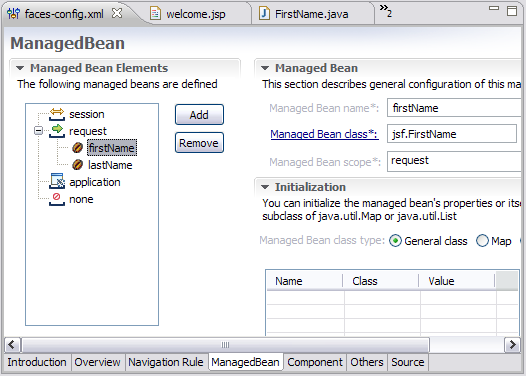
Model as suggested by MVC architecture handles data and logic of the application. In an enterprise application. Java Beans are used to represent collection of data and operation on that data. In JSF we use Java Beans to define the Model.

  1. Under the project explorer right click on the SimpleJSF project and create a new class


  2. Fill the New Java Class form with jsf as the package name and FirstName as the bean class name. Select Finish once done


  3. Add the following code to the FirstName bean class


    JAVAsolidFirstName.java package jsf; public class FirstName { String username; public String getName() { return username; } public void setName(String name) { username = name; } }
  4. Create a second Bean class LastName and add the following code to the class JAVAsolidLastName.java package jsf; public class LastName { String lastname; public String getLName() { return lastname; } public void setLName(String lname) { lastname = lname; } } This completes the Model definition and implementation of bean class.

Define and implement Model(M) objects to Controller

  1. In an JSF application controller is implemented by a configuration file WebContent/WEB-INF/faces-config.xml. Double Click on the file. This will open a Faces Configuration Editor.


  2. Select the ManagedBean tab in the editor. Choose Managed Bean of scope request and select Add.


  3. Using the existing java class option, select Browse. Give the search element as FirstName and select ok.


  4. Select Finish on the next window. Similarly add the other bean LastName. Now select the Source tab in the Faces configuration Editor. It displays the bean components(Model) in the controller.


    This completes the description of Model to Controller.

Define and implement View(V) in application

  1. Right Click on WebContent and create a New Folder with the name pages


  2. Right Click on pages folder and create a jsp page login.jsp. Select Finish.


  3. Similarly create another jsp page welcome.jsp.
  4. Moving forward now we now have to include Tag Library Descriptors(TLD) in our application.
    Geronimo comes packaged with the TLD's required for application. The TLD's can be found in solidLocation of TLD <GERONIMO_HOME>\repository\org\apache\myfaces\core\myfaces-impl\1.2.2\myfaces-impl-1.2.2.jar\META-INF\myfaces-html.tld and <GERONIMO_HOME>\repository\org\apache\myfaces\core\myfaces-impl\1.2.2\myfaces-impl-1.2.2.jar\META-INF\myfaces_core.tld #To add these two TLD's in the application, In Eclipse Under project Explorer right click on WEB-INF. Create a folder tld. Copy myfaces-html.tld and myfaces_core.tld to this folder.
    #Next step is to populate login.jsp and welcome.jsp with data ActionScriptsolidlogin.jsp <%@ taglib uri="/WEB-INF/tld/myfaces-html.tld" prefix="h" %> <%@ taglib uri="/WEB-INF/tld/myfaces_core.tld" prefix="f" %> <html> <head> <meta http-equiv="Content-Type" content="text/html; charset=ISO-8859-1"> <title>Welcome to Apache Geronimo</title> </head> <body> <f:view> <h1><h:outputText value="Welcome to Apache Geronimo" /></h1> <h:form> <h:message for="firstName" style="color: red;" /> <h:message for="lastName" style="color: red;" /> <br> <h:outputText value="Enter your first name" /> <br> <h:inputText id="firstName" value="#{firstName.name}" required="true"> <f:validateLength minimum="4" maximum="10" /> </h:inputText> <br> <h:outputText value="Enter your last name" /> <br> <h:inputText id="lastName" value="#{lastName.LName}" required="true"> <f:validateLength minimum="3" maximum="10" /> </h:inputText> <br> <h:commandButton id="submit" action="validated" value="Enter" /> </h:form> </f:view> </body> </html> ActionScriptsolidwelcome.jsp <%@ taglib uri="/WEB-INF/tld/myfaces-html.tld" prefix="h"%> <%@ taglib uri="/WEB-INF/tld/myfaces_core.tld" prefix="f"%> <%@ page language="java" contentType="text/html; charset=ISO-8859-1" pageEncoding="ISO-8859-1"%> <!DOCTYPE html PUBLIC "-//W3C//DTD HTML 4.01 Transitional//EN" "http://www.w3.org/TR/html4/loose.dtd"> <html> <head> <meta http-equiv="Content-Type" content="text/html; charset=ISO-8859-1"> <title>Welcome</title> </head> <body> <f:view> <h3><h:outputText value="You have successfully Logged in" /> <h:outputText value="#{firstName.name} " /> <h:outputText value="#{lastName.LName}" /> <h:outputText value="!" /></h3> </f:view> </body> </html> Lets now try to understand what each line of code represents.
  5. The first two lines in login.jsp defines two tag libraries ActionScriptsolidCode Snippet from login.jsp <%@ taglib uri="/WEB-INF/tld/myfaces-html.tld" prefix="h" %> and <%@ taglib uri="/WEB-INF/tld/myfaces_core.tld" prefix="f" %> These two sets of tags are defined by JSF. First one with the namespace "h" is used to generate html views. Second one with the namespace "f" handles the core functionalities of JSF like type conversions, validations and listeners for input from user.
  6. The next few lines contains the usual html tags ActionScriptsolidCode Snippet from login.jsp <html> <head> <meta http-equiv="Content-Type" content="text/html; charset=ISO-8859-1"> <title>Welcome to Apache Geronimo</title> </head> <body>
  7. <f:view>- This tag represents the start of JSF code.
  8. ActionScriptsolidCode Snippet from login.jsp <h:inputText id="firstName" value="#{firstName.name}" required="true"> Represents the input tag. id="firstName" and value="firstName.name"
    comes from the Managed Bean. Use the Faces Configuration Editor, Select firstName bean under Managed Bean tab. The Managed Bean Name is firstName. See the figure below


    This completes the implementation of View(V) in the application.
    The other tags <f:validateLength> and <h:commandButton> will be explained in the next section.

Define the Validator Component

The <f:validateLength minimum="4" maximum="10"/> defines the input text length to be minimum of 4 characters and maximum of 10 characters. This is the standard validation provided by core tag libraries. Other examples of validators are Validate Long Range Tag, Validate Double Range Tag etc. JSF also provides a Validator interface which can be implemented to create custom validators.

The code <h:message for="" style="color: red;"/> defines the error message. When the user inputs the controller Validates each of the inputs. If the inputs are invalid Controller displays the same page again with an error message for the errors. The color:red suggests that the error message will be displayed in red color.

Define and implement the View navigation by Controller(C)

This step suggests the JSP page navigation in the order of user inputs and validation by controller. If all the inputs are valid than the controller performs the action as suggested by the HTML form. This action is submitted by the HTML for as a command button.
The code in the input.jsp <h:commandButton id="submit" action="validated" value="Enter" /> suggests that if all the inputs are valid. This is the button which submits the form to controller if all inputs are valid.
In this case the commandButton tells the controller to execute the validated action if all the inputs are valid.
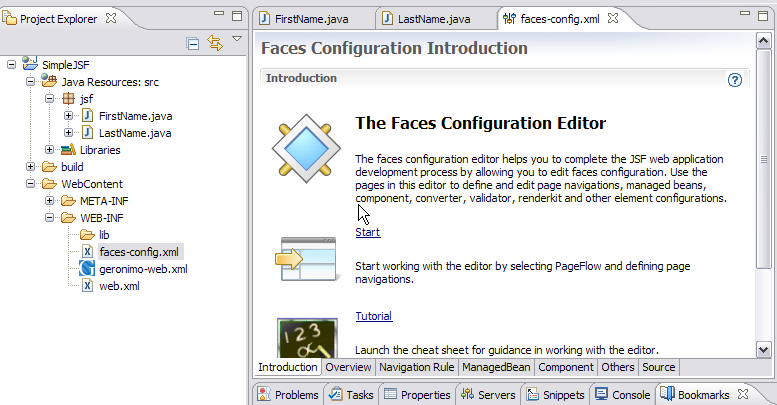
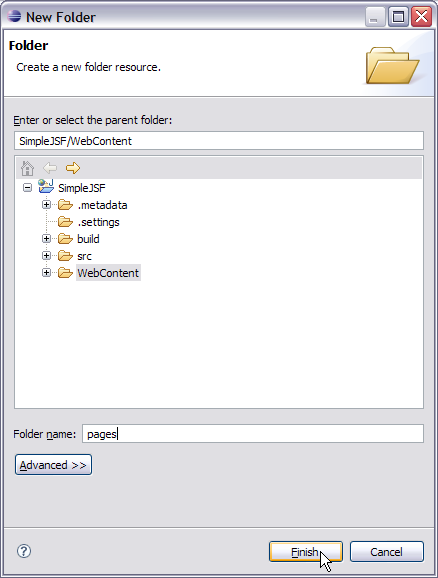
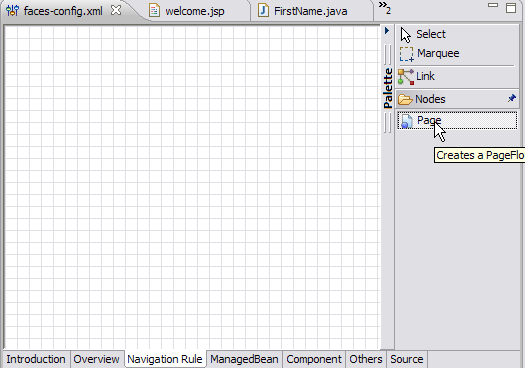
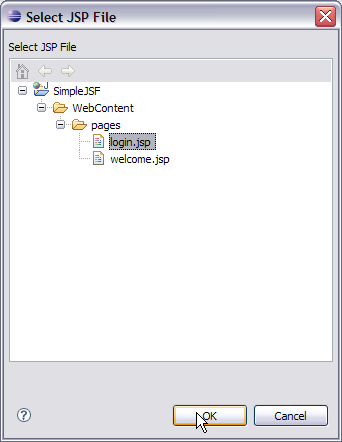
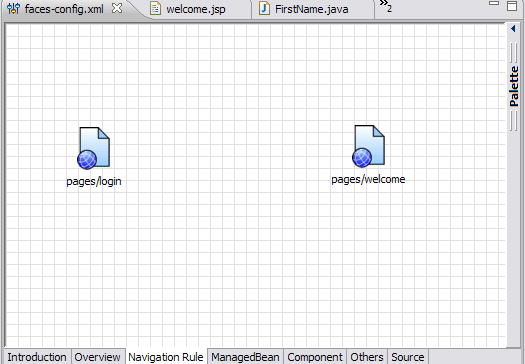
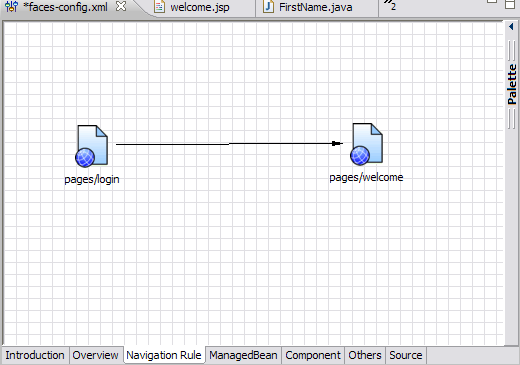
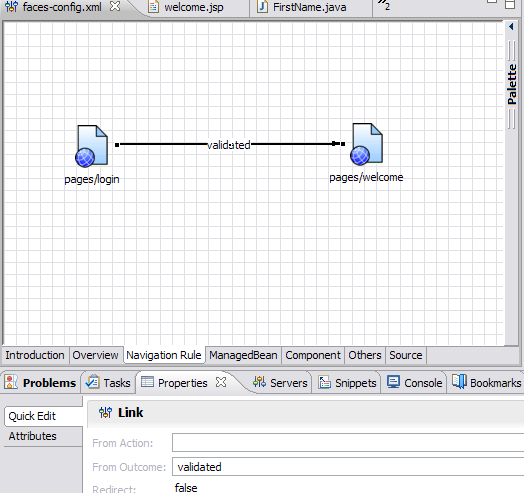
The pages navigation in a JSF is defined by faces-config.xml. Follow the underlined steps to define the pages navigation.

  1. Launch the Faces Configuration Editor by double clicking on faces-config.xml
  2. Select the Navigation tab in the Configuration Editor. Under the Palette window select Page. This will select a GUI object, page.


  3. Drag the mouse over the Navigation Rule Window and click on the window. This will give a Select JSP file window. Select login.jsp as shown in the figure and select OK.


  4. Similarly add the welcome.jsp page on the Navigation Rule window. See the figure below


  5. Select Link from the Palette window and join the two pages as shown in the figure


  6. Select the link and between the two pages and go to properties view and set the value for From Outcome field as validated. This is because of the tag <h:commandButton id="submit" action="validated" value="Enter" />. Once all the input are valid the action taken is validated. See the figure


  7. Once done have a look the source tab in the Faces Navigation Editor. A <navigation-rule> tag has been introduced into the faces-config.xml.  This rule suggests the Controller that if you all the inputs are valid from a form in the /pages/login.jsp, and the action is 'validated', then go to page /pages/welcome.jsp.


    Now lets add a index.jsp under WEB-INF as follows ActionScriptsolidindex.jsp <%@ page language="java" contentType="text/html; charset=ISO-8859-1"pageEncoding="ISO-8859-1"%> <\!DOCTYPE html PUBLIC "-//W3C//DTD HTML 4.01 Transitional//EN" "http://www.w3.org/TR/html4/loose.dtd"> <html> <body> <jsp:forward page="/pages/login.jsf" /> </body> </html> Now what is this login.jsf in the forward path. If you look at the web.xml *.jsf is used as the URL pattern to suggest that forwarded page be taken care by Java Server Faces Servlet.
    This completes the Application Development process. Next step is to deploy and test the application.

Deploy and Test the application

Right Click on the project SimpleJSF and Select Run As-> Run On Server. This will deploy the sample on Apache Geronimo Server and a Login page will be launched.


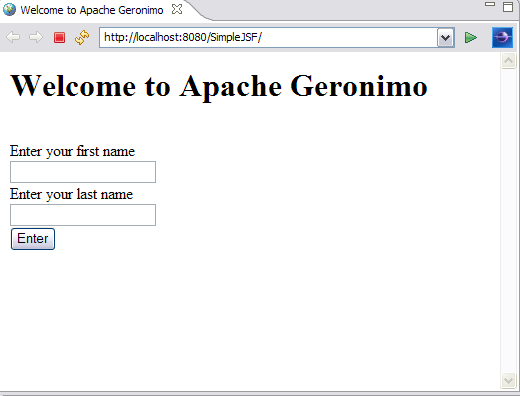
Lets give some sample inputs
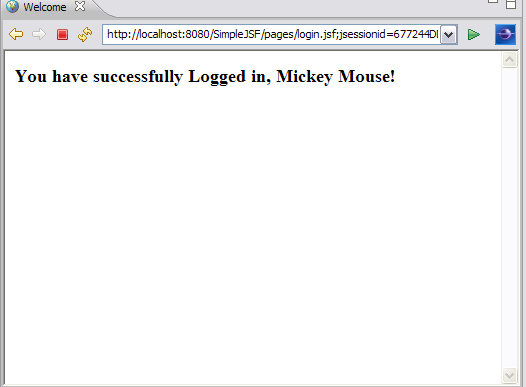
Sample Input1:
First Name: Mickey
Last Name: Mouse
Both the First Name as well as Last Name fulfills the validation rules, so this form will be submitted to controller and according to the navigation rule controller will launch a welcome.jsp page.
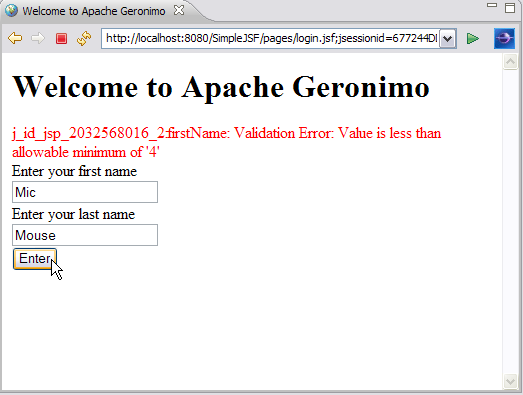


Sample Input2:
First Name: Mic
Last Name: Mouse
First Name should be minimum of length=4 but in this case First Name is of length=3. In this case validation will fail and an error message will be generated by controller for First Name field.
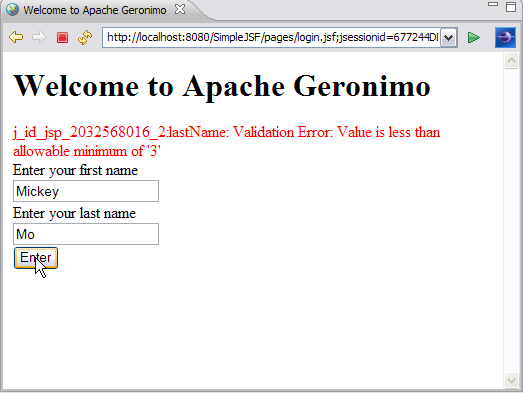


Sample Input3:
First Name: Mickey
Last Name: Mo
Last Name should be minimum of length=3 but in this case Last Name is of length=2. In this case validation will fail and an error message will be generated by controller for Last Name field.