|
|
| Home > Documentation > Developer's guide > Tutorials > Persistence > Working with JSF and JPA |
The Java Persistence API is a new programming model under EJB3.0 specification (JSR220) for the management of persistence and object/relational mapping with Java EE and Java SE. With JPA, developers can easily develop java applications that perform operations on relational databases using java objects and mapping. In that way, java applications developed using JPA are not only portable across different platforms, but also applications can be easily developed using simple yet powerful programming model provided by JPA. This greatly improves application maintainability against ever changing database world. JPA insulates applications from all the complexity and non-portable boilerplate code involved in database connectivity and operations.
Apache geronimo uses OpenJPA for providing Java Persistence API to Java EE applications deployed in the server. Even though JPA is a part of EJB3.0 spec, it is independent of it. Hence, JPA can be used in JavaSE, web and ejb applications in the same uniform way.
Below tutorial explains developing a JSF (JavaServerFaces) application using JPA for persistence. The application has an ejb application and a web application. The ejb application uses JPA to manipulate entities in the database. The web application uses JSF to look up ejbs that trigger operations on the entities. The database being used is the embedded derby database shipped with geronimo. The web application displays a list of currencies of various countries along with the corresponding USD conversion rate. The web interface allows user to add a new currency, edit the existing currency and delete a currency etc.
The application can be downloaded from this link.
In order to develop, deploy and run the application, the following environment is required.
The tutorial covers following topics.
1. Download the geronimo v2.1 and install it in your system. Look into the geronimo documentation for
instructions to install the server.
2 Install the eclipse IDE and download geronimo eclipse plugin and install it on top of eclipse. Look into the
geronimo eclipse plugin documentation for instructions.
3. Create a runtime environment for geronimo v2.1 in the eclipse. Look into the geronimo eclipse plugin
documentation for instructions to install a runtime environment for geronimo.
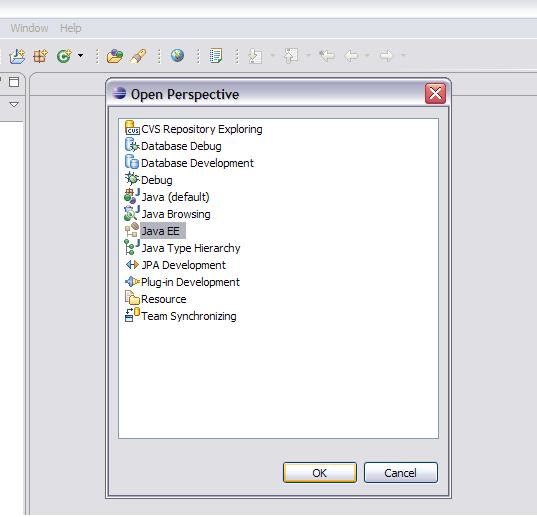
1. Open the eclipse IDE and change the perspective to Java EE by clicking on Windows => Open Perspective => Other. It will open up Open Perspective wizard as shown in the screen shot below. Select Java EE from the list and click OK button.
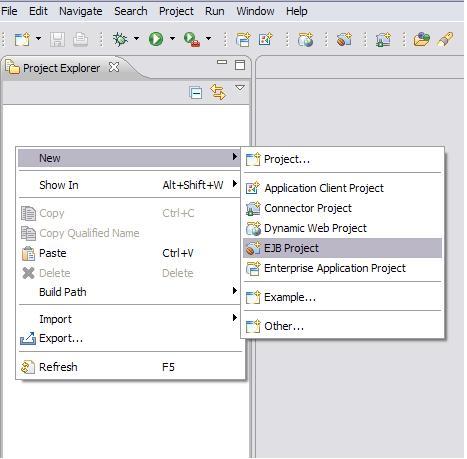
2. Right click on the Package Explorer and select EJB Project.
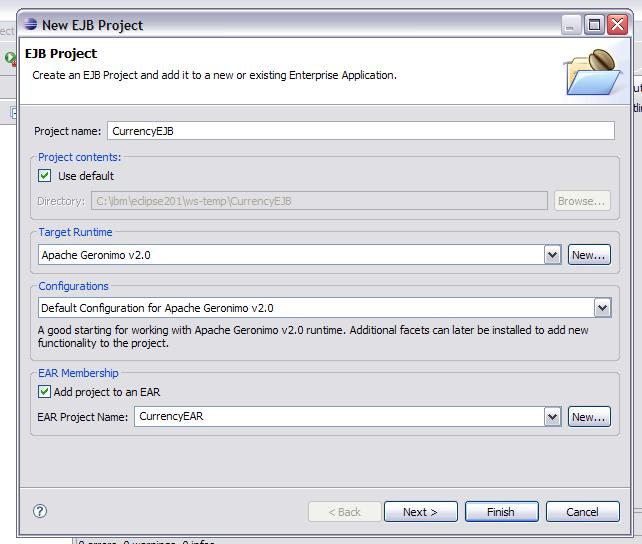
3. This will open up the New EJB Project wizard. Provide the values for Project Name, Target Runtime as shown in the below screen shot.
If target runtime is not setup, create a new target runtime pointing to geronimo installation directory. For more information, look at the geronimo documentation that explains setting up eclipse plugin for geronimo and setting up runtime environment. This setup is required to resolve class dependencies during compilation.
Click on the Next button.
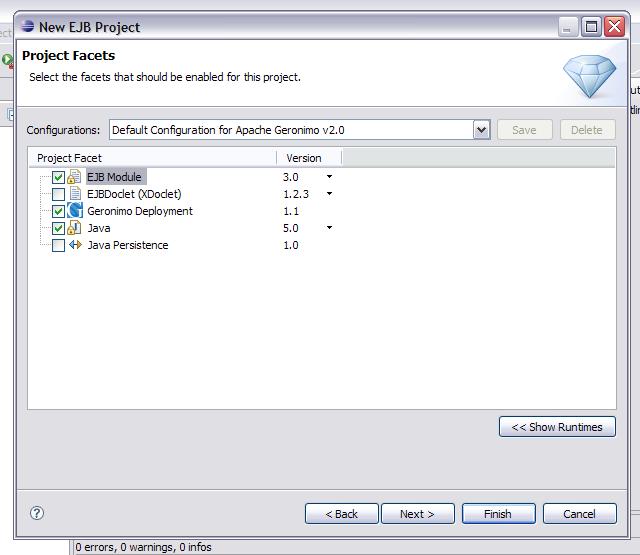
4. Select the checkboxes as given in the below screen shot and click on the Next button.
5. Select the checkboxes as given in the below screen shot and click on the Next button.

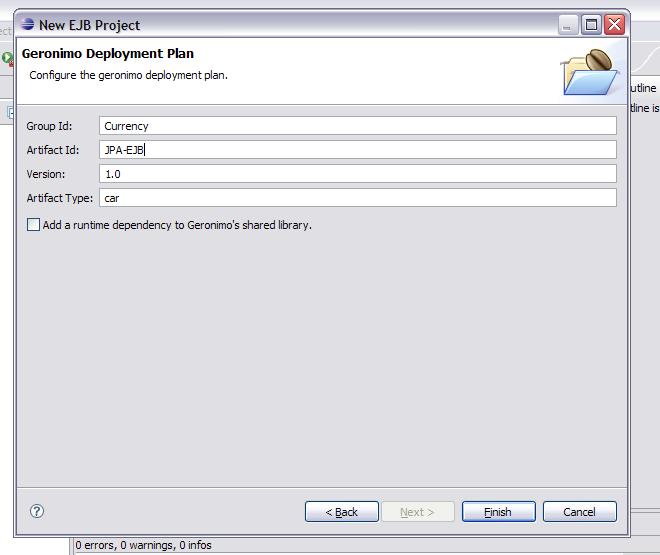
6. Provide the following values in the textboxes as shown in the below screen shot and click on the Finish button.
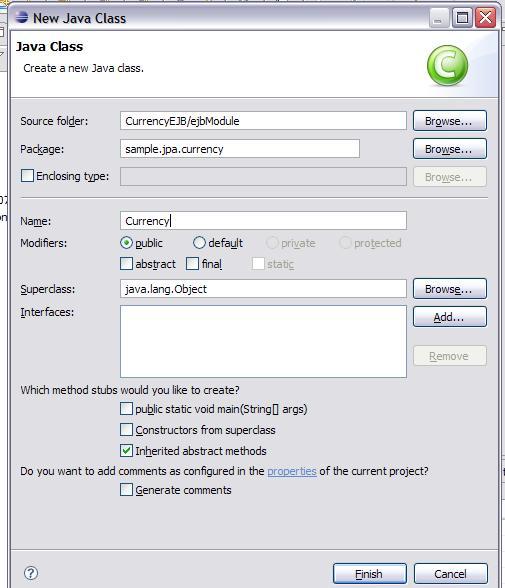
7. Right click on the CurrencyEJB project and navigate to New => Class option. Provide the following values in the New Java Class wizard and click on Finish button.
8. Copy the following contents into Currency.java. The Currency.java uses various JPA annotations to mark the class as an entity and designates database table to persist the attribute values.
9. Similarly, create the interface CurrencyInterface.java and copy the following contents. This is the
stateless session bean interface.
10. Similarly, create CurrencyBean.java and copy the following contents. This class is the bean class that implements CurrencyInterface.java interface.
@PersistenceContext(unitName="CurrencyRateUnit") annotation is used to inject the EntityManager object by container. In this case, the EntityManager object injected is Container Managed EntityManager object. The transaction type is JTA and the persistence scope is Transaction.
Since we have not declared any transactional attributes in the CurrencyBean, the default is Container Managed Transaction with transaction attribute being REQUIRED for the bean methods. So, the EntityManager object will join the EJB transaction whenever a method is called on the bean.
11. As outlined above, right click on the META-INF directory of CurrencyEJB project and create persistence.xml. Copy the following contents into persistence.xml.
12. Since we are going to use EJB annotations, the META-INF/ejb-jar.xml will not have any declarations. The contents of the META-INF/openejb-jar.xml file should be as below. Otherwise, modify it accordingly.
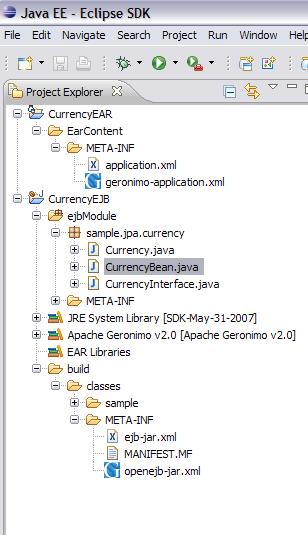
13. Finally the project CurrencyEJB should like as below.
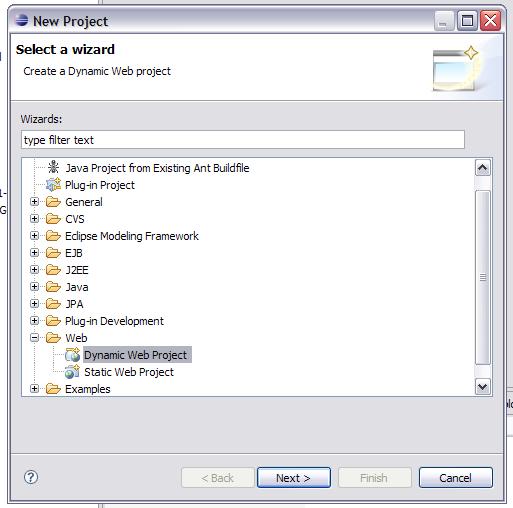
1. Right click on the Project Explorer and select New => Project. This will open New Project wizard as below. Select Dynamic Web Project under option Web. Click on the Next button.
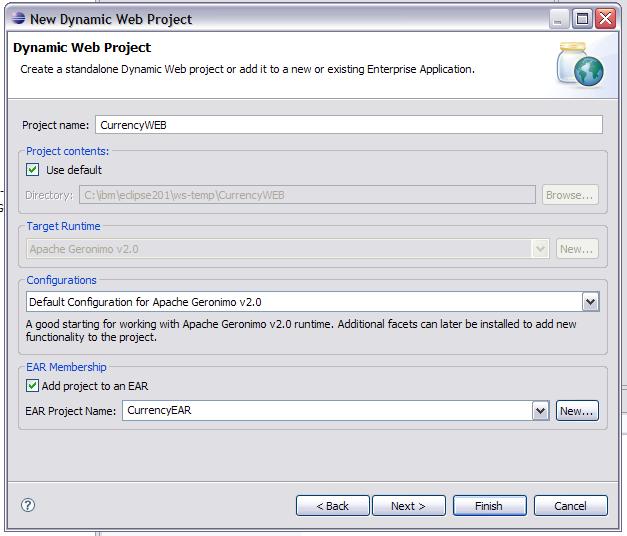
2. Provide the values as given in the below screen shot on the New Dynamic Web Project wizard. Please note that Add project to an EAR checkbox is check to add this web project to CurrencyEAR created earlier.
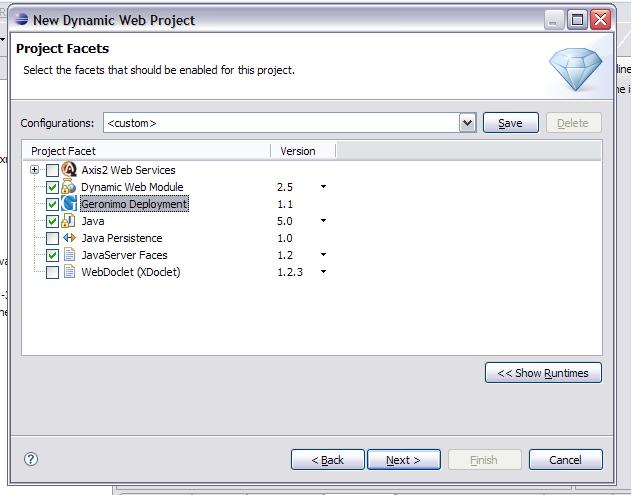
3. In the next screen, select the Version values as given in the below screen shot and click on the Next button. Please note that the Java Server Faces check box is checked and the version values should be 1.2.
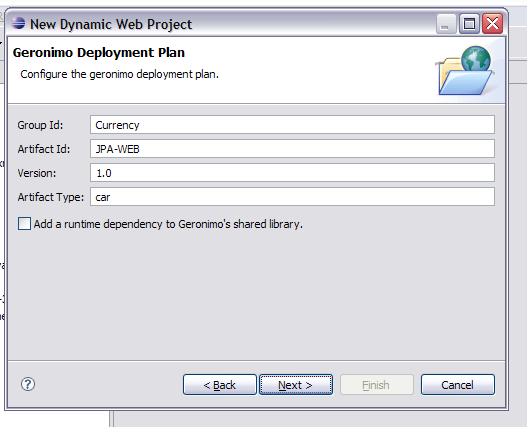
4. Check on the Generate Deployment Descriptor checkbox and click on the Next button. On the next screen, configure the deployment plan as follows. After this click on the Next button.
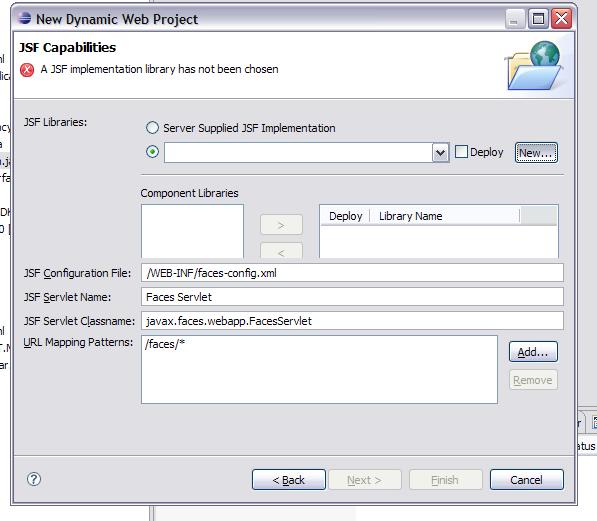
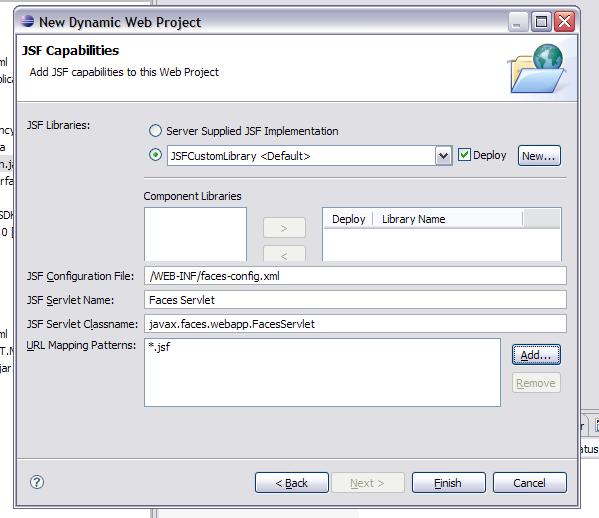
5. On the JSF Capabilities window, select the second radio button and click on the new button.
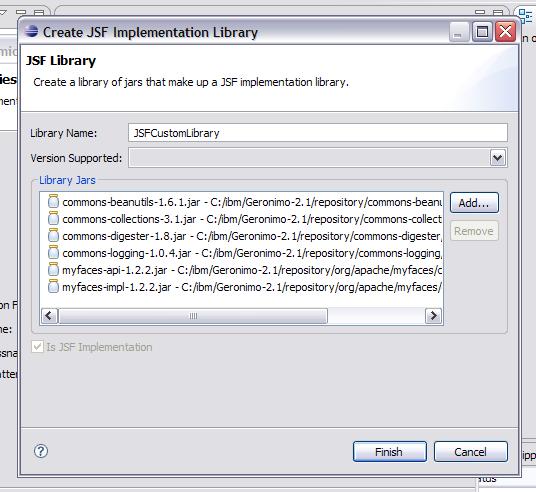
6. The next wizard Create JSF Implementation Library suggests to create JSF Implementation library. Give the library name as JSFCustomLibrary and add the following jars. Click on the Finish button once done. See the screen shot below.
7. On the JSF Capabilities window change the value of URL Mapping Patterns to *.jsf and click on the Finish button.
Right click on the WEB-INF folder and create a tld folder and copy the following files into it.
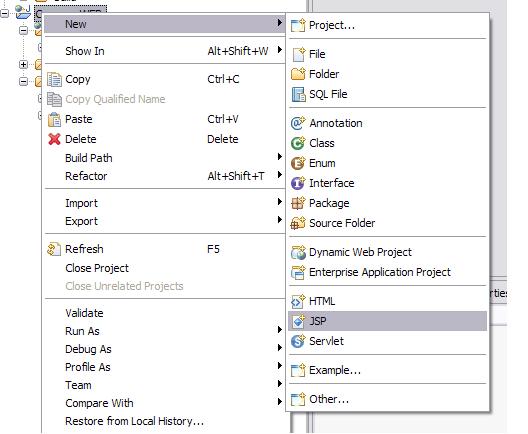
8. The above steps create a new web project with JSF capabilities. Now we can create the required JSPs, JSF managed beans and configure the navigation rules in the WEB_INF/faces-config.xml. Right click on the _CurrencyWEB => WebContent_and create the following JSPs as given in the below screen shot. The contents of the JSPs are also provided below.
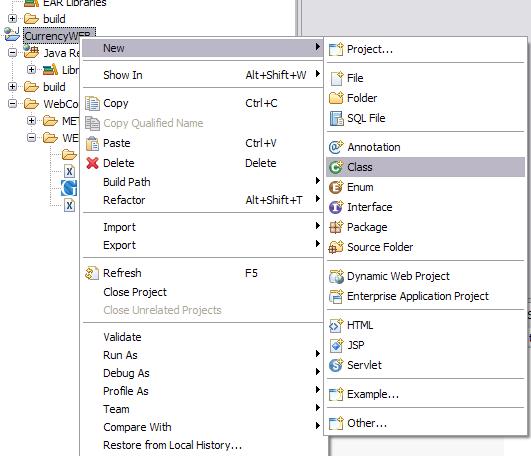
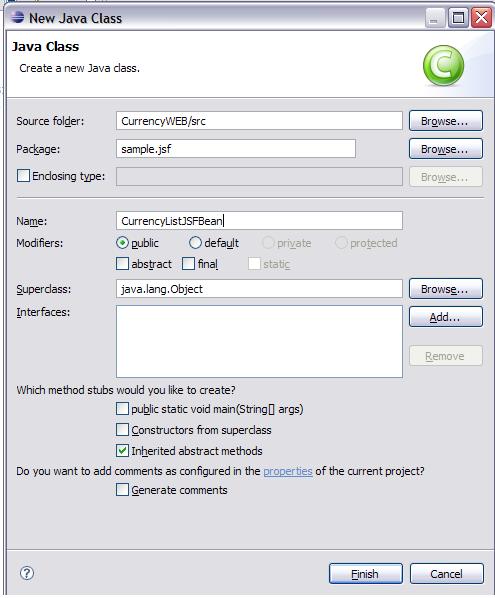
9. Create two JSF managed beans CurrencyJSFBean.java and CurrencyListJSFBean.java as follows. Right click on the CurrencyWEB and select CurrencyWEB => New => Class. See the below screen shot.
In the New Java Class wizard, provide the values as given in the screen shot and click on the Finish button.
Copy the below contents into CurrencyListJSFBean.java
Similarly, create CurrencyJSFBean.java in the same package and copy the following contents into it.
10. Open the WEB-INF/faces-config.xml and copy the below contents to it.
The faces-config.xml can also be configured using JSF wizards. In this case, we have copied the already prepared JSF configuration in to the faces-config.xml file.
11. The web.xml and the geronimo-web.xml files are as follows. In the web.xml the ejb reference ejb/CurrencyInterface is mapped to the CurrencyBean.
11. Right click on the CurrencyWEB project and click on Properties to open Properties for CurrencyWEB wizard. Click on the Java Build Path and Projects tab. Click on the Add button and add CurrencyEJB project. Finally, click on the OK button on Properties for CurrencyWEB wizard. This is required because, CurrencyWEB projects looks up CurrencyInterface ejb in the CurrencyEJB project. To resolve the dependency during compilation, the EJB project has to be added to the build path of the WEB project.
12. Finally export the CurrencyEAR file.
1. Start the geronimo server and open a command window. Deploy the EAR file as follows.
C:\Geronimo-2.1\bin>deploy.bat --user system --password manager deploy c:\temp\CurrencyEAR.ear
Using GERONIMO_BASE:   C:\Geronimo-2.1
Using GERONIMO_HOME:   C:\Geronimo-2.1
Using GERONIMO_TMPDIR: var\temp
Using JRE_HOME:        C:\SDK-May-31-2007\jre
    Deployed default/CurrencyEAR/1.0/car
      `-> CurrencyWEB.war @ /CurrencyWEB
      `-> CurrencyEJB.jar
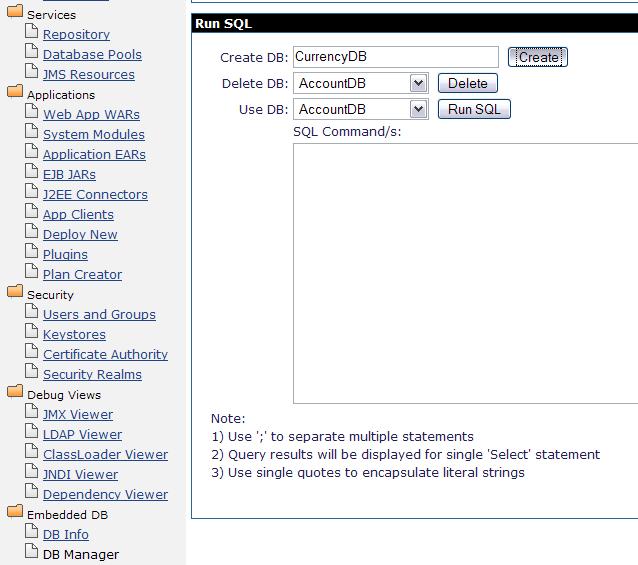
1. Open a browser window and hit the URL http://localhost:8080/console to open admin console. Click on Console Navigation => DB Manager. This will open up DB Viewer and Run SQL portlets on the right side. Enter CurrencyDB in the Create DB textbox and click on the Create button. This will create a database by name CurrencyDB.
2. On the Run SQL portlet, enter the below SQL command in the SQL Command/s textarea to create CURRENCYRATETABLE table. Select CurrencyDB in the Use DB combo box and click on the Run SQL button. Please see the screen shot below.
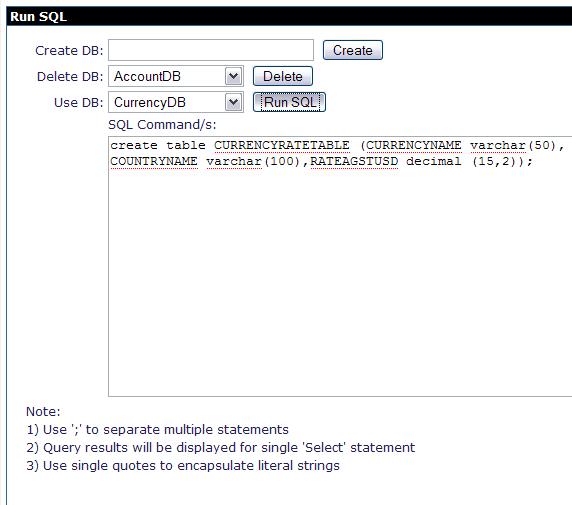
Enter some sample rows in the table to list the currencies later while running the application.
1. Open a browser window and hit the URL as http://localhost:8080/CurrencyWEB/
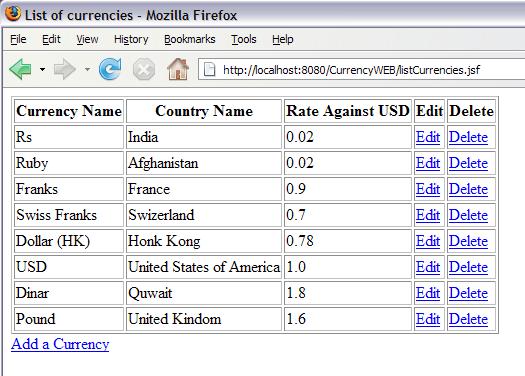
This page displays the list of currencies currently in the database. For each currency, the page displays Currency Name, Country Name and Rate Against USD values. It also provides link to Edit and Delete a particular currency.
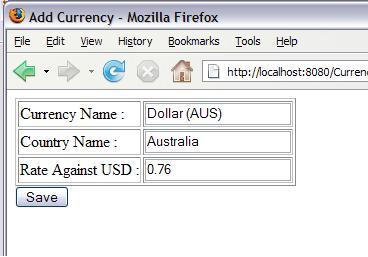
2. Click on the Add a Currency link at the bottom of the table. It will open up the following screen. Enter the values and click on the Save button. This will take back to the list of currencies with the new entry in the list.
Similarly, the Edit and Delete operations can also be performed.
|
|
Privacy Policy - Copyright © 2003-2011, The Apache Software Foundation, Licensed under ASL 2.0. |