HomeDocumentation > Configuring and administering > Configuring services > Configuring datasource > Import database pools from JBoss 4
{scrollbar}

INLINE

In this article, we will walk you through in importing existing JBoss 4 database pools.

For this particular example, we will use the hsqldb-ds.xml provided by the default JBoss server, that is <jboss_home>\server\default\deploy\hsqldb-ds.xml and Hypersonic database.

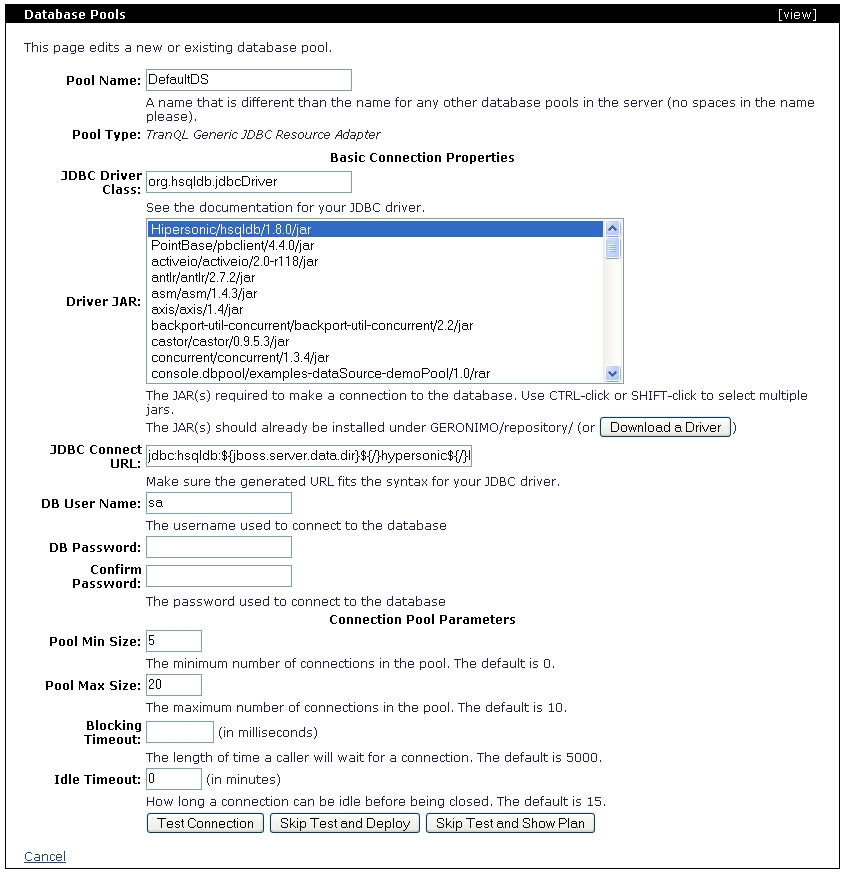
Before getting started, you must provide Geronimo with the driver jar for Hypersonic HSQL. You can install that driver into Geronimo's repository as described in the following steps.

  1. Locate the HSQL driver jar hsqldb.jar. This file is located in the <jboss_home>\server\default\lib directory. Make a copy of this file and rename it hsqldb-1.8.0.jar.
  2. Use the Repository portlet to install the HSQL driver jar . From the Administration Console, click JAR Repository to access the portlet, click Browse and point to the database driver jar. Change the Group: to Hipersonic, leave the remaining fields by default and click Install. You will see Hipersonic/hsqldb/1.8.0/jar listed near the top of the repository entries list.

The next steps will guide you through importing JBoss 4 database pools in the administration console.

  1. From the Geronimo Administration Console click on the Database Pools link. From the Database Pools portlet click Import from JBoss 4. In the Step 1 of Importing the Database Pools, specify the location of the *-ds.xml file and click Next.


  2. Once the JBoss specific datasource is loaded, Step 2 lists the database pools the wizard was able to recognize from the 
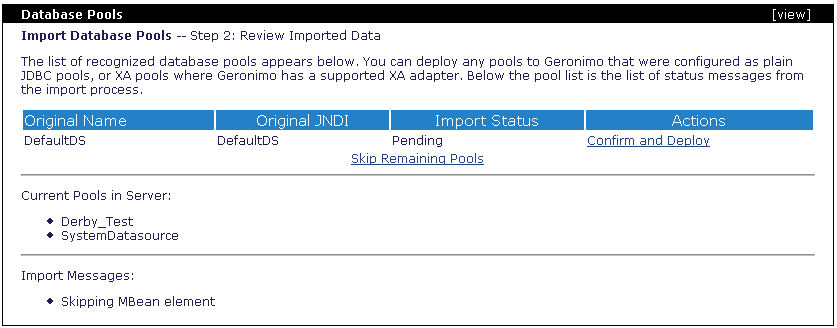
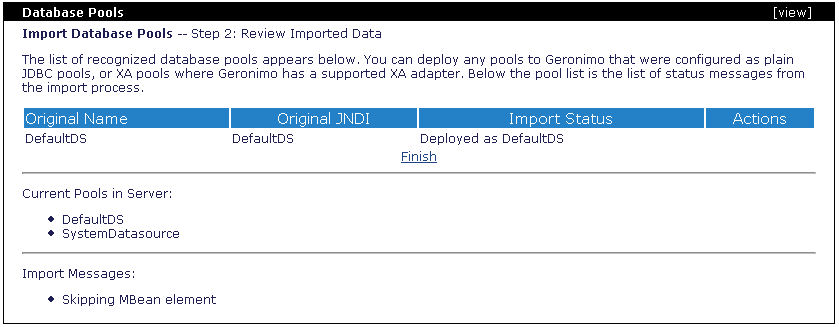
hsqldb-ds.xml file. Click Confirm and Deploy.


  3. The third step allows you to edit the recognized database pool. In this step you will have to specify the driver jar you declared when updating the Geronimo repository. See how Driver JAR: is listed in the following figure.


    1. Click Test Connection to verify that you entered all the necessary data, and Geronimo can establish a connection.


    2. Click Deploy, this will take you to the same database pool list page you saw in Step 2. If you would have more pools defined in the file you can repeat these steps and selectively import some of the database pools. Since we only have one in this example you can click Finish to complete the import wizard.


    3. You now see the imported DefaultDS database pool.