HomeDocumentation > Developing > Tutorials > Developing EJB applications > JMS application with Message-Driven Bean
{scrollbar}

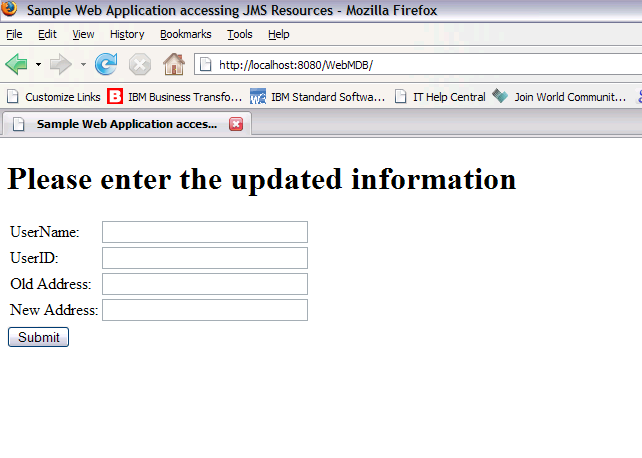
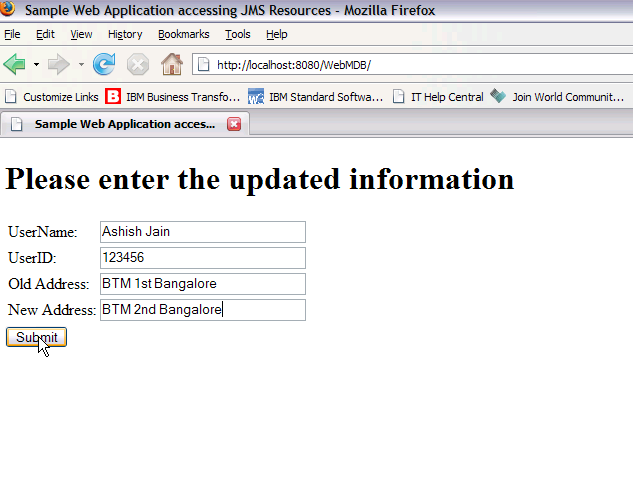
This application is a simple JMS application where in a user sends information to the administrator for update.

To run this tutorial, as a minimum you will be required to have installed the following prerequisite software.

  • Sun JDK 5.0+ (J2SE 1.5)
  • Eclipse 3.3.1.1 (Eclipse Classic package of Europa distribution), which is platform specific
  • Web Tools Platform (WTP) 2.0.1
  • Data Tools Platform (DTP) 1.5.1
  • Eclipse Modeling Framework (EMF) 2.3.1
  • Graphical Editing Framework (GEF) 3.3.1

Details on installing eclipse are provided in the Development environment section. This tutorial is organized in the following sections:

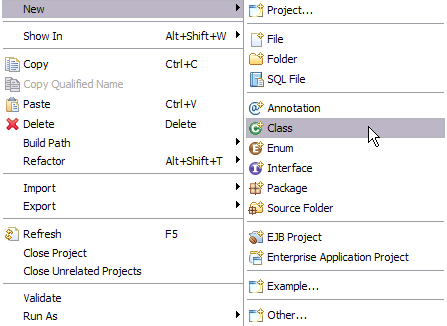
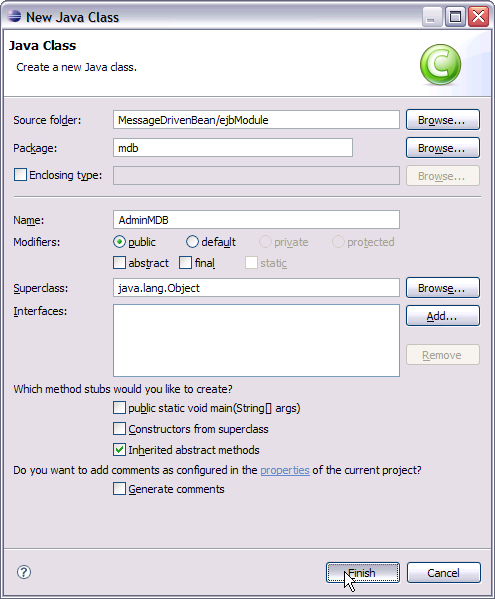
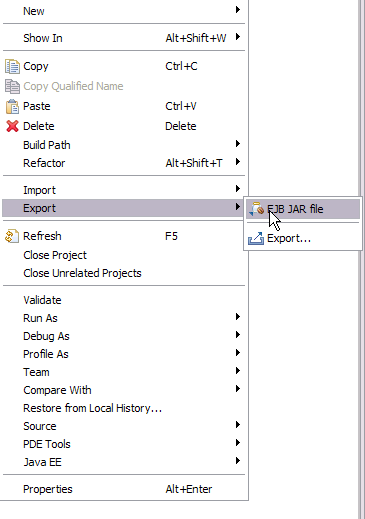
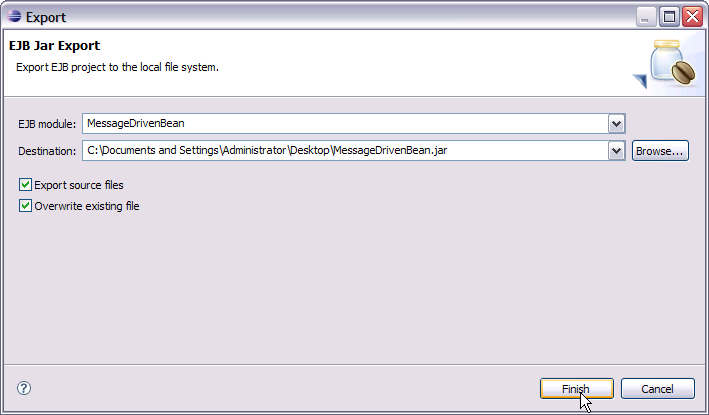
The application development will take you through the following

Creating a Dynamic Web Project

  1. Launch Eclipse. Select File->New->Project.


  2. Select Web->Dynamic Web Project. Select Next.


  3. Name the project as WebMDB. Select Next.


  4. Next window displays the various project facets. Keep the default values and select Next.


  5. Keep the default values for the next window. Select Next->Finish.


  6. Right click on WebMDB project and create a new servlet.


  7. Name the servlet as UserServlet and package as webmdb. This is the producer in the application.


  8. Select Next and later Finish.


  9. Add the following code to UserServlet.java UserServlet.javasolid package webmdb; import java.io.IOException; import java.io.PrintWriter; import java.util.Enumeration; import java.util.Properties; import javax.annotation.Resource; import javax.jms.Connection; import javax.jms.ConnectionFactory; import javax.jms.JMSException; import javax.jms.MessageListener; import javax.jms.MessageProducer; import javax.jms.Queue; import javax.jms.Session; import javax.jms.TextMessage; import javax.naming.Context; import javax.naming.InitialContext; import javax.servlet.ServletException; import javax.servlet.http.HttpServletRequest; import javax.servlet.http.HttpServletResponse; import mdb.AdminMDB; public class UserServlet extends javax.servlet.http.HttpServlet implements javax.servlet.Servlet { @Resource(name="DefaultActiveMQConnectionFactory") private ConnectionFactory connectionFactory; @Resource(name="SendReceiveQueue") private Queue queue; static final long serialVersionUID = 1L; public UserServlet() { super(); } protected void doGet(HttpServletRequest request, HttpServletResponse response) throws ServletException, IOException { PrintWriter out = response.getWriter(); if(connectionFactory == null) { out.println("Connection Factory lookup has failed"); return; } if(queue == null) { out.println("Queue lookup has failed"); return; } Connection connection; try{ connection = connectionFactory.createConnection(); connection.start(); Session session = connection.createSession(false, Session.AUTO_ACKNOWLEDGE); MessageProducer producer = session.createProducer(queue); TextMessage message = session.createTextMessage(); Enumeration arr=request.getParameterNames(); while(arr.hasMoreElements()) { String fields= (String)arr.nextElement(); String paramname[]=request.getParameterValues(fields); String s=null; int i; for (i=0; i<paramname.length;i++) { s=fields+":" + paramname[i]; message.setText(s); producer.send(message); } } } catch(Exception e) { e.printStackTrace(); } } protected void doPost(HttpServletRequest request, HttpServletResponse response) throws ServletException, IOException { doGet(request, response); } }
  10. Let us walkthrough the code
    • @Resource(name="DefaultActiveMQConnectionFactory")- This is a resource injection wherein connection factory has been injected.
    • @Resource(name="SendReceiveQueue")- a queue has been injected. Resource injection is useful in the sense that we need not include the entries in a deployment descriptor.
    • Servlets follow a request response model wherein a request is send to servlet and a response is generated. The function protected void doGet(....,....) follows a request response model.
    • PrintWriter out = response.getWriter()- This statement returns a PrintWriter object which is used to send HTML content to client page.
    • connection = connectionFactory.createConnection()- Creates a connection to DefaultActiveMQConnectionFactory
    • Session session = connection.createSession(..,..)- A session is a context for producing and consuming messages. Use this statement we create a new session.
    • MessageProducer producer = session.createProducer(queue)- A client uses message producer to send messages to a destination. Queue name is passed to createProducer method provided by session object.
    • TextMessage message = session.createTextMessage()- A TextMessage is used to send a message of java.lang.String type.
  1. Right Click on WebContent and create a jsp.


  2. Name the jsp as index.jsp. Select Next.


  3. Select Finish.


    Add the following code to index.jsp index.jspsolid <%@ page language="java" contentType="text/html; charset=ISO-8859-1" pageEncoding="ISO-8859-1"%> <!DOCTYPE html PUBLIC "-//W3C//DTD HTML 4.01 Transitional//EN" "http://www.w3.org/TR/html4/loose.dtd"> <html> <head> <meta http-equiv="Content-Type" content="text/html; charset=ISO-8859-1"> <title>Sample Web Application accessing JMS Resources</title> </head> <body> <form action="UserServlet"> <h1>Please enter the updated information</h1> <table> <tr> <td>UserName:</td> <td><input type="text" name="username" size="30"></td> </tr> <tr> <td>UserID:</td> <td><input type="text" name="userid" size="30"></td> </tr> <tr> <td>Old Address:</td> <td><input type="text" name="oldaddress" size="30"></td> </tr> <tr> <td>New Address:</td> <td><input type="text" name="newaddress" size="30"></td> <tr> </table> <input type="submit" value="Submit"> </form> </body> </html> This will create the producer and user interface required by the application.

Creating Connection Factory and Destination

In simple terms a Connection Factory is an object which is used by a client to connect to the Service provider. In our case we will be using Active MQ as the provider. Destination is an object which is used by client to provide the target to messages produced and source of the messages to be consumed. In our case the target is going to be a queue. We will use the default connection factory and queue which is already available with Apache Geronimo.

Creating a EJB Project

  1. Right click under project explorer and Select New-> Project-> EJB Project.


  2. Name the project as MessageDrivenBean and Select Next.


  3. On the next screen keep defaults and select Next.


  4. On the next screen uncheck Generate Deployment Descriptor and select Next.


  5. Next screen suggests to configure Geronimo Deployment Plan. For current tutorial we are keeping the default values.


    This creates the skeleton of the EJB project. Next step is to add a pojo to our project and annotate it.
  6. Right click on EJB project and select New->class.


  7. Name the class as AdminMDB and package as mdb. Select Finish.


  8. Add the following code to AdminMDB.java. AdminMDB.javasolid package mdb; //import java.sql.SQLException; import javax.annotation.PostConstruct; import javax.annotation.PreDestroy; import javax.ejb.ActivationConfigProperty; import javax.ejb.MessageDriven; import javax.jms.JMSException; import javax.jms.Message; import javax.jms.MessageListener; import javax.jms.TextMessage; @MessageDriven(name="AdminMDB", activationConfig = { @ActivationConfigProperty(propertyName="destinationType", propertyValue="javax.jms.Queue"), @ActivationConfigProperty(propertyName="destination", propertyValue="SendReceiveQueue") }) public class AdminMDB implements MessageListener{ public AdminMDB() { super(); } @PostConstruct public void initialize() { } @PreDestroy public void cleanup() { } public void onMessage(Message message) { TextMessage textMessage = (TextMessage) message; try { System.out.println(textMessage.getText()+ "\n"); } catch (JMSException e) { e.printStackTrace(); } } }
    • @MessageDriven- @MessageDriven annotation identifies this object as an MDB and specifies the MDB configuration
    • @ActivationConfigProperty- This annotation provides messaging configuration which is a name value pair.
    • propertyName="destinationType"- This suggests that MDB is listening to a queue or a topic. In our case propertyValue="javax.jms.Queue" suggesting MDB is listening to queue.
    • propertyName="destination"- This suggests that our MDB is listening to a destination with a JNDI name SendReceiveQueue which is suggested by propertyValue="SendReceiveQueue".
    • public class AdminMDB implements MessageListener- It is used by container to register MDB with message provider.
    • public void onMessage(Message message)- This method processes incoming messages.

Modifying Deployment plan

  1. In WebMDB project select WebContent/WEB-INF/geronimo-web.xml and modify the content with the one shown below. geronimo-web.xmlsolid <?xml version="1.0" encoding="UTF-8" standalone="yes"?> <ns8:web-app xmlns="http://geronimo.apache.org/xml/ns/deployment-1.2" xmlns:ns2="http://geronimo.apache.org/xml/ns/j2ee/connector-1.2" xmlns:ns3="http://geronimo.apache.org/xml/ns/naming-1.2" xmlns:ns4="http://geronimo.apache.org/xml/ns/j2ee/ejb/openejb-2.0" xmlns:ns5="http://geronimo.apache.org/xml/ns/j2ee/application-2.0" xmlns:ns6="http://geronimo.apache.org/xml/ns/security-2.0" xmlns:ns7="http://java.sun.com/xml/ns/persistence" xmlns:ns8="http://geronimo.apache.org/xml/ns/j2ee/web-2.0.1" xmlns:ns9="http://geronimo.apache.org/xml/ns/j2ee/application-client-2.0"> <environment> <moduleId> <groupId>default</groupId> <artifactId>WebMDB</artifactId> <version>1.0</version> <type>car</type> </moduleId> <dependencies> <dependency> <groupId>default</groupId> <artifactId>MessageDrivenBean</artifactId> <version>1.0</version> <type>car</type> </dependency> <dependency> <groupId>org.apache.geronimo.configs</groupId> <artifactId>activemq-ra</artifactId> <version>2.1.1</version> <type>car</type> </dependency> </dependencies> </environment> <ns8:context-root>/WebMDB</ns8:context-root> <ns3:resource-ref> <ns3:ref-name>testfactory</ns3:ref-name> <ns3:resource-link>DefaultActiveMQConnectionFactory</ns3:resource-link> </ns3:resource-ref> </ns8:web-app>
    • <dependency>- Defines the dependency of the application on ActiveMQ and MessageDrivenBean
    • <ns3:resource-ref>- This tag is basically used to define connections that can be JDBC Connection, Java Mail connection or JMS Connection Factory. In our case we are using it for JMS Connection Factory.
  2. In MessageDrivenBean project select META-INF/openejb-jar.xml and modify it as follows openejb-jar.xmlsolid <?xml version="1.0" encoding="UTF-8" standalone="yes"?> <openejb-jar xmlns="http://www.openejb.org/xml/ns/openejb-jar-2.2" xmlns:nam="http://geronimo.apache.org/xml/ns/naming-1.2" xmlns:pkgen="http://www.openejb.org/xml/ns/pkgen-2.0" xmlns:sec="http://geronimo.apache.org/xml/ns/security-1.2" xmlns:sys="http://geronimo.apache.org/xml/ns/deployment-1.2"> <sys:environment> <sys:moduleId> <sys:groupId>default</sys:groupId> <sys:artifactId>MessageDrivenBean</sys:artifactId> <sys:version>1.0</sys:version> <sys:type>car</sys:type> </sys:moduleId> <sys:dependencies> <sys:dependency> <sys:groupId>org.apache.geronimo.configs</sys:groupId> <sys:artifactId>activemq-ra</sys:artifactId> <sys:version>2.1.1</sys:version> <sys:type>car</sys:type> </sys:dependency> </sys:dependencies> </sys:environment> <enterprise-beans> <message-driven> <ejb-name>AdminMDB</ejb-name> <nam:resource-adapter> <nam:resource-link>ActiveMQ RA</nam:resource-link> </nam:resource-adapter> <activation-config> <activation-config-property> <activation-config-property-name> destination </activation-config-property-name> <activation-config-property-value> SendReceiveQueue </activation-config-property-value> </activation-config-property> <activation-config-property> <activation-config-property-name> destinationType </activation-config-property-name> <activation-config-property-value> javax.jms.Queue</activation-config-property-value> </activation-config-property> </activation-config> </message-driven> </enterprise-beans> </openejb-jar>


    • <enterprise-beans>- This tag suggests that the usage of EJB's in our application.
    • <message-driven>- This tag suggest the usage of MDB's in our application.
    • <ejb-name>- Name of the ejb.
    • <nam:resource-link>- Link for the resource adapter.
      To learn more on MDB deployment plans refer Creating deployment plans section.

      Deploy and Run

  3. Export MessageDrivenBean.jar and WebMDB.war from eclipse as shown in the figure below


  4. Launch Administrative console and deploy the EJB and Web Application using Deploy New.
  5. Once done launch the web application with http://localhost:8080/WebMDB/.\\

  6. Fill the form as suggested in the figure and Select Submit.


  7. Once done check out the command prompt. Message Driven Bean has triggered and it displays the message currently on the queue.