|
|
| Home > Documentation > Developing > Tutorials > Developing Aries applications > Developing a Hello World Blueprint application |
This application is a simple Hello World Blueprint application which shows basic principles of building an Aries application and definitions of bean, service and reference in Blueprint.
To run this tutorial, as a minimum you will be required to have installed the following prerequisite software:
Details on installing Eclipse are provided in the Development environment section. This tutorial is organized in the following sections:


com.sample.blueprint.helloworld.api and create a new Interface as shown in the figure.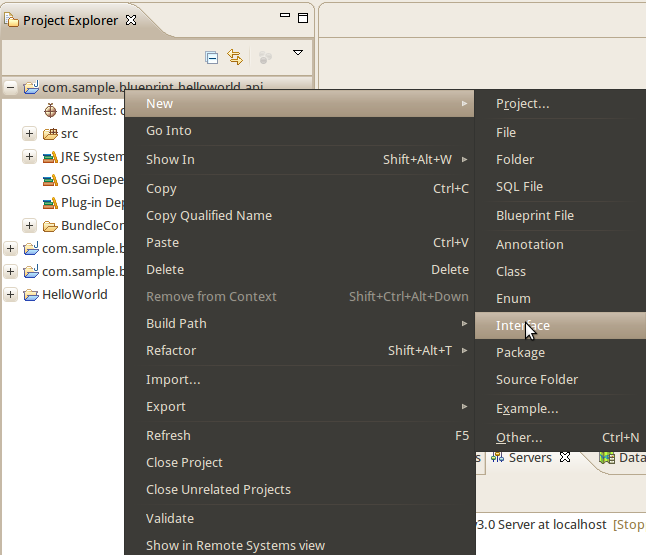
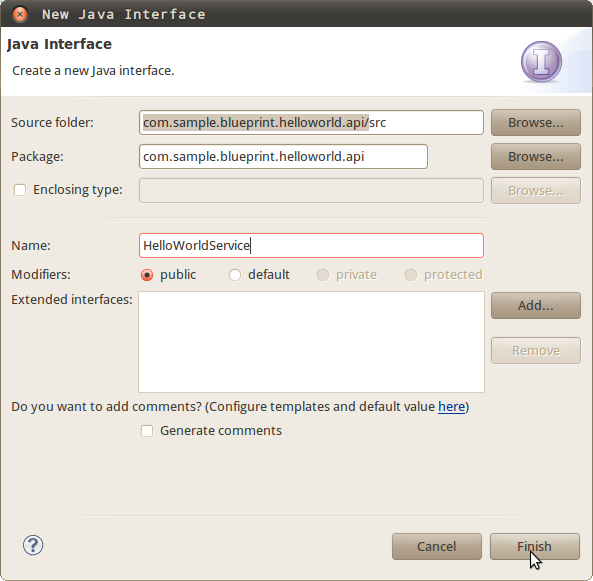
HelloWorldService as follows.
package com.sample.blueprint.helloworld.api;

public interface HelloWorldService {

	public void hello();

	public void startUp();

}
META-INF\MANIFEST.MF and make sure com.sample.blueprint.helloworld.api is listed under Exported packages.
com.sample.blueprint.helloworld.server and create a new class as shown in the figure.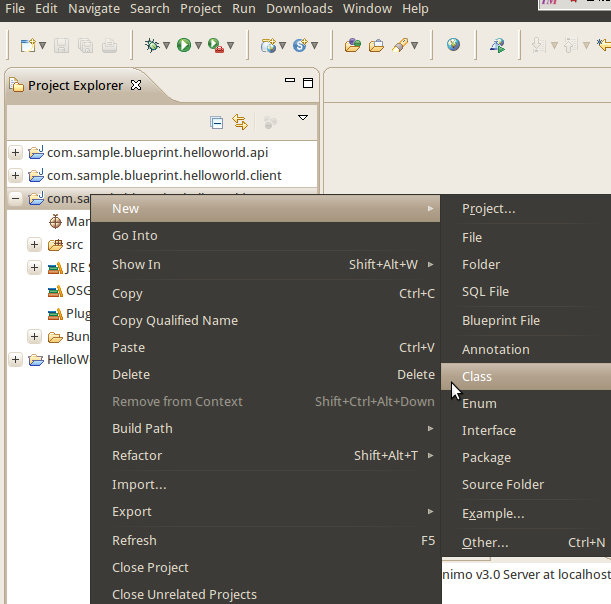
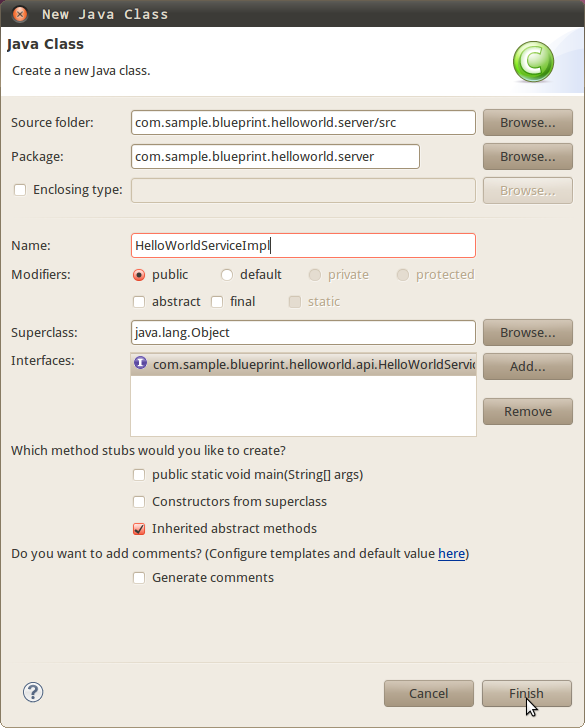
HelloWorldServiceImpl as follows.
package com.sample.blueprint.helloworld.server;
import com.sample.blueprint.helloworld.api.*;

public class HelloWorldServiceImpl implements HelloWorldService {

    public void hello() {
            System.out.println("======>>> A message from the server: Hello World!");
    }

    public void startUp() {
            System.out.println("======>>> Starting HelloWorld Server");
    }
}
OSGI-INF\blueprint directory automatically.
<?xml version="1.0" encoding="UTF-8"?>
<blueprint xmlns="http://www.osgi.org/xmlns/blueprint/v1.0.0">

      <bean id="helloservice"
            class="com.sample.blueprint.helloworld.server.HelloWorldServiceImpl"
            init-method="startUp">
      </bean>

      <service ref="helloservice"
          interface="com.sample.blueprint.helloworld.api.HelloWorldService"/>
</blueprint>
META-INF\MANIFEST.MF and make sure com.sample.blueprint.helloworld.api is listed under Import-Pakcage.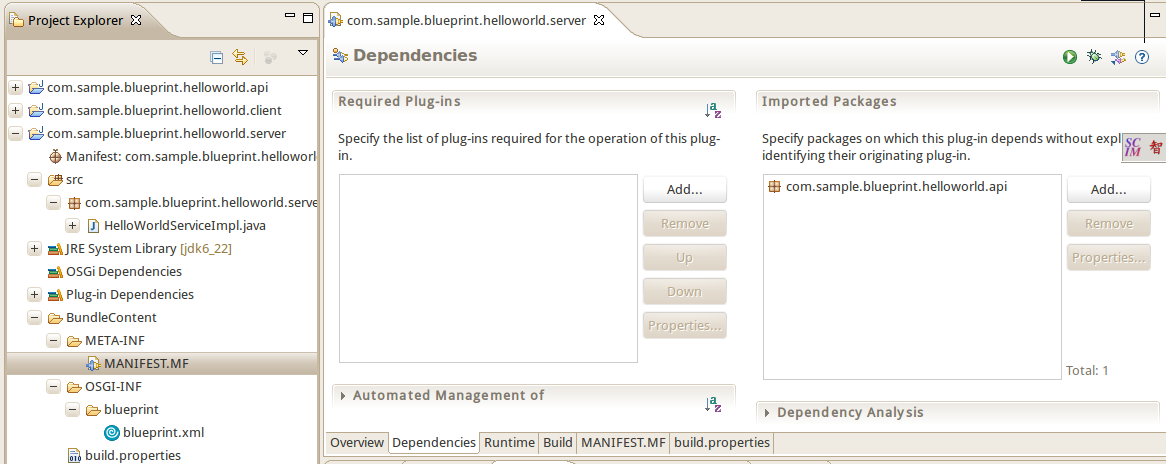
com.sample.blueprint.helloworld.client and create a new class as shown in the figure.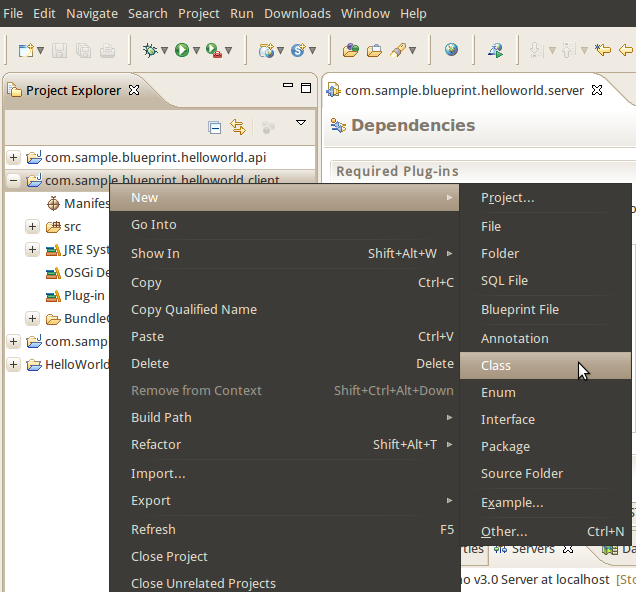

HelloWorldClient as follows.
package com.sample.blueprint.helloworld.client;
import com.sample.blueprint.helloworld.api.HelloWorldService;

public class HelloWorldClient {

	HelloWorldService helloWorldService = null;

	public void startUp() {
		System.out
				.println("========>>>>Client HelloWorld: About to execute a method from the Hello World service");
		helloWorldService.hello();
		System.out
				.println("========>>>>Client HelloWorld: ... if you didn't just see a Hello World message something went wrong");
	}

	public HelloWorldService getHelloWorldService() {
		return helloWorldService;
	}

	public void setHelloWorldService(HelloWorldService helloWorldService) {
		this.helloWorldService = helloWorldService;

	}
}
OSGI-INF\blueprint directory automatically.<?xml version="1.0" encoding="UTF-8"?> <blueprint xmlns="http://www.osgi.org/xmlns/blueprint/v1.0.0"> <reference id="helloservice" interface="com.sample.blueprint.helloworld.api.HelloWorldService" /> <bean id="helloclient" class="com.sample.blueprint.helloworld.client.HelloWorldClient" init-method="startUp"> <property name="helloWorldService" ref="helloservice" /> </bean> </blueprint>
META-INF\MANIFEST.MF and make sure com.sample.blueprint.helloworld.api is listed under Import-Pakcage.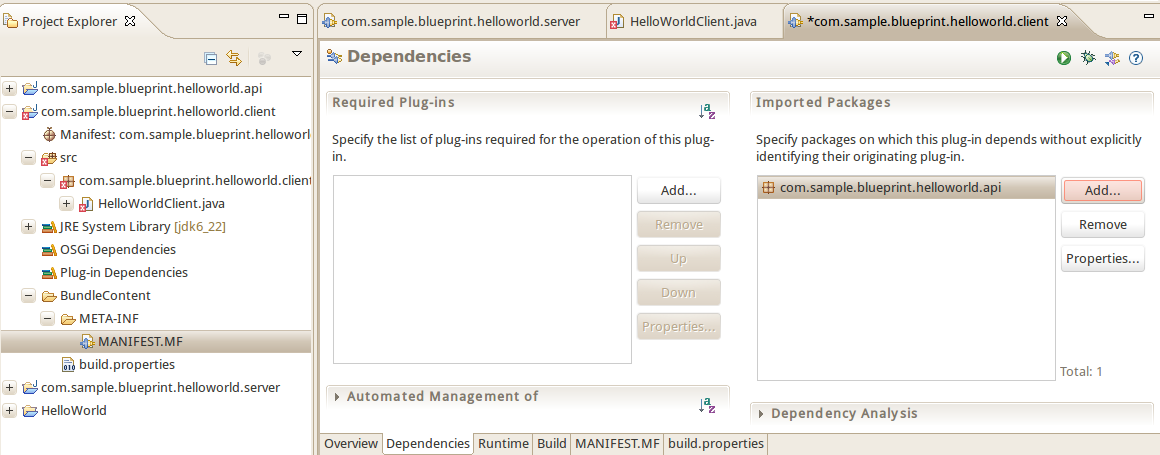

|
|
Privacy Policy - Copyright © 2003-2013, The Apache Software Foundation, Licensed under ASL 2.0. |