|
|
| Home > Documentation > Developing > Fast and easy development |
The Geronimo Eclipse Plugin (GEP) provides integration between Geronimo and the Web Tools Platform (WTP). With this plugin, users will be able to use the features in WTP to create, deploy and debug applications on Geronimo.
This section provides a quick tutorial for developing and running applications with GEP in Geronimo.
This Quick start guide for developers is organized in the following sections:The Geronimo Eclipse Plugin (GEP) requires the following prerequisite software (all of which is platform specific):
Sun JDK 6.0 can be downloaded from Sun's Java SE Downloads site. The Eclipse IDE for Java EE Developers can be downloaded in from the Eclipse Downloads site. Download and extract the Eclipse IDE for Java EE Developers archives to a directory of your choice (for example, C:\eclipse). The archive will be extracted to a directory named eclipse under the directory you specified (for example, C:\eclipse\eclipse), referred to as <ECLIPSE_HOME> from now on. Make sure that the JDK in the PATH is Sun JDK 6.0. Launch Eclipse by running <ECLIPSE_HOME>/eclipse.
The Geronimo server can be installed using the Geronimo Eclipse Plugin, or optionally you may install the manually. To install it manually, download the Geronimo 3.0M1 server from http://geronimo.apache.org/downloads.html and extract the archive to a directory of your choice (for e.g. C:\g). The archive will be extracted to a directory geronimo-tomcat7-javaee5-3.0M1 (for e.g. C:\g\geronimo-tomcat7-javaee6-3.0M1) or geronimo-jetty8-javaee6-3.0M1 depending on whether you downloaded Geronimo 3.0M1 distribution with Tomcat or Jetty as the web container. We will refer to this directory as <GERONIMO_HOME> from now on.
The GEP can be installed via the Eclipse Update manager by creating a new remote site pointing to http://www.apache.org/dist/geronimo/eclipse/updates/. Follow the steps below to install GEP:

The definitive and current version of the GEP installation instructions may be found here: Installing Geronimo Eclipse Plugin.
To verify that the GEP installation has been successful, start your new Eclipse installation and from the workspace select Help --> About Eclipse Platform". In the panel that appears you will see anywhere from 4-6 Eclipse icons representing the various Eclipse projects and/or components installed. You must also see the Geronimo icon as shown below. If not something has not been installed correctly. If the Geronimo icon does appear, that is a very good indication that Eclipse and the GEP have been installed correctly, and you can confidently continue to the next step.
![]()
Follow the steps below to define a new Geronimo v3.0M1Server Runtime:
The directory specified for Application Server Installation Directory must exist in order to select Download Options.
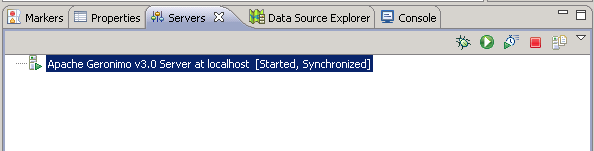
This completes defining a new Geronimo Server runtime. The newly added server will appear in the Servers view. The server can be started by selecting the server and clicking on the Start server button.
If you do not have your application already in the Eclipse workspace, import the application archive using the following steps:
Remaining steps are based on a Web application.
The imported application can be viewed in the Project Explorer view. The GEP will create a Geronimo specific deployment plan, in this case geronimo-web.xml under WebContent/WEB-INF, if one is not already present in the archive. You might need to edit the deployment plan to map any resources used by your application.
To deploy the application on Geronimo, follow the steps below:
The application will be deployed when the server is Started or a Publish is invoked.
In order to run the application follow the steps below:
This will start the server if it not already started and run the application. The application's welcome page will open in a browser inside Eclipse.
|
|
Privacy Policy - Copyright © 2003-2013, The Apache Software Foundation, Licensed under ASL 2.0. |