HomeDocumentation > Developing > Tutorials > Developing EJB applications > Stateful Session Bean
{scrollbar}

This application will take you through the basics of Stateful Session Bean. This application will demonstrate how annotations like @Stateful, @Resource, @PostConstruct, @PreDestroy, @PrePassivate, @PostActivate, @Remove are used in an EJB3 application.

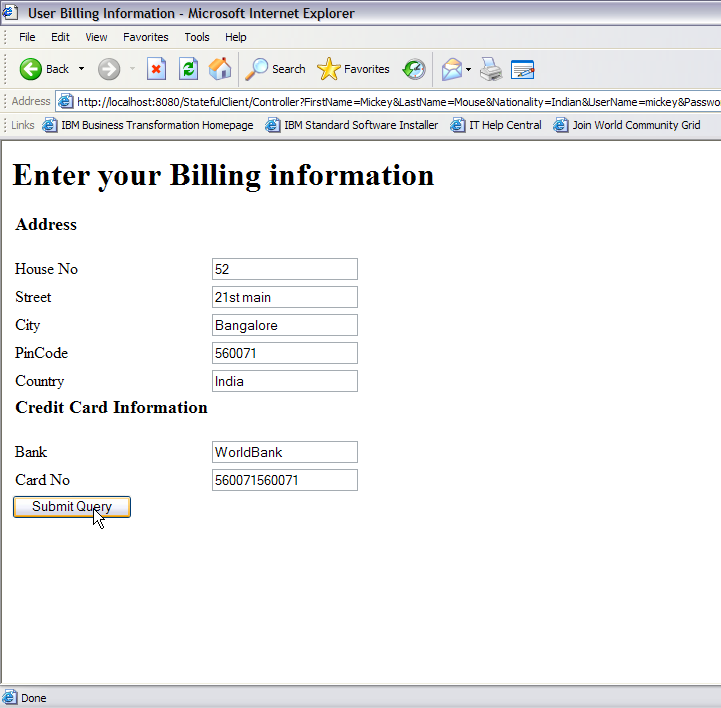
Basically a Stateful Session EJB is used whenever there is a requirement to maintain a session. The example is a user registration process wherein the registration process is a two step process. First page prompts to enter your personal credentials and second page prompts to enter your billing and credit card information. The session is maintained till the user has filled up both the jsp pages. Later the complete information is populated on to a database. The application has a Controller servlet which routes the call received from the jsp client to the Bean class, setter methods and jsp pages.

To run this tutorial, as a minimum you will be required to have installed the following prerequisite software.

  • Sun JDK 5.0+ (J2SE 1.5)
  • Eclipse 3.3.1.1 (Eclipse Classic package of Europa distribution), which is platform specific
  • Web Tools Platform (WTP) 2.0.1
  • Data Tools Platform (DTP) 1.5.1
  • Eclipse Modeling Framework (EMF) 2.3.1
  • Graphical Editing Framework (GEF) 3.3.1

Details on installing eclipse are provided in the Development environment section.
This tutorial is organized in the following sections:

Creating an EJB project

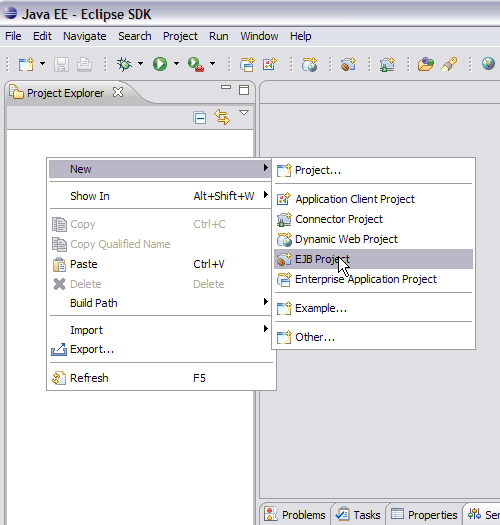
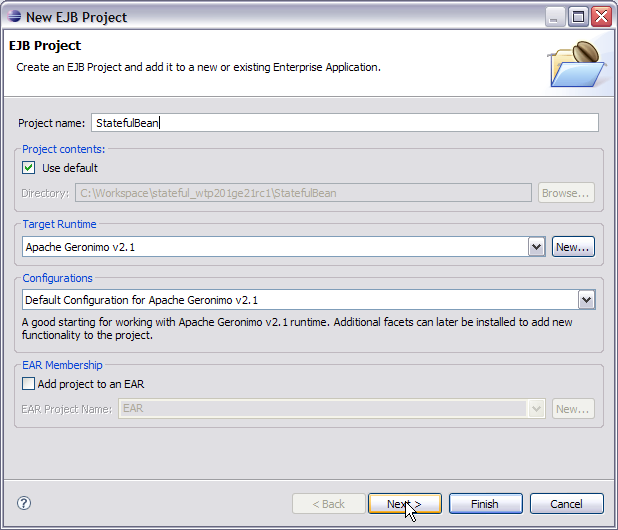
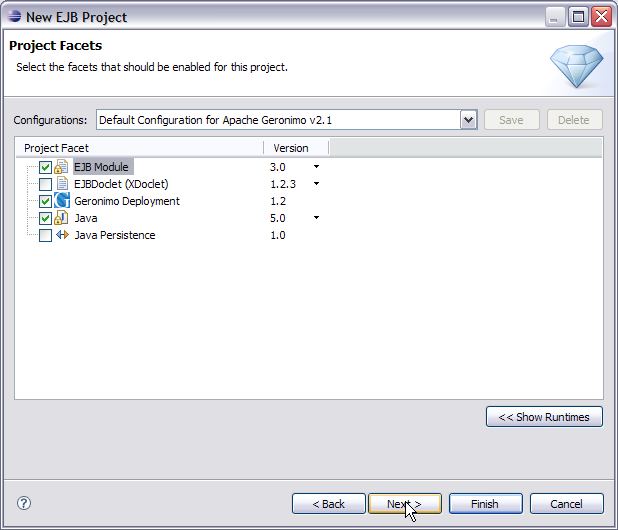
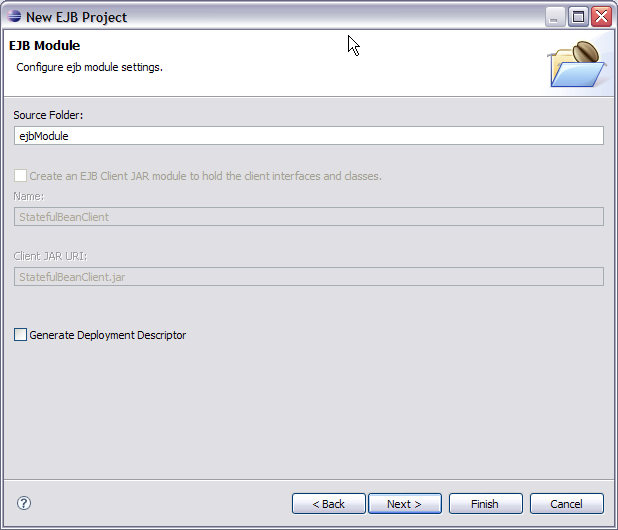
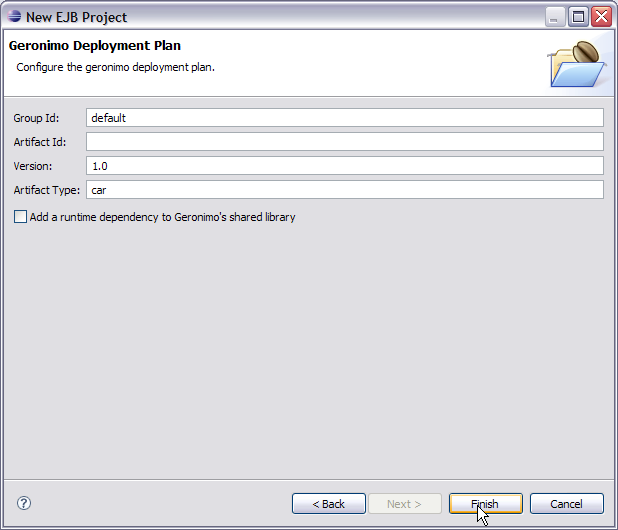
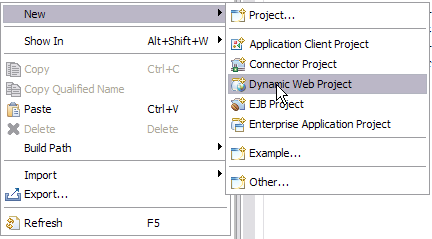
This section is organized in the following parts:
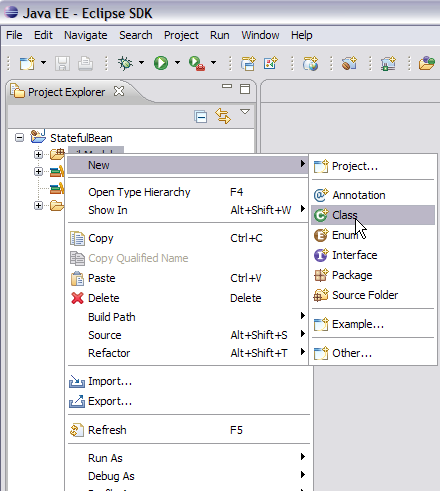
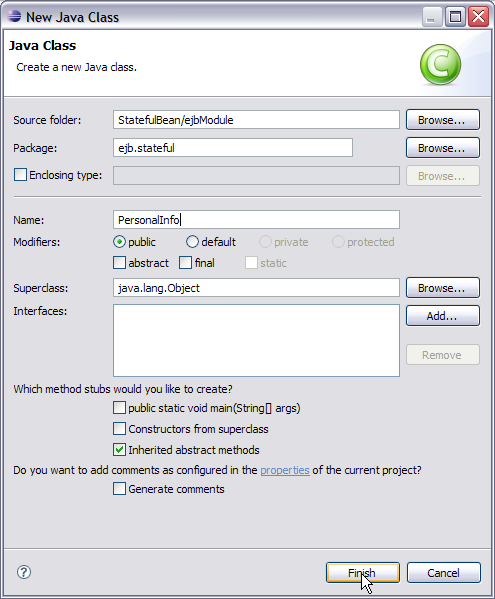
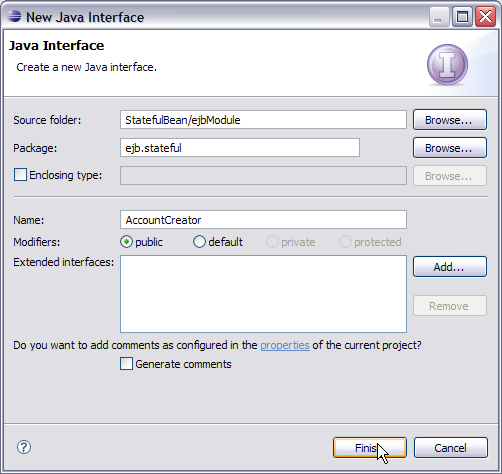
Setting up the project environment

  1. Right click Under Project Explorer and Select New->EJB Project.


  2. Name the project as StatefulBean. Select Next.


  3. Mark the fields as suggested in the screenshot and Select Next.


  4. Uncheck Generate Deployment Descriptor. This is beacuse we are using annotations is our applications and so deployment descriptors are redundant entity. Select Next.


  5. On next screen select all default values and Select Finish.


    This creates a skeleton for the EJB project. Next steps are adding the bean class, bean interface and setter/getter methods.
  6. Right click on ejbModule in StatefulBean project and select New->class.


  7. Name the class as PersonalInfo and package as ejb.stateful. Select Finish.


Adding Java classes and interfaces

  1. Add the following code to PersonalInfo.java. solidPersonalInfo.java package ejb.stateful; public class PersonalInfo implements java.io.Serializable { private static final long serialVersionUID = 1L; private String FirstName; private String LastName; private String UserName; private String Password; private String Nationality; public void setFirstName(String FirstName) { this.FirstName=FirstName; } public void setLastName(String LastName) { this.LastName=LastName; } public void setUserName(String UserName) { this.UserName=UserName; } public void setPassword(String Password) { this.Password=Password; } public void setNationality(String Nationality) { this.Nationality=Nationality; } public String getFirstName() { return FirstName; } public String getLastName() { return LastName; } public String getUserName() { return UserName; } public String getPassword() { return Password; } public String getNationality() { return Nationality; } }


  2. Similarly create a class BillingInfo.java and add the following code. solidBillingInfo.java package ejb.stateful; public class BillingInfo implements java.io.Serializable { private static final long serialVersionUID = 1L; private String houseNo; private String street; private String city; private String pincode; private String country; private String bank; private String cardno; public void setBank(String bank) { this.bank=bank; } public void setCardno(String cardno) { this.cardno=cardno; } public void setHouseNo(String houseNo) { this.houseNo=houseNo; } public void setStreet(String street) { this.street=street; } public void setCity(String city) { this.city=city; } public void setPincode(String pincode) { this.pincode=pincode; } public void setCountry(String country) { this.country=country; } public String getBank() { return bank; } public String getCardno() { return cardno; } public String getHouseNo() { return houseNo; } public String getStreet() { return street; } public String getCity() { return city; } public String getPincode() { return pincode; } public String getCountry() { return country; } } PersonalInfo.java and BillingInfo.java are classes for setting and getting the user information.
  3. Now we will add the Business interface or bean interface. Right click on the package ejb.stateful and Select New->Interface.


  4. Name the interface as AccountCreator and Select Finish.


  5. Add the following code to AccountCreator interface. solidAccountCreator.java package ejb.stateful; import javax.ejb.Remote; @Remote public interface AccountCreator { void addPersonalInfo(PersonalInfo personalinfo); void addBillingInfo(BillingInfo billinginfo); void createAccount(); } Note: Once you enter this code you might see errors like @EJB can be resolved. Currently there are some limitations with the geronimo eclipse plugin which will resolved soon. We will soon suggest you how to get rid of those errors.
  6. Next step is to add the implementation to the interface. Right click on ejb.stateful interface and select New->class.


  7. Name the bean class as AccountCreatorBean and Select Finish.


  8. Add the following code to AccountCreatorBean. solidAccountCreatorBean.java package ejb.stateful; import java.sql.Connection; import java.sql.Statement; import javax.annotation.PostConstruct; import javax.annotation.PreDestroy; import javax.annotation.Resource; import javax.ejb.PostActivate; import javax.ejb.PrePassivate; import javax.ejb.Remove; import javax.ejb.Stateful; import javax.sql.DataSource; @Stateful public class AccountCreatorBean implements AccountCreator{ @Resource(name="jdbc/userds") private DataSource datasource; private Connection connection; private PersonalInfo personalinfo=new PersonalInfo(); private BillingInfo billinginfo=new BillingInfo(); public AccountCreatorBean() { super(); } @PostConstruct @PostActivate public void openConnection() { try{ connection=datasource.getConnection(); } catch(Exception e) { e.printStackTrace(); } } @PreDestroy @PrePassivate public void closeConnection() { connection=null; } public void addPersonalInfo(PersonalInfo personalinfo) { this.personalinfo=personalinfo; } public void addBillingInfo(BillingInfo billinginfo) { this.billinginfo=billinginfo; } @Remove public void createAccount() { try{ System.out.println(personalinfo.getFirstName()); Statement statement = connection.createStatement(); String sql = "INSERT INTO USERINFO(" + "FIRSTNAME, " + "LASTNAME, " + "USERNAME," + "PASSWORD, " + " PINCODE, " + " CARDNO ) VALUES (" + "'" + personalinfo.getFirstName() + "', " + "'" + personalinfo.getLastName() + "', " + "'" + personalinfo.getUserName() + "', "+ "'" + personalinfo.getPassword() + "', "+ "'" + billinginfo.getPincode() + "', "+ "'" + billinginfo.getCardno() + "'" + ")"; statement.execute(sql); statement.close(); } catch(Exception e) { e.printStackTrace(); } } } Once you have added the code you will see lot of errors but this can be resolved easily and is shown in next step. The errors in the code is due to missing classes from our server runtime.

Making additional configurations

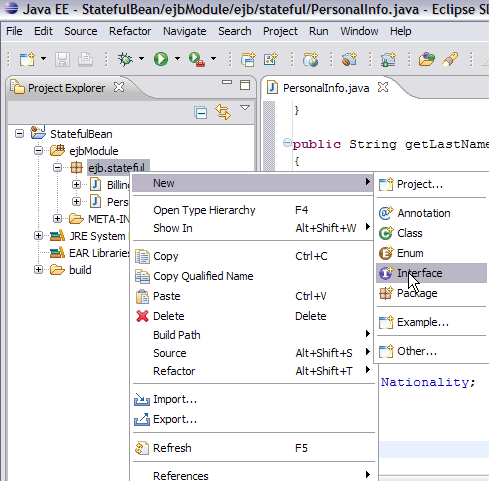
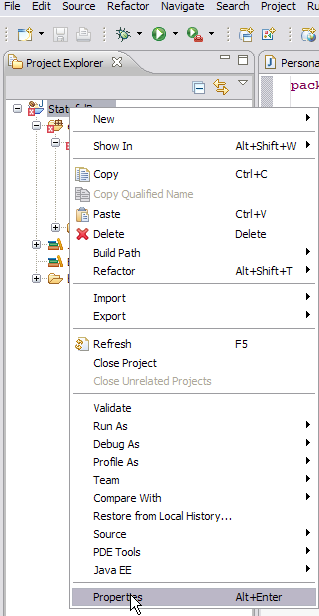
Resolve the errors as follows.

  1. Right click on StatefulBean project and select Properties.


  2. On the next screen select Java Build Path->Libraries->Add External Jars.


  3. Browse to 
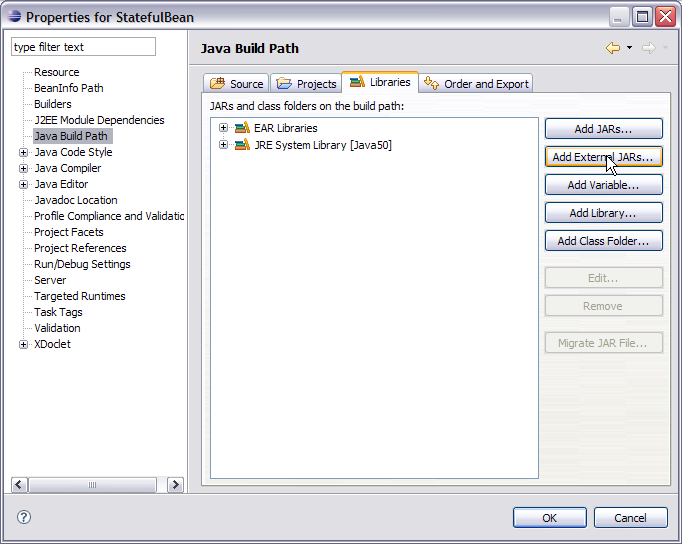
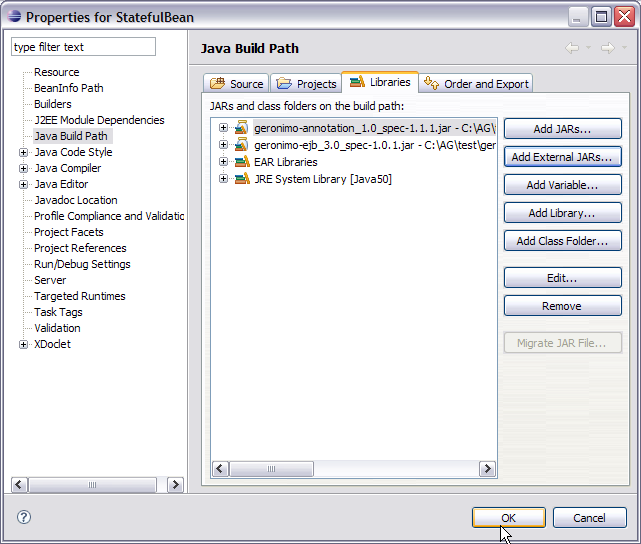
<GERONIMO_HOME>/repository/org/apache/geronimo/specs/geronimo-ejb_3.0_spec/1.0.1 and select geronimo-ejb_3.0_spec-1.0.1.jar. Select Open.


  4. Similarly browse to <GERONIMO_HOME>/repository/org/apache/geronimo/specs/geronimo-annotation_1.0_spec/1.1.1 and add 
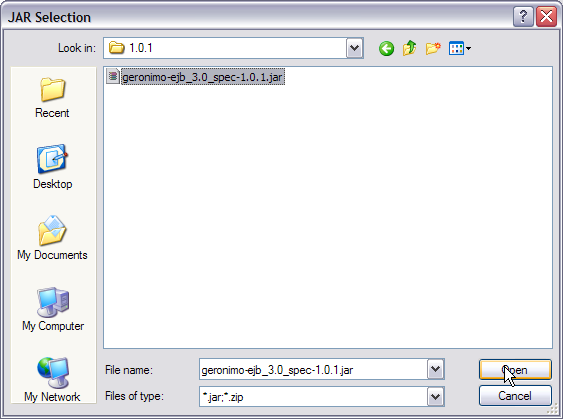
geronimo-annotation_1.0_spec-1.1.1.jar.


  5. Once done you can see both the jars enlisted. Select OK.


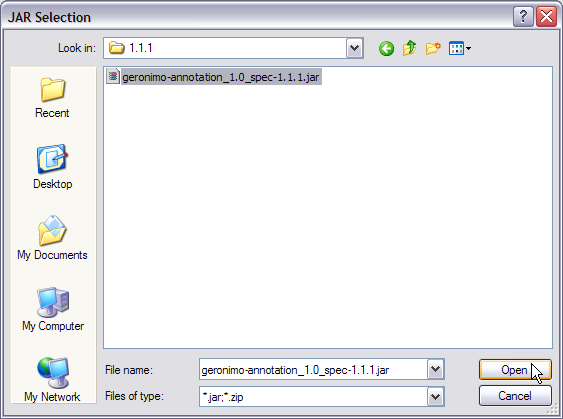
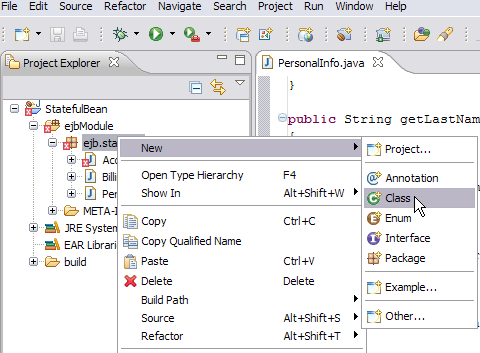
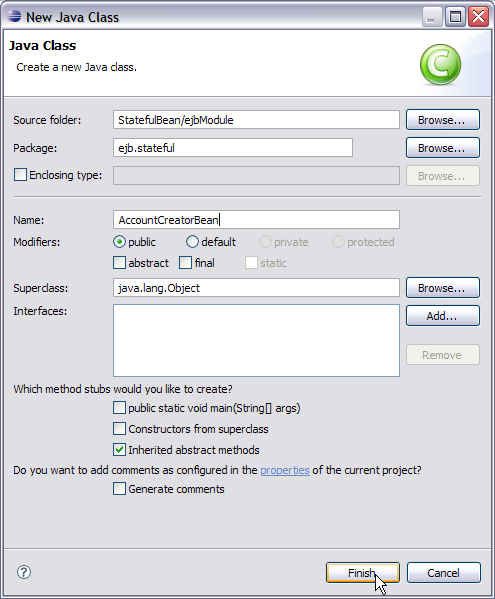
Let us walk through the EJB bean class code.

  • @Stateful public class AccountCreatorBean implements AccountCreator- @ Stateful annotation declares the Bean class as Stateful class.
  • @Resource(name="jdbc/userds") DataSource datasource;- This is a resource injection into the bean class wherin a datasource is injected using the @Resource annotation. We will shortly see how to create a datasource in geronimo.
    • public AccountCreatorBean*-This is a constructor for the bean class and it will be used to create a bean instance whenever a request is received from new client connection.
  • @PostConstruct, @PostActivate public void openConnection()- @PostConstruct and @PostActivate are annotations which are basically called lifecycle callback annotation. The lifecycle for these annotation is as follows
    • New bean instance is created using the default constructor.
    • Resources are injected
    • Now the PostConstruct method is called which in our case is to open a database connection.
    • PostActivate is called on the bean instances which have been passivated and required to be reactivated. It goes on the same cycle as being followed by PostConstruct.
    • @PreDestroy @PrePassivate public void closeConnection()- Again @PreDestroy and @PrePassivate are Lifecycle callback annotation. The lifecycle of these annotation is as follows
    • Bean instances in the pool are used and business methods are invoked.
    • Once the client is idle for a period of time container passivates the bean instance. The closeConnection function is called just before container passivates the bean.
    • If the client does not invoke a passivated bean for a period of time it is destroyed.
  • public void addPersonalInfo(PersonalInfo personalinfo) and public void addBillingInfo(BillingInfo billinginfo)- These two functions are invoked to store client data across various calls.
    • @Remove public void createAccount()- There are two ways in which a bean is destroyed and hence this where a client session ends in stateful bean. One is when a bean has been passivated and is not reinvoked by client hence the bean instance is destroyed. Another way is to use @Remove annotation. Once the client confirms and submits all the required information the data is populated into the database and that is where the session ends.

Creating a database using the administrative console

  1. Start the server and lunch the administrative console using the URL http://localhost:8080/console.
  2. Enter default username and password.
  3. In the welcome page, Under Embedded DB, Select DB Manager.


  4. On the next page create a database named userdbs and Select Create.


  5. Once done you can see the userdbs database listed in DB Viewer portlet under Databases. This confirms that the database has been successfully created.


  6. As shown in the figure under Use DB, select userdbs from the dropdown box.


  7. Run the 
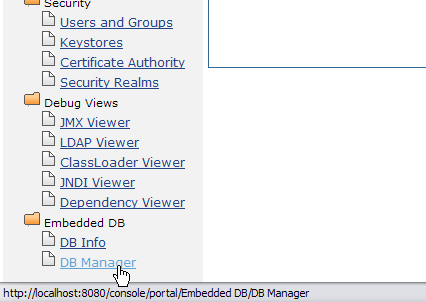
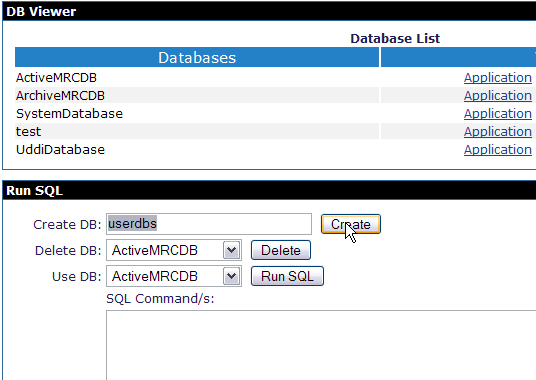
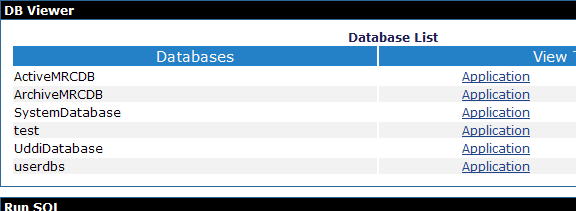
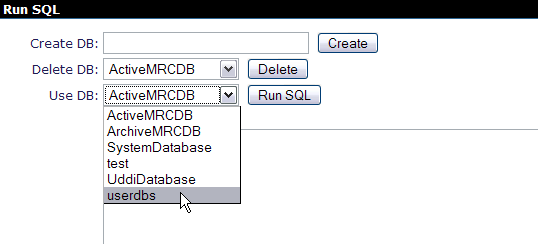
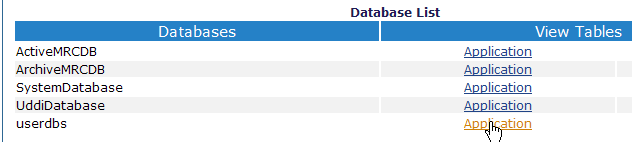
userinfo.sql script. Select Run Sql.


    soliduserinfo.sql create table userinfo(firstname varchar(20),lastname varchar(20), username varchar(20), password varchar(20), pincode varchar(20), cardno varchar(20))
  8. To verify the table creation succeeded. Select Application as shown in the figure.


  9. Next screen suggests the table has been successfully created. To view the contents of the table select VIEW CONTENTS.


  10. The table is currently empty as shown in the figure.


Creating a datasource using the administrative console

  1. Start the server and launch the administrative console using the URL http://localhost:8080/console.
  2. Enter default username and password.
  3. Once in the welcome page. In console navigation, Under Services, Select Database Pools.


  4. On the next screen, Create a new database pool using Geronimo database pool wizard.


  5. On the next screen give the name as suggested in the figure. This will initiate the process to create a Derby Embedded XA datasource.


  6. Select the Driver jar and give the database name as userdbs (Remember this is the database we created in the previous step). Rest all fields can be set to default.


  7. Select Deploy to deploy the connector plan.


  8. Once done you can see the Database Pool jdbc/userds listed in the available database pools.


Creating a Web based application client

  1. Right click under Project Explorer and Select New->Dynamic Web Project.


  2. Name the project as StatefulClient and Select Next.


  3. Keep the default settings as shown in the figure. Select Next.


  4. On the next screen keep default values. Select Next.


  5. Default values on this screen too. Select Finish.


  6. Right click on the StatefulClient project and Select New->Servlet.


  7. Name the package as ejb.stateful and Servlet as Controller.


  8. Keep the default values and Select Next.


  9. Keep the default values and Select Finish.


  10. Once the servlet is created it shows error. This is due to servlet api missing from the runtime. This can be easily resolved. Right click on StatefulClient project and Select Properties.


  11. On the next screen select Java build path and select Libraries.


  12. Select Add External jars.


  13. Browse to your 
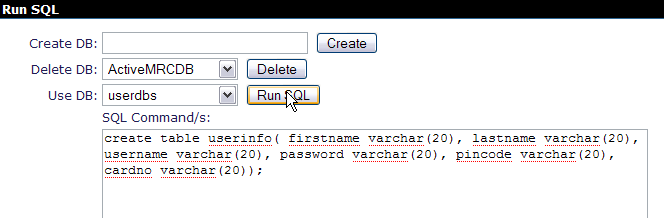
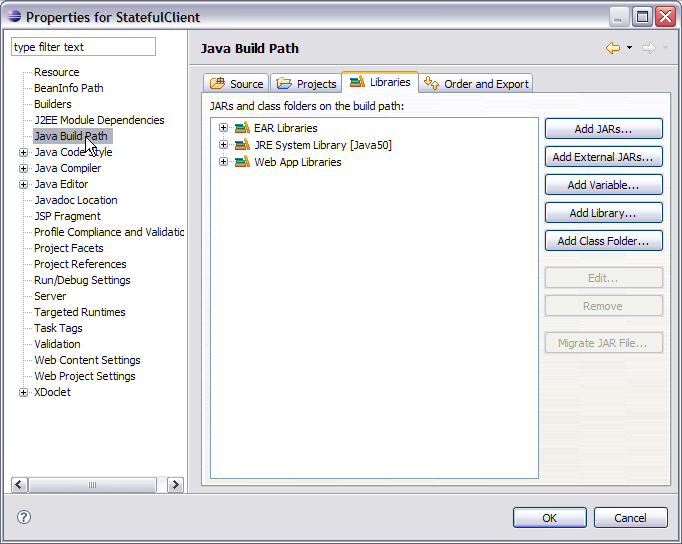
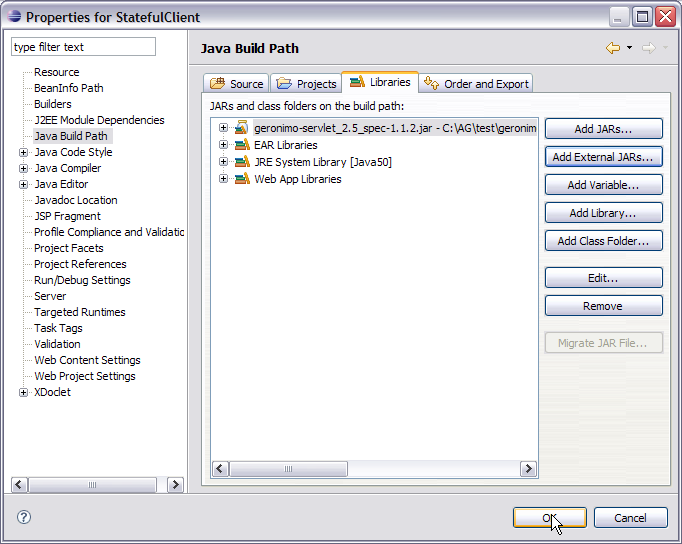
<GERONIMO_HOME>\repository\org\apache\geronimo\specs\geronimo-servlet_2.5_spec\1.1.2 and select geronimo-servlet_2.5_spec-1.1.2.jar and Select Open.


  14. Select OK on the next screen this will remove all the errors.


  15. Add the following code to 
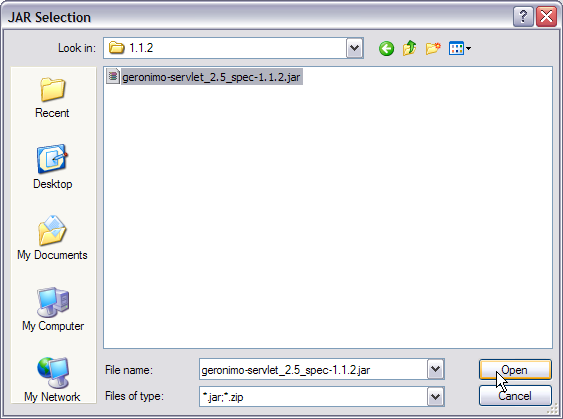
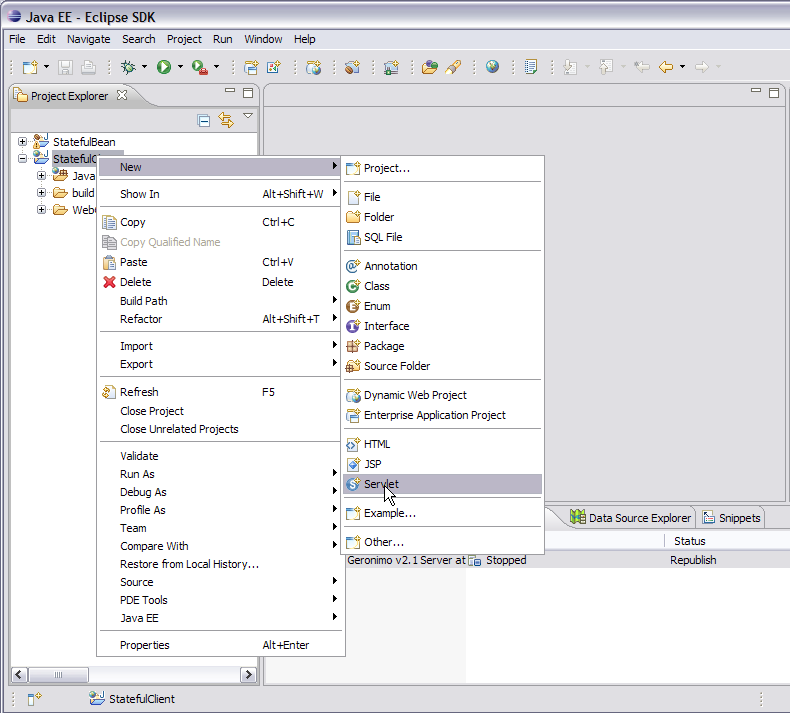
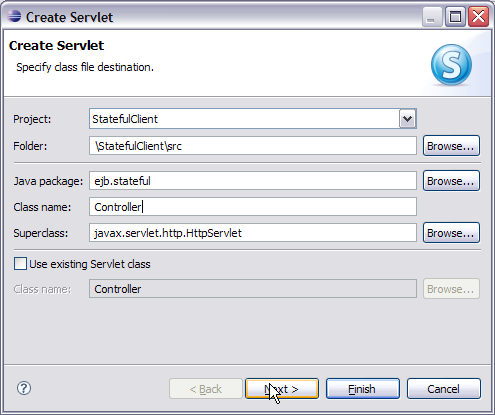
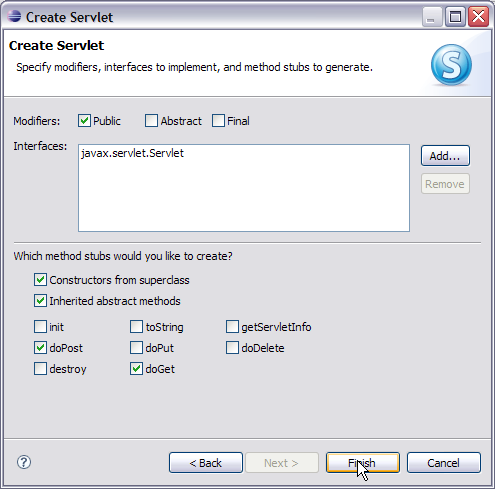
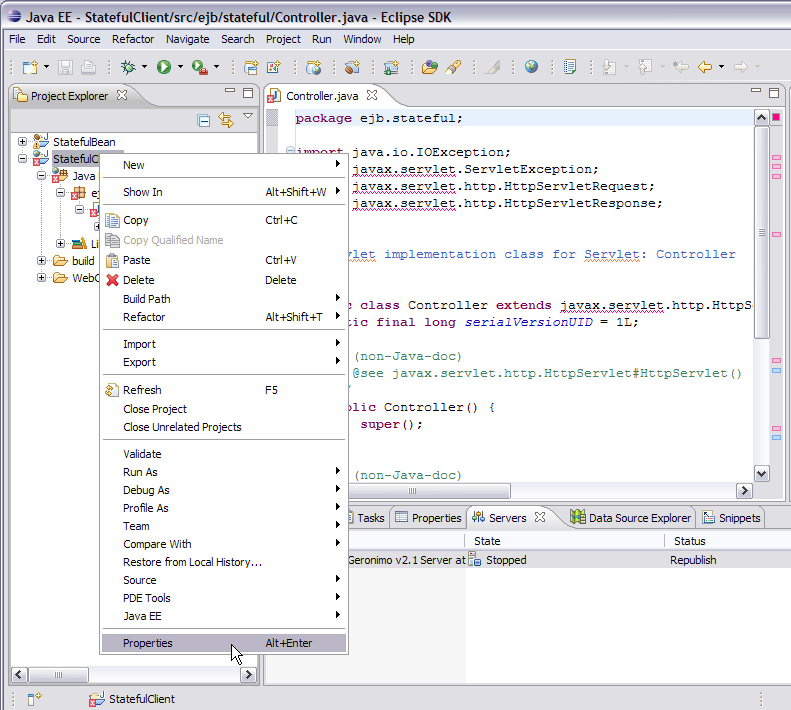
Controller.java servlet. solidController.java package ejb.stateful; import java.io.IOException; import java.util.Properties; import javax.naming.Context; import javax.naming.InitialContext; import javax.servlet.RequestDispatcher; import javax.servlet.ServletException; import javax.servlet.http.HttpServletRequest; import javax.servlet.http.HttpServletResponse; import javax.servlet.http.HttpSession; /** * Servlet implementation class for Servlet: Controller * */ public class Controller extends javax.servlet.http.HttpServlet implements javax.servlet.Servlet { static final long serialVersionUID = 1L; AccountCreator ac; /* (non-Java-doc) * @see javax.servlet.http.HttpServlet#HttpServlet() */ public Controller() { super(); } /* (non-Java-doc) * @see javax.servlet.http.HttpServlet#doGet(HttpServletRequest request, HttpServletResponse response) */ protected void doProcess(HttpServletRequest request, HttpServletResponse response) throws ServletException, IOException { /*PrintWriter out =response.getWriter(); out.println(request.getRequestURI());*/ try{ Properties prop=new Properties(); prop.put(Context.INITIAL_CONTEXT_FACTORY, "org.apache.openejb.client.RemoteInitialContextFactory"); prop.put("java.naming.provider.url", "ejbd://localhost:4201"); Context context = new InitialContext(prop); ac=(AccountCreator)context.lookup("AccountCreatorBeanRemote"); } catch(Exception e) { e.printStackTrace(); } if ( (request.getRequestURI()).equals("/StatefulClient/Controller")) { PersonalInfo personalinfo=new PersonalInfo(); personalinfo.setFirstName(request.getParameter("FirstName")); personalinfo.setLastName(request.getParameter("LastName")); personalinfo.setNationality(request.getParameter("Nationality")); personalinfo.setUserName(request.getParameter("UserName")); personalinfo.setPassword(request.getParameter("Password")); ac.addPersonalInfo(personalinfo); HttpSession hs= request.getSession(true); hs.setAttribute("handle", ac); RequestDispatcher rd=request.getRequestDispatcher("BillingInfo.jsp"); rd.forward(request, response); } else { BillingInfo billingInfo=new BillingInfo(); billingInfo.setBank(request.getParameter("Bank")); billingInfo.setCardno(request.getParameter("CardNo")); billingInfo.setCity(request.getParameter("City")); billingInfo.setCountry(request.getParameter("Country")); billingInfo.setHouseNo(request.getParameter("HouseNo")); billingInfo.setPincode(request.getParameter("PinCode")); billingInfo.setStreet(request.getParameter("Street")); HttpSession hs= request.getSession(true); ac=(AccountCreator)hs.getAttribute("handle"); ac.addBillingInfo(billingInfo); ac.createAccount(); PrintWriter out=response.getWriter(); out.println("Account successfully created"); } } protected void doGet(HttpServletRequest request, HttpServletResponse response) throws ServletException, IOException { // TODO Auto-generated method stub doProcess(request, response); } /* (non-Java-doc) * @see javax.servlet.http.HttpServlet#doPost(HttpServletRequest request, HttpServletResponse response) */ protected void doPost(HttpServletRequest request, HttpServletResponse response) throws ServletException, IOException { doProcess(request, response); // TODO Auto-generated method stub } }


    This servlet contains code referring to bean interface class and PersonalInfo and BilllingInfo class. We need to add these projects to the build path so that the classes can be compiled.
  16. Right click on StatefulClient project and Select Properties->Java Build Path->Projects. Select Add.


  17. Check StatefulBean and Select OK.


  18. Once done the project will be visible in the build path. Select OK.


  19. Next step is to add jsp pages to our client project. Right click on WebContent under StatefulClient project and Select New->jsp.


  20. Name the jsp as 
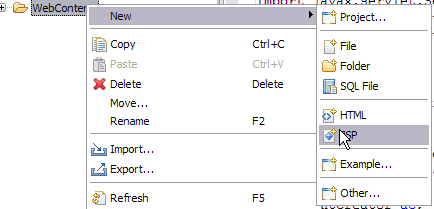
PersonalInfo.jsp and Select Next.
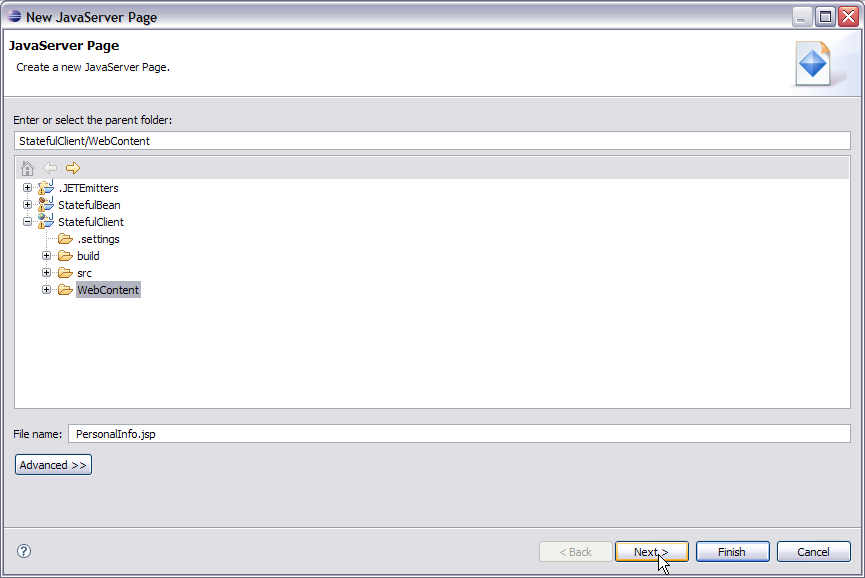
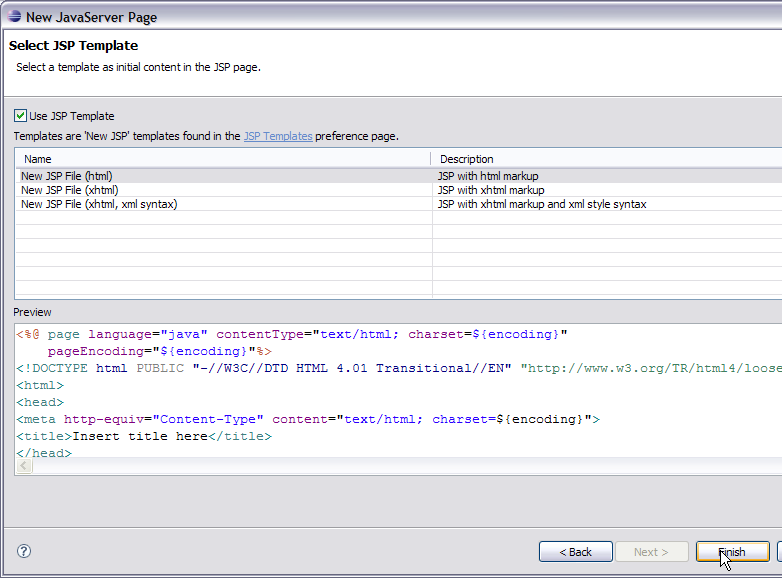


  21. On the next screen select Finish.


  22. Add the following code to PersonalInfo.jsp. solidPersonalInfo.jsp <%@ page language="java" contentType="text/html; charset=ISO-8859-1" pageEncoding="ISO-8859-1"%> <!DOCTYPE html PUBLIC "-//W3C//DTD HTML 4.01 Transitional//EN" "http://www.w3.org/TR/html4/loose.dtd"> <html> <head> <meta http-equiv="Content-Type" content="text/html; charset=ISO-8859-1"> <title>User Personal Information</title> </head> <body> <form action="Controller"> <h1>Enter your personal information</h1> <table> <tr> <td><h3>Name</h3></td> </tr> <tr> <td>FirstName</td> <td><input type="text" name="FirstName"></td> </tr> <tr> <td>LastName</td> <td><input type="text" name="LastName"></td> </tr> <tr><td><h3>Nationality</h3></td></tr> <tr> <td>Nationality</td> <td><input type="text" name="Nationality"></td> </tr> <tr><td><h3>Login</h3></td></tr> <tr> <td>UserName</td> <td><input type="text" name="UserName"></td> </tr> <tr> <td>Password</td> <td><input type="password" name="Password"></td> </tr> </table> <input type="submit" Name="Next"> </form> </body> </html>


  23. Similarly add another jsp with the name BillingInfo.jsp and add the following code.


    solidBillingInfo.jsp <%@ page language="java" contentType="text/html; charset=ISO-8859-1" pageEncoding="ISO-8859-1"%> <!DOCTYPE html PUBLIC "-//W3C//DTD HTML 4.01 Transitional//EN" "http://www.w3.org/TR/html4/loose.dtd"> <html> <head> <meta http-equiv="Content-Type" content="text/html; charset=ISO-8859-1"> <title>User Billing Information</title> </head> <body> <form action="Controller1"> <h1>Enter your Billing information</h1> <table> <tr> <td><h3>Address</h3></td> </tr> <tr> <td>House No</td> <td><input type="text" name="HouseNo"></td> </tr> <tr> <td>Street</td> <td><input type="text" name="Street"></td> </tr> <tr> <td>City</td> <td><input type="text" name="City"></td> </tr> <tr> <td>PinCode</td> <td><input type="text" name="PinCode"></td> </tr> <tr> <td>Country</td> <td><input type="text" name="Country"></td> </tr> <tr><td><h3>Credit Card Information</h3></td></tr> <tr> <td>Bank</td> <td><input type="text" name="Bank"></td> </tr> <tr> <td>Card No</td> <td><input type="text" name="CardNo"></td> </tr> </table> <input type="submit" name="Submit"> </form> </body> </html>

Let's walk through the servlet and jsp code. First through Controller servlet code.

    • if ( (request.getRequestURI()).equals("/StatefulClient/Controller"))- This code act as a controller on the jsp which is making a request. This is possible only when the jsp's make a call to th servlet with different names. How this can be done will be illustrated in the next section.
    • HttpSession hs= request.getSession(true); hs.setAttribute("handle", ac); This part of the code saves the remote interface handle and later in the second call same handle is used to make another call to bean methods.
    • RequestDispatcher rd=request.getRequestDispatcher("BillingInfo.jsp")- This code section and the next line forwards the control to next jsp that is BillingInfo.jsp.
    • Rest of the servlet deals with calling the setter methods and later sets the object so as to persist the data between different calls.
  1. Next walkthrough the jsp code.
    • PersonalInfo.jsp has <form action="Controller"> whereas BillingInfo.jsp has <form action="Controller1"> as the action element but both internally calling the same servlet. This can be easily done by modifying web.xml this will be shown in the next section.

Modifying openejb-jar.xml, web.xml and geronimo-web.xml

  1. In StatefulBean project select META-INF/openejb-jar.xml and replace the existing code with following code solidopenejb-jar.xml <?xml version="1.0" encoding="UTF-8" standalone="yes"?> <openejb-jar xmlns="http://www.openejb.org/xml/ns/openejb-jar-2.2" xmlns:nam="http://geronimo.apache.org/xml/ns/naming-1.2" xmlns:pkgen="http://www.openejb.org/xml/ns/pkgen-2.0" xmlns:sec="http://geronimo.apache.org/xml/ns/security-1.2" xmlns:sys="http://geronimo.apache.org/xml/ns/deployment-1.2"> <environment> <moduleId> <groupId>default</groupId> <artifactId>StatefulBean</artifactId> <version>1.0</version> <type>car</type> </moduleId> <sys:dependencies> <sys:dependency> <sys:groupId>console.dbpool</sys:groupId> <sys:artifactId>jdbc/userds</sys:artifactId> </sys:dependency> </sys:dependencies> </environment> </openejb-jar> The above deployment plan is different from the above one in the following way
    • The namespace generated by geronimo eclipse plugin are not to AG 2.1 level. This is due to some limitation which will be fixed soon.
    • Since the ejb bean class refers to jdbc/userds datasource a <dependency> element has to be added in EJB deployment plan.
  2. In StatefulClient project select WEB-INF/web.xml and replace the existing code with the following solidweb.xml <?xml version="1.0" encoding="UTF-8"?> <web-app xmlns:xsi="http://www.w3.org/2001/XMLSchema-instance" xmlns="http://java.sun.com/xml/ns/javaee" xmlns:web="http://java.sun.com/xml/ns/javaee/web-app_2_5.xsd" xsi:schemaLocation="http://java.sun.com/xml/ns/javaee http://java.sun.com/xml/ns/javaee/web-app_2_5.xsd" id="WebApp_ID" version="2.5"> <display-name>StatefulClient</display-name> <welcome-file-list> <welcome-file>index.html</welcome-file> <welcome-file>index.htm</welcome-file> <welcome-file>index.jsp</welcome-file> <welcome-file>default.html</welcome-file> <welcome-file>default.htm</welcome-file> <welcome-file>default.jsp</welcome-file> </welcome-file-list> <servlet> <description></description> <display-name>Controller</display-name> <servlet-name>Controller</servlet-name> <servlet-class>ejb.stateful.Controller</servlet-class> </servlet> <servlet> <description></description> <display-name>Controller1</display-name> <servlet-name>Controller1</servlet-name> <servlet-class>ejb.stateful.Controller</servlet-class> </servlet> <servlet-mapping> <servlet-name>Controller</servlet-name> <url-pattern>/Controller</url-pattern> </servlet-mapping> <servlet-mapping> <servlet-name>Controller1</servlet-name> <url-pattern>/Controller1</url-pattern> </servlet-mapping> </web-app>
  3. In StatefulClient project select WEB-INF/geronimo-web.xml and add a dependency element for the StatefulBean EJB project. THe final web deployment plan will look as follows solidgeronimo-web.xml <?xml version="1.0" encoding="UTF-8" standalone="yes"?> <ns8:web-app xmlns="http://geronimo.apache.org/xml/ns/deployment-1.2" xmlns:ns2="http://geronimo.apache.org/xml/ns/j2ee/connector-1.2" xmlns:ns3="http://geronimo.apache.org/xml/ns/naming-1.2" xmlns:ns4="http://geronimo.apache.org/xml/ns/j2ee/ejb/openejb-2.0" xmlns:ns5="http://geronimo.apache.org/xml/ns/j2ee/application-2.0" xmlns:ns6="http://geronimo.apache.org/xml/ns/security-2.0" xmlns:ns7="http://java.sun.com/xml/ns/persistence" xmlns:ns8="http://geronimo.apache.org/xml/ns/j2ee/web-2.0.1" xmlns:ns9="http://geronimo.apache.org/xml/ns/j2ee/application-client-2.0"> <environment> <moduleId> <groupId>default</groupId> <artifactId>StatefulClient</artifactId> <version>1.0</version> <type>car</type> </moduleId> <dependencies> <dependency> <groupId>default</groupId> <artifactId>StatefulBean</artifactId> <version>1.0</version> <type>car</type> </dependency> </dependencies> </environment> <ns8:context-root>/StatefulClient</ns8:context-root> </ns8:web-app>

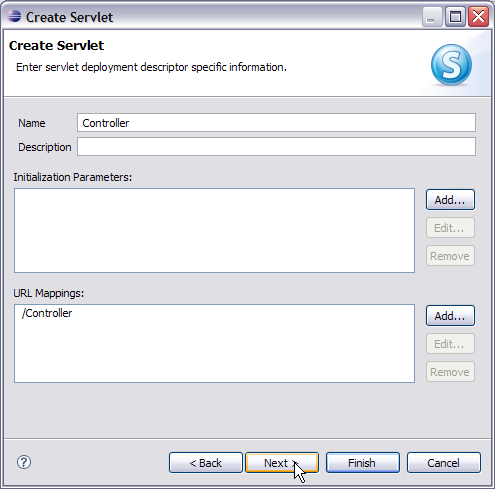
The above code is different from the original one in the sense that we have added another <servlet> for Controller1 which is mapped to the same servlet class. Similarly adding a <servlet-mapping> element for the Controller1 servlet. This feature is basically mapping of more than one servlet with same servlet class. This helps in routing each call from jsp in the Controller servlet.

Deploy and Run

  1. Under project explorer right click on StatefulBean project and select Export->EJB jar file.


  2. Browse to a destination and Select Finish.
  3. Similarly export StatefulClient project.
  4. Launch the administrative console with http://localhost:8080/console. Under application select Deploy New.


  5. Browse to the StatefulBean project and select Install.


  6. Similarly deploy StatefulClient project.
  7. Launch the application using the link http://localhost:8080/StatefulClient/PersonalInfo.jsp. Fill up the form and select SubmitQuery.


  8. Once you submitt the current page, next page will be displayed wherein you need to enter your Billing Information. Once done select SubmitQuery.


  9. Later you can verify the database which is populated with the user data.