|
|
| Home > Documentation > Apache Geronimo v1.1 - User's Guide > Administration > Administrative tasks > Configuring services > Configuring database pools > Import database pools from JBoss 4 |
This wizard will assist you in importing existing JBoss 4 database pools. For this particular example we will use the hsqldb-ds.xml provided by the default JBoss server, that is <jboss_home>\server*default*\deploy\hsqldb-ds.xml and Hypersonic database.
Before we continue you will have to provide Geronimo with the driver jar for Hypersonic HSQL. To do that you will have to follow similar steps as described in Configuring DB2 Datasource. Here is the steps summary for declaring the HSQL driver jar in Geronimo.
hsqldb.jar. This file is located in the <jboss_home>\server\default\lib directory. Make a copy of this file and rename it to hsqldb-1.8.0.jar.Alternatively you could use the Adding archives to the Geronimo repository portlet to copy the HSQL driver into the appropriate directory structure. Just make sure you rename the driver to hsqldb-1.8.0.jar, once the driver is selected the remaining fields are filled automatically. Verify the values and click Install.
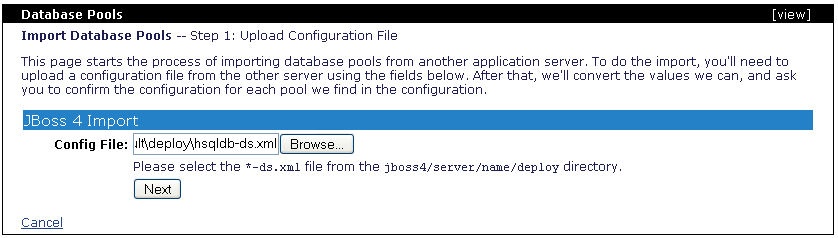
From the Geronimo Administration Console click on the Database Pools link. From the Database Pools portlet click on Import from JBoss 4. In the Step 1 of Importing the Database Pools specify the location of the -ds.xml file and click Next.
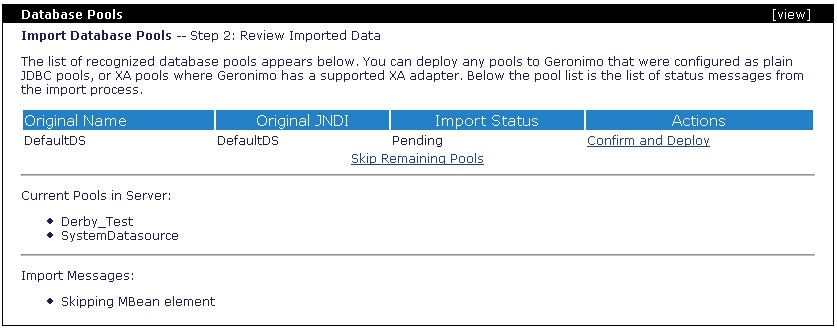
Once the JBoss specific datasource is loaded, Step 2 lists the database pools the wizard was able to recognize from the hsqldb-ds.xml file. Click on Confirm and Deploy.
The following step allows you to edit the recognized database pool. In this step you will have to specify the driver jar you declared when updating the Geronimo repository. See how Driver JAR: is listed in the following figure.
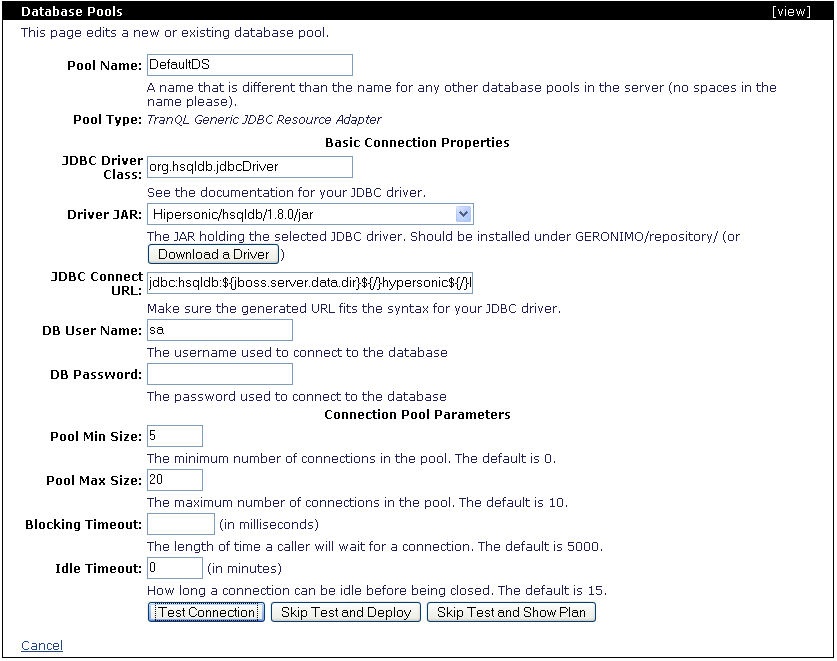
Click on Test Connection to verify you entered all the necessary data and Geronimo can establish a connection.

Click on Deploy, this will take you to the same page you saw in Step 2. If you would have more pools defined in the file you could repeat these steps and selectively import some of the database pools. Since we only have one in this example you may click on Finish to complete the import wizard.
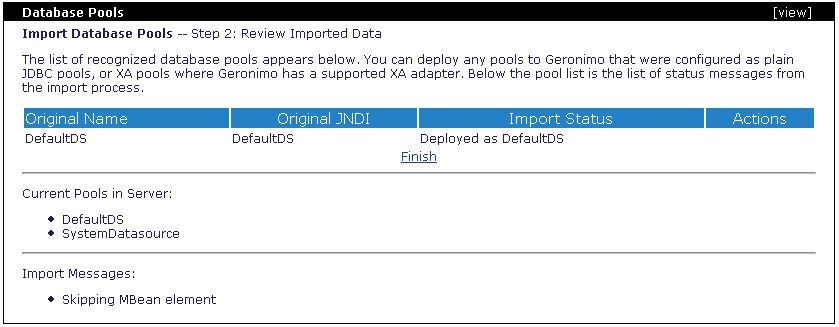
You should now see the imported DefaultDS database pool.

|
|
Privacy Policy - Copyright © 2003-2009, The Apache Software Foundation, Licensed under ASL 2.0. |